Lots of apps need to deal with selecting or taking photos but in SwiftUI we’ll need to wrap UIKit’s UIImagePickerController with a SwiftUI view.
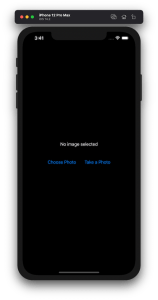
Example application presenting a UI for opening image picker.
Wrapping UIImagePickerController in SwiftUI
UIImagePickerController has been available since iOS 2 and it supports both selecting photos from photo albums and taking new photos with a camera. If we would like to use an image picker in a SwiftUI view then the first step is wrapping this view controller with a SwiftUI view. UIViewControllerRepresentable protocol defines required methods for representing an UIViewController. We’ll provide a completion handler for passing back the selected image. We need to implement a coordinator which acts as a delegate for the UIImagePickerController. When the imagePickerController(_:didFinishPickingMediaWithInfo:) delegate method is called, then we can call the completion handler and handle the selected image in a SwiftUI view. As UIImagePickerController supports both the camera function and accessing existing photos, we’ll add a source type property for configuring which mode to use.
This file contains hidden or bidirectional Unicode text that may be interpreted or compiled differently than what appears below. To review, open the file in an editor that reveals hidden Unicode characters.
Learn more about bidirectional Unicode characters
ImagePicker view which wraps UIImagePickerController.
The ImagePicker can then be presented with the fullScreenCover view modifier. The presented state and the selected image is stored in the view’s view model. When the image picker is displayed and an image is selected, the completion handler is called and the selectedImage property is updated in the view model which in turn reloads the SwiftUI view.
This file contains hidden or bidirectional Unicode text that may be interpreted or compiled differently than what appears below. To review, open the file in an editor that reveals hidden Unicode characters.
Learn more about bidirectional Unicode characters
This file contains hidden or bidirectional Unicode text that may be interpreted or compiled differently than what appears below. To review, open the file in an editor that reveals hidden Unicode characters.
Learn more about bidirectional Unicode characters
A SwiftUI view containing an image preview and buttons for taking or choosing a photo.
Summary
Wrapping UIKit views with a SwiftUI view is fairly simple. The coordinator object is a perfect fit for handling delegate methods which UIKit views often provide. As we saw, adding a SwiftUI compatible image picker was pretty easy to do. Please check the full example project on GitHub.
This time we will take a look on how to take photos and browse them on iOS.
Using UIImagePickerController
Creating user interface for taking photos consists of presenting an instance of UIImagePickerController. Controller needs a delegate and source type what defines if we are going to take a photo or pick a photo from the library. But even before creating the controller it is required to call isSourceTypeAvailable(_:) class method and verifying if the source type is available. For example, it returns false if picker’s sourceType is set to UIImagePickerController.SourceType.photoLibrary and the library is empty. Makes sense, as there are no photos to pick from.
This file contains hidden or bidirectional Unicode text that may be interpreted or compiled differently than what appears below. To review, open the file in an editor that reveals hidden Unicode characters.
Learn more about bidirectional Unicode characters
UIImagePickerControllerDelegate contains two methods we need to implement for handling interactions in image picker. Firstly, consuming taken or picked images and secondly, dismissing the picker. Info dictionary in imagePickerController(_:didFinishPickingMediaWithInfo:) contains quite a many values from images to metadata. All the possible keys can be seen here. As a bare minimum we need to handle editedImage and originalImage keys. If it is required to add the image to photo library, then this can be done by calling UIImageWriteToSavedPhotosAlbum(). This starts an asynchronous operation for adding the image to library. And if needed, it is possible to specify callback when this operation finishes.
This file contains hidden or bidirectional Unicode text that may be interpreted or compiled differently than what appears below. To review, open the file in an editor that reveals hidden Unicode characters.
Learn more about bidirectional Unicode characters
Before going ahead and presenting the image picker it is required to add privacy statements to info.plist. Privacy - Camera Usage Description (NSCameraUsageDescription) is required for using the camera and Privacy - Photo Library Additions Usage Description (NSPhotoLibraryUsageDescription) when using UIImageWriteToSavedPhotosAlbum() for storing photos. Values of those keys are localised descriptions which are shown when app requests to use the camera or when adding the photo to the library.
Summary
Setting up user interface for taking photos is quite easy thanks to UIImagePickerController. All in all it was a three step process: configure picker, add privacy statements and handle images.