Categories
iOS Swift UIKit

Building a list view with collection view in UIKit

UICollectionViewCompositionalLayout was an important change to how we create collection view layouts. In iOS14 Apple added a new static function to this class which creates a layout object for list views. Meaning, it is very easy to create a list views which look like a table view we are familiar with. The static list() function takes a configuration object UICollectionLayoutListConfiguration which allows further to configure the appearance of the header view. For example, supplementary header views are enabled here. In this blog post, we’ll create a list view with a collection view and use cell registration and diffable data source APIs.

List view created with diffable data source and collection view.

Generating data for the list view

Firstly, we’ll generate some data types which we want to display in the list view. The aim is to represent each Palette type with one section, and each PaletteColor is a row in the section.

struct Palette: Hashable {
let name: String
let colors: [PaletteColor]
// other properties
static let fancy = Palette(name: "Fancy", colors: [
PaletteColor(name: "Red", color: .systemRed),
PaletteColor(name: "Blue", color: .systemBlue),
PaletteColor(name: "Cyan", color: .systemCyan),
PaletteColor(name: "Mint", color: .systemMint),
PaletteColor(name: "Pink", color: .systemPink),
PaletteColor(name: "Teal", color: .systemTeal),
PaletteColor(name: "Green", color: .systemGreen),
PaletteColor(name: "Brown", color: .systemBrown)
])
static let secondary = Palette(name: "Secondary", colors: [
PaletteColor(name: "Label", color: .secondaryLabel),
PaletteColor(name: "Fill", color: .secondarySystemFill)
])
}
struct PaletteColor: Hashable {
let name: String
let color: UIColor
// other properties
}
view raw ListView.swift hosted with ❤ by GitHub

Configuring a collection view instance

We’ll create the collection view instance with a layout object which is configured to display lists. We go for insetGrouped appearance and turn on header views.

final class ListViewController: UIViewController {
private func makeCollectionView() -> UICollectionView {
var configuration = UICollectionLayoutListConfiguration(appearance: .insetGrouped)
configuration.headerMode = .supplementary
let layout = UICollectionViewCompositionalLayout.list(using: configuration)
let view = UICollectionView(frame: .zero, collectionViewLayout: layout)
view.backgroundColor = .systemBackground
view.translatesAutoresizingMaskIntoConstraints = false
return view
}
private lazy var collectionView = makeCollectionView()
override func loadView() {
title = "Palettes"
view = UIView(frame: .zero)
view.addSubview(collectionView)
NSLayoutConstraint.activate([
collectionView.leadingAnchor.constraint(equalTo: view.leadingAnchor),
collectionView.trailingAnchor.constraint(equalTo: view.trailingAnchor),
collectionView.topAnchor.constraint(equalTo: view.topAnchor),
collectionView.bottomAnchor.constraint(equalTo: view.bottomAnchor)
])
viewModel.reloadContent(in: dataSource)
}
}
view raw ListView.swift hosted with ❤ by GitHub

Configuring collection view data source and cell registration

The UICollectionViewDiffableDataSource is used for managing the data and also provides cells on demand. We’ll need to define section and item types when creating the data source. With the data we want to display, we’ll use String as a section type and PaletteColor as the item type when the section is just the name of the Palette’s name. In addition, we’ll use the cell and supplementary view registration APIs which keep the logic of creating different cells with a model object in the same place, which I find it to be really nice. Cells and supplementary views we’ll configure using the content configuration APIs which describe the data the cell or supplementary view displays. For list views, there is a specialized UIListContentConfiguration type which supports a variety of appearances. In many cases we do not need any custom cell classes at all since UIListContentConfiguration and UICollectionViewListCell takes care of it for us.

final class ListViewController: UIViewController {
let viewModel: ViewModel
init(viewModel: ViewModel) {
self.viewModel = viewModel
super.init(nibName: nil, bundle: nil)
}
required init?(coder: NSCoder) {
fatalError("init(coder:) has not been implemented")
}
private func makeDataSource() -> UICollectionViewDiffableDataSource<String, PaletteColor> {
let cellRegistration = UICollectionView.CellRegistration<UICollectionViewListCell, PaletteColor> { [viewModel] cell, indexPath, paletteColor in
var configutation = UIListContentConfiguration.cell()
configutation.image = viewModel.cellImage(for: paletteColor)
configutation.text = viewModel.cellTitle(for: paletteColor)
cell.contentConfiguration = configutation
}
let headerRegistration = UICollectionView.SupplementaryRegistration<UICollectionViewListCell>(elementKind: UICollectionView.elementKindSectionHeader) { [viewModel] supplementaryView, elementKind, indexPath in
var configutation = UIListContentConfiguration.groupedHeader()
configutation.text = viewModel.headerTitle(in: indexPath.section)
supplementaryView.contentConfiguration = configutation
}
let dataSource = UICollectionViewDiffableDataSource<String, PaletteColor>(collectionView: collectionView, cellProvider: { collectionView, indexPath, paletteColor in
collectionView.dequeueConfiguredReusableCell(using: cellRegistration, for: indexPath, item: paletteColor)
})
dataSource.supplementaryViewProvider = { collectionView, elementKind, indexPath in
collectionView.dequeueConfiguredReusableSupplementary(using: headerRegistration, for: indexPath)
}
return dataSource
}
private lazy var dataSource = makeDataSource()
}
view raw ListView.swift hosted with ❤ by GitHub

Applying a snapshot

The final missing piece is creating a snapshot and applying it to the collection view data source which then tells the collection view what to render. If we would generate a new snapshot with slightly different data then the collection view only renders the changes between snapshots. No need to do this manually on our own.

extension ListViewController {
@MainActor final class ViewModel {
let palettes: [Palette]
init(palettes: [Palette]) {
self.palettes = palettes
}
func reloadContent(in dataSource: UICollectionViewDiffableDataSource<String, PaletteColor>) {
var snapshot = NSDiffableDataSourceSnapshot<String, PaletteColor>()
snapshot.appendSections(palettes.map(\.name))
palettes.forEach({ palette in
snapshot.appendItems(palette.colors, toSection: palette.name)
})
dataSource.apply(snapshot)
}
}
}
view raw ViewModel.swift hosted with ❤ by GitHub

Summary

Diffable data sources with new cell registration APIs make a huge difference in how we implement collection views. Although it might take a bit of time to see how all the new APIs work together, I do not want to go back. Please check the example project for full code.

Example project

UIKitExampleDiffableListView (Xcode 13.3.1)

If this was helpful, please let me know on Mastodon@toomasvahter or Twitter @toomasvahter. Feel free to subscribe to RSS feed. Thank you for reading.
Categories
iOS Swift UIKit

Flow layout with self-sizing items and fixed spacing in UIKit

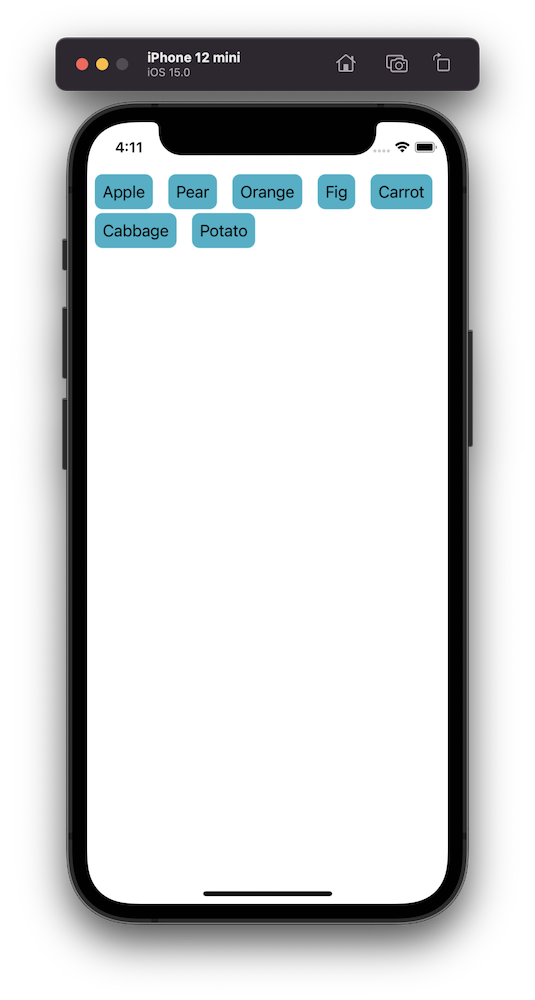
One of the really common layouts I have needed to implement with collection view is a simple flow layout but with fixed spacings. Apple provides us UICollectionViewFlowLayout, but the sad part is that it has dynamic spacing between items. Everything is there but not quite. Before UICollectionViewCompositionalLayout, one needs to create a subclass of the flow layout and then fixing spacings manually, which is pretty cumbersome to do. Therefore, let’s instead see what it takes to implement a simple self-sizing flow layout with fixed spacings when using UICollectionViewCompositionalLayout. The end goal is visible below, where we have a single section with 7 items.

Flow layout with fixed spacings.

UICollectionViewCompositionalLayout was created to be a flexible layout which allows building all sorts of layouts quickly. Data in that layout is divided into sections, where each section can have one or more groups of items. Grouping allows creating more complex layouts, where each group describes how items in the group are laid out in relation to each other. But in our case we have something really simple in mind, which is having self-sizing items which we can configure with NSCollectionLayoutSize and passing estimated dimensions. Then the next step is creating NSCollectionLayoutItem with that layout size and with some space around the item. The edge spacing with fixed edges gives us the wanted fixed spacing between items. After that, we’ll create NSCollectionLayoutGroup with horizontal layout direction and with a layout size which takes max width, but height is fitted based on item sizes. Creating layouts like this is so much better compared to subclassing UICollectionViewLayout and then calculating frames one by one. Down below is the configured layout object, which has fixed spacing and items are self-sizing.

extension UICollectionViewLayout {
static func fixedSpacedFlowLayout() -> UICollectionViewLayout {
let itemSize = NSCollectionLayoutSize(
widthDimension: .estimated(50),
heightDimension: .estimated(50)
)
let item = NSCollectionLayoutItem(layoutSize: itemSize)
item.edgeSpacing = NSCollectionLayoutEdgeSpacing(
leading: .fixed(8),
top: .fixed(4),
trailing: .fixed(8),
bottom: .fixed(4)
)
let groupSize = NSCollectionLayoutSize(
widthDimension: .fractionalWidth(1.0),
heightDimension: .estimated(100)
)
let group = NSCollectionLayoutGroup.horizontal(layoutSize: groupSize, subitems: [item])
let section = NSCollectionLayoutSection(group: group)
return UICollectionViewCompositionalLayout(section: section)
}
}

Example project can be found here: GitHub

If this was helpful, please let me know on Mastodon@toomasvahter or Twitter @toomasvahter. Feel free to subscribe to RSS feed. Thank you for reading.