This time we are going to look into how to embed custom view in UIScrollView and setting up autolayout constraints for different scenarios.
Setting up view controller with scroll view
We’ll gonna create a new view controller what contains UIScrollView as it’s subview. UIScrollView will cover the whole view area. Everything is set up in code as it is easier to represent the steps needed. It is easy to use those steps and setting up constraints in interface builder.
This file contains hidden or bidirectional Unicode text that may be interpreted or compiled differently than what appears below. To review, open the file in an editor that reveals hidden Unicode characters.
Learn more about bidirectional Unicode characters
Most common case is to have scroll view with vertically scrollable content. Embedded view’s leading, trailing, top and bottom layout anchors should be equal to scroll view’s content layout margin’s corresponding anchors. For making the view only scrollable in vertical axis, embedded view’s width should match with scroll view’s width. This is achieved by adding an extra width constraint to the embedded view. Width constraint should make the view width equal to scroll view’s width. When setting view’s up in interface builder, make sure to add at least one subview to the embedded view what has intrinsic content size (label, button etc) (also add constraints). Otherwise interface builder does not know what size the embedded view has.
This file contains hidden or bidirectional Unicode text that may be interpreted or compiled differently than what appears below. To review, open the file in an editor that reveals hidden Unicode characters.
Learn more about bidirectional Unicode characters
Horizontally scrollable view follows the same setup except instead of width constraint, we’ll add height constraint instead. When setting up the height constraint, scroll view’s safeAreaLayoutGuide’s heightAnchor should be used. This layout guide ignores the portion of the view what is covered by navigation bars, tab bars, toolbars, and other views.
This file contains hidden or bidirectional Unicode text that may be interpreted or compiled differently than what appears below. To review, open the file in an editor that reveals hidden Unicode characters.
Learn more about bidirectional Unicode characters
Case 3: Vertically and horizontally scrollable view
For making the embedded view to be scrollable in horizontal and vertical axis, we’ll only add leading, trailing, top and bottom constraints to scroll view’s contentLayoutGuide’s corresponding anchors. Embedded view should define intrinsicContentSize as this size is used by scroll view for knowing what size the view wants to be. This kind of layout is probably usable only for fixed size view’s. For example, building a custom grid view where the row and column count define the size of the view.
This file contains hidden or bidirectional Unicode text that may be interpreted or compiled differently than what appears below. To review, open the file in an editor that reveals hidden Unicode characters.
Learn more about bidirectional Unicode characters
Vertically and horizontally scrollable embedded view
Summary
We took a look on how to add constraints to embedded view in scroll view for getting a specific scrolling behaviour. In one sentence: leading, trailing, top, and bottom constraints to contentLayoutGuide and adding width or height constraint when necessary.
Let’s see how to replace multiple tokens in string. As an example problem to solve we will use this string: The quick <color_1> <animal_1> jumps over the lazy <animal_2>
String extension for replacing tokens
Token’s format is < text _ numbers > what can be turned into regular expression: <[:alpha:]+_{1}[:digit:]+>.
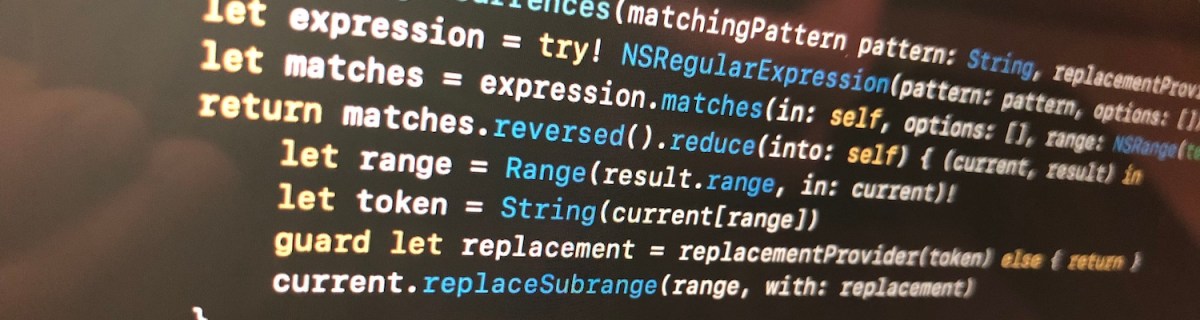
We’ll extend string and add a function what takes in regular expression and closure responsible of providing replacement strings. For finding tokens, we’ll use NSRegularExpression and get all the matches in the string. Next step is to reverse enumerate matches and replace tokens. Reverse enumerating is required it ensures that token ranges are constant. If we would start replacing from the first match, then all the succeeding ranges should be shifted based on the length difference of all the preceding tokens and replacements. In this case reduce is convenient because we can enumerate all the matches and then mutating the copy of the initial string with very few lines. Another aspect to note is that NSRegularExpression uses NSRange instead of <a rel="noreferrer noopener" aria-label="RangeRange<String.Index>. Therefore we need to convert ranges from one type to another making sure character indexes match. This function can now be used with custom logic when providing replacements. For example: we can have a simple mapping or even returning the same replacement string.
This file contains hidden or bidirectional Unicode text that may be interpreted or compiled differently than what appears below. To review, open the file in an editor that reveals hidden Unicode characters.
Learn more about bidirectional Unicode characters
String extension replacing tokens matching a pattern.
Summary
When we would like to do multiple replacements in a string, then one of the approaches is to get all the replacement ranges and then reverse enumerating the ranges and making replacements. In this way we can avoid having complex code trying to adjust based on the length difference of the source and replacement string.
Property wrappers allow property declaration to state what kind of property wrapper is used for implementing the property. We can use it for implementing transformations on properties like validating if string is email or not. This is what we will do: creating a property wrapper for email properties and validating emails using NSDataDetector. If value being set is email, we store it and if it is not, we set the property to nil instead.
Creating property wrapper
Property wrappers are types annotated with @propertyWrapper. The type needs to implement one property: wrappedValue. Emails are represented with strings, therefore our wrappedValue property is optional string. Optional is required, because string can contain invalid email and in that case we set the property to nil. Whenever we would like to use this property wrapper, we just need to add @EmailValidated in front of the property definition.
This file contains hidden or bidirectional Unicode text that may be interpreted or compiled differently than what appears below. To review, open the file in an editor that reveals hidden Unicode characters.
Learn more about bidirectional Unicode characters
Validating emails using regular expressions is not easy. Fortunately Apple provides API exactly for this: NSDataDetector. We can create an instance of NSDataDetector with specifying link as detected types. When matching emails, we use anchored option as we expect the string to only include email, nothing else. Anchored will tell the data detector to match starting with the first character. As firstMatch(in:options:range:) uses NSRange, we need to convert Swift’s range to NSRange because those ranges do not have one-to-one match. For this, we can use special NSRange initialiser taking Swift string and its range.
NSDataDetector represents links with URL, therefore we will see if match contains an URL and if URL’s scheme is mailto. If it is, we can extract the matched email and return it.
This file contains hidden or bidirectional Unicode text that may be interpreted or compiled differently than what appears below. To review, open the file in an editor that reveals hidden Unicode characters.
Learn more about bidirectional Unicode characters
For using the created property wrapper, all we need to do is to annotate property with @EmailValidated.
This file contains hidden or bidirectional Unicode text that may be interpreted or compiled differently than what appears below. To review, open the file in an editor that reveals hidden Unicode characters.
Learn more about bidirectional Unicode characters
We created a simple property wrapper for validating emails. We saw that creating a property wrapper for validating email with NSDataDetector requires only a little bit of code.
When writing code in Swift it is often needed to observe changes in other objects. We can use Apple’s key-value observation but it has some implications: requires to use NSObject and dynamic dispatch through Objective-C runtime. This time, let’s build a simple key-value observation in Swift what does not require to use NSObject at all. Although it is far from being as feature complete as Apple’s implementation, it delivers the basic use-case which is often all what we need.
Custom KeyValueObservable protocol
The approach we take here is defining a protocol, providing default implementations for all the functions. Then we can make any class to conform to this protocol, but as we need to store observation related information, then the class needs to define a property holding an instance of ObservationStore. Secondly, it is required to send key-value change notification manually using didChangeValue(for:).
Add observer function returns an instance of Observation what can be used for removing the added observation. If the observer does not need to be removed during the lifetime of the observer, it can be ignored. Observation is always cleaned up automatically next time any key value changes happen after observer is deallocated. This is due to the fact that observation handler captures observer weakly and during key-value changes, it is checked if the object is still alive or not.
This file contains hidden or bidirectional Unicode text that may be interpreted or compiled differently than what appears below. To review, open the file in an editor that reveals hidden Unicode characters.
Learn more about bidirectional Unicode characters
/// Adds observer for key path and returns observation token.
/// – Note: Observation token is only useful if it is needed to remove observation before observer is deallocated. When observer is deallocated, then observation is removed when next key value change is handled.
When adding observer, we create an observation handler what captures self and observer weakly. Handler returns boolean, what tells if the handler is still valid or not. Handler is not valid when observer has been deallocated since the last change. Otherwise handler is valid and should not be removed automatically.
This file contains hidden or bidirectional Unicode text that may be interpreted or compiled differently than what appears below. To review, open the file in an editor that reveals hidden Unicode characters.
Learn more about bidirectional Unicode characters
As mentioned before, ObservationStore is needed to added to every class conforming to KeyValueObservable protocol. It stores all the observations and restricts the access to modifying the observations directly from the observable class.
Observation is a simple struct containing an identifier and subtype defining the observation options. In this basic case, it just has initial option what assures handler is called immediately when adding an observer.
This file contains hidden or bidirectional Unicode text that may be interpreted or compiled differently than what appears below. To review, open the file in an editor that reveals hidden Unicode characters.
Learn more about bidirectional Unicode characters
In this small example a class Event conforms to KeyValueObservable and ViewController observers the title change and updates a label.
This file contains hidden or bidirectional Unicode text that may be interpreted or compiled differently than what appears below. To review, open the file in an editor that reveals hidden Unicode characters.
Learn more about bidirectional Unicode characters
This time we added basic support for observing key paths without using key-value observing APIs known already from Objective-C times. The added KeyValueObservable protocol is easy to add to existing classes but requires manually calling didChangeValue(for:) for every property change.
Inspiration came from Observers in Swift part 2 (Swift by Sundell).
iOS 13 added a new class named UIContextMenuInteraction what is used for attaching menus to views. When adding menu interaction to a view and user uses 3D Touch or long press gesture on devices not supporting it, a menu is presented alongside with the highlighted content view. Therefore depending on the available space, not all the menu items can fit into the menu.
Setting up UIContextMenuInteraction
UIContextMenuInteraction is initialised with a delegate. Delegate’s job is to create an instance of UIContextMenuConfiguration with provider block for creating a menu when needed. It also should be noted that delegate can return nil in what case no menu is shown.
This file contains hidden or bidirectional Unicode text that may be interpreted or compiled differently than what appears below. To review, open the file in an editor that reveals hidden Unicode characters.
Learn more about bidirectional Unicode characters
Action provider of UIContextMenuConfiguration is a function taking in suggested menu items and returning an instance of UIMenu. Suggested menu items are the ones provided by responders from responder chain. For example we could use it for sharing actions among multiple responders.
Every menu item is represented by UIAction or another UIMenu allowing to have nested menus. UIActions have title and optionally image and state icon if the state is on. In addition we can explicitly disable actions and set a destructive appearance.
This file contains hidden or bidirectional Unicode text that may be interpreted or compiled differently than what appears below. To review, open the file in an editor that reveals hidden Unicode characters.
Learn more about bidirectional Unicode characters