Categories
iOS Swift Swift Package

Requiring min code coverage in Swift packages with GitHub actions

I have written before about running tests and getting code coverage data for Swift packages in Running tests in Swift package with GitHub actions and Code coverage for Swift Packages with Fastlane. In this post, I am going to revisit the problem and use only tools from Xcode: xcodebuild and xccov. One downside of the approach in Code coverage for Swift Packages with Fastlane is that it required to generate Xcode project which is a deprecated feature in Xcode 12.5, and also it used xcov for forcing code coverage which does not seem to be maintained. Therefore, take two is here. I have a tiny Swift package on GitHub called IndexedDataStore, and we’ll add min code coverage requirement with GitHub action to that package.

Generating xcresult bundle with code coverage information

IndexedDataStore Swift package already has a GitHub action set up which runs tests for macOS and iOS platforms. As we’ll need to run several commands, then we’ll add a new ci-ios-code-coverage.sh script to Scripts folder and then the GitHub action will just invoke that script. This allows to run the same commands easily in the local development environment. Let’s take a look at the first half of the script, which builds and runs tests and generates a result bundle with code coverage information.

#!/bin/sh
SCHEME="IndexedDataStore"
RESULT_BUNDLE="CodeCoverage.xcresult"
RESULT_JSON="CodeCoverage.json"
MIN_CODE_COVERAGE=50.0 # should really be higher =)
# Pre-clean
if [ -d $RESULT_BUNDLE ]; then
rm -rf $RESULT_BUNDLE
fi
if [ -f $RESULT_JSON ]; then
rm $RESULT_JSON
fi
# Build
set -o pipefail && env NSUnbufferedIO=YES xcodebuild build-for-testing -scheme $SCHEME -destination "platform=iOS Simulator,OS=latest,name=iPhone 12" -enableCodeCoverage YES | xcpretty
# Test
set -o pipefail && env NSUnbufferedIO=YES xcodebuild test-without-building -scheme $SCHEME -destination "platform=iOS Simulator,OS=latest,name=iPhone 12" -enableCodeCoverage YES -resultBundlePath $RESULT_BUNDLE | xcpretty
Building and running tests with code coverage enabled.

The pre-clean section of the script makes sure that we do not have files present. The RESULT_BUNDLE is created by xcodebuild and RESULT_JSON later when processing the bundle. Although we could skip deleting the RESULT_JSON then on the other hand RESULT_BUNDLE must always be deleted or otherwise xcodebuild will log a warning and wouldn’t create a new one. The run tests section is separated into two steps: build the package for testing and then running tests without building. An alternative would be to use test argument instead of build-for-testing and test-without-building. The current setup makes it easier to see which step failed: was it a build error or a test error. Code coverage is enabled by passing enableCodeCoverage=YES and specifying a path where the result bundle should be created with resultBundlePath. Other things to note is that we are using set -o pipefail for making sure the script wouldn’t ignore any errors and would fail immediately. Also, we’ll pipe xcodebuild’s output to xcpretty for a bit nicer output in logs. If we run this piece of script then we end up with a CodeCoverage.xcbundle which contains code coverage information in the package root.

Extracting line coverage and forcing min coverage

For extracting code coverage information from the CodeCoverage.xcresult bundle we can use Apple’s xccov command line tool which was built exactly for that. The first step is that we’ll convert CodeCoverage.xcresult to CodeCoverage.json file with xccov.

CodeCoverage.json

The second step is to parse the create json file which lists all the targets and their code coverage. I am not fully sure why, but it contains two targets with the same name IndexedDataStore. One target contains correct code coverage, but the other one is just an empty target but with the same name. Therefore we’ll need to filter out the empty one which luckily is not so difficult with jq command line tool. The jq command first takes an array for key targets and then finds a target which has a name “IndexedDataStore” and value for key executableLines is greater than 0. After that, we can access the key lineCoverage in the found target. Finally, we’ll convert the code coverage to percentages, but as the value is in float then we’ll need to use the bc command.

set -o pipefail && env NSUnbufferedIO=YES xcrun xccov view –report –json $RESULT_BUNDLE > $RESULT_JSON
CODE_COVERAGE=$(cat $RESULT_JSON | jq '.targets[] | select( .name == "IndexedDataStore" and .executableLines > 0 ) | .lineCoverage')
CODE_COVERAGE=$(echo $CODE_COVERAGE*100.0 | bc)
Extracting line coverage from the xcresult.

After extracting the code coverage, we can proceed with forcing a minimum code coverage. Yet again, we’ll use bc command when comparing two float values and then checking if the comparison was true. If code coverage is too low, we’ll print red error message and in case it was enough, we’ll print success message in green colour.

COVERAGE_PASSES=$(echo "$CODE_COVERAGE > $MIN_CODE_COVERAGE" | bc)
if [ $COVERAGE_PASSES -ne 1 ]; then
printf "\033[0;31mCode coverage %.1f%% is less than required %.1f%%\033[0m\n" $CODE_COVERAGE $MIN_CODE_COVERAGE
exit -1
else
printf "\033[0;32mCode coverage is %.1f%%\033[0m\n" $CODE_COVERAGE
fi
Printing code coverage result.
Success message when min code coverage is 50%.
Error message when min code coverage requirement is 90%.

Calling the script from GitHub action

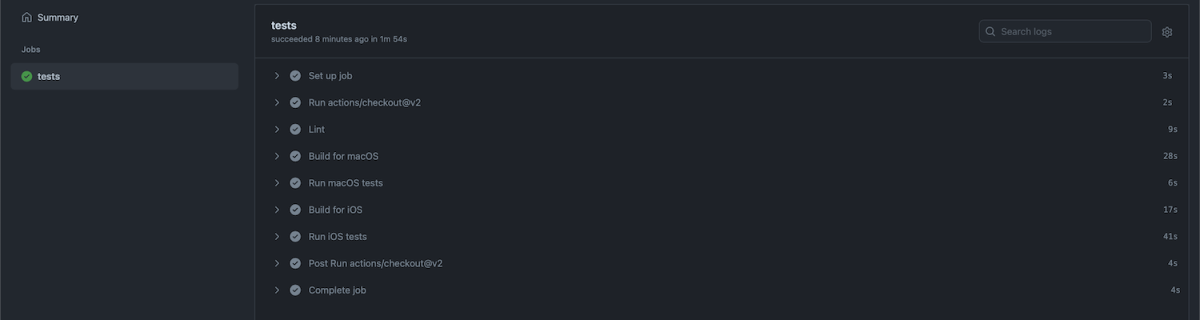
The created script can now be called from a GitHub action.

name: CI
on:
push:
branches: [ main ]
pull_request:
branches:
– '*'
jobs:
tests:
runs-on: macos-latest
steps:
– uses: actions/checkout@v2
– name: Lint
run: swiftlint
– name: Build for macOS
run: swift build -v
– name: Run macOS tests
run: swift test -v
– name: Run iOS tests
run: sh ./Scripts/ci-ios-code-coverage.sh
view raw ci.yml hosted with ❤ by GitHub
GitHub action which calls the created script.
GitHub action log which ran the script.

Summary

In this blog post we revisited code coverage set up for Swift packages. By using xcodebuild and xccov we created code coverage setup for Swift packages.

If this was helpful, please let me know on Mastodon@toomasvahter or Twitter @toomasvahter. Feel free to subscribe to RSS feed. Thank you for reading.

Categories
SignalPath Swift

Signal Path 2.5 for macOS, iOS and iPadOS

Signal Path version 2.5 is out with a new welcome view on macOS and general improvements related to faster app launch time on all the platforms.

Download on the Mac App Store Download on the App Store
Welcome view on macOS
Categories
Foundation iOS macOS Swift SwiftUI

Exploring AttributedString and custom attributes

WWDC’21 brought new APIs for creating attributed strings. AttributedString is a new value type which provides a type-safe API for dealing with attributes, its also localizable, supports limited amount of Markdown syntax, and can be even archived and unarchived thanks to the Codable support. In this blog post, we’ll take a look at the new API and will compose some attributed strings.

In addition to AttributedString type, there are many supporting types. For example, AttributeContainer is a collection of attributes which can be applied to the attributed string with one go. AttributeScope protocol groups attributes and AttributeScopes type contains several groups of attributes like AttributeScopes.swiftUI for attributed strings rendered in SwiftUI views. There is also AttributeScopes.uiKit, AttributeScopes.appKit, and AttributeScopes.foundation. Let’s now see how to create attributed strings and render them in a SwiftUI view.

An AttributedString with attributes applied to multiple ranges.

The attributed string visible above contains multiple attributes starting with background color attribute and finishing with a link attribute. In the snippet below we can find different ways how to set attributes: searching for a range, manually creating a range, using AttributedContainer for setting multiple attributes at once, and also setting attributes to the whole string. As this string is displayed in a SwiftUI view then all the used attributes are part of the SwiftUI attribute scope.

var string = AttributedString(localized: "The quick brown fox jumps over the lazy dog")
// Add attribute to the whole string
string.font = Font.system(size: 14, weight: .heavy, design: .rounded)
// Add a single attribute to a range
if let range = string.range(of: "The") {
string[range].backgroundColor = Color.indigo
}
if let range = string.range(of: "lazy") {
string[range].strikethroughColor = .yellow
string[range].strikethroughStyle = .single
}
// Add a link
if let range = string.range(of: "dog") {
string[range].link = URL(string: "https://www.apple.com")!
}
// Create a range manually with indices
let start = string.characters.index(string.startIndex, offsetBy: 10)
let end = string.characters.index(start, offsetBy: 5)
string[start..<end].foregroundColor = .brown
// Add multiple attributes at once to a range
if let range = string.range(of: "jumps") {
var attributeContainer = AttributeContainer()
attributeContainer.baselineOffset = 4
attributeContainer.kern = 5
attributeContainer.underlineColor = .cyan
attributeContainer.underlineStyle = .patternDot
string[range].mergeAttributes(attributeContainer)
}

If we would like to see the ranges attributes were set to, we can use the runs API. A single run is a set of attributes shared by a single range. If we print all the runs, in this case 9, then it would look like this:

The {
	NSLanguage = en
	NSPresentationIntent = [paragraph (id 1)]
	SwiftUI.Font = Font(provider: SwiftUI.(unknown context at $7fff5bb7d400).FontBox<SwiftUI.Font.(unknown context at $7fff5bbfdb68).SystemProvider>)
	SwiftUI.BackgroundColor = indigo
}
 quick  {
	SwiftUI.Font = Font(provider: SwiftUI.(unknown context at $7fff5bb7d400).FontBox<SwiftUI.Font.(unknown context at $7fff5bbfdb68).SystemProvider>)
	NSLanguage = en
	NSPresentationIntent = [paragraph (id 1)]
}
brown {
	NSPresentationIntent = [paragraph (id 1)]
	NSLanguage = en
	SwiftUI.Font = Font(provider: SwiftUI.(unknown context at $7fff5bb7d400).FontBox<SwiftUI.Font.(unknown context at $7fff5bbfdb68).SystemProvider>)
	SwiftUI.ForegroundColor = brown
}
 fox  {
	SwiftUI.Font = Font(provider: SwiftUI.(unknown context at $7fff5bb7d400).FontBox<SwiftUI.Font.(unknown context at $7fff5bbfdb68).SystemProvider>)
	NSLanguage = en
	NSPresentationIntent = [paragraph (id 1)]
}
jumps {
	SwiftUI.UnderlineColor = cyan
	NSLanguage = en
	SwiftUI.Kern = 5.0
	SwiftUI.BaselineOffset = 4.0
	SwiftUI.Font = Font(provider: SwiftUI.(unknown context at $7fff5bb7d400).FontBox<SwiftUI.Font.(unknown context at $7fff5bbfdb68).SystemProvider>)
	NSPresentationIntent = [paragraph (id 1)]
	NSUnderline = NSUnderlineStyle(rawValue: 256)
}
 over the  {
	SwiftUI.Font = Font(provider: SwiftUI.(unknown context at $7fff5bb7d400).FontBox<SwiftUI.Font.(unknown context at $7fff5bbfdb68).SystemProvider>)
	NSLanguage = en
	NSPresentationIntent = [paragraph (id 1)]
}
lazy {
	SwiftUI.StrikethroughColor = yellow
	SwiftUI.Font = Font(provider: SwiftUI.(unknown context at $7fff5bb7d400).FontBox<SwiftUI.Font.(unknown context at $7fff5bbfdb68).SystemProvider>)
	NSLanguage = en
	NSPresentationIntent = [paragraph (id 1)]
	NSStrikethrough = NSUnderlineStyle(rawValue: 1)
}
  {
	SwiftUI.Font = Font(provider: SwiftUI.(unknown context at $7fff5bb7d400).FontBox<SwiftUI.Font.(unknown context at $7fff5bbfdb68).SystemProvider>)
	NSLanguage = en
	NSPresentationIntent = [paragraph (id 1)]
}
dog {
	NSLink = https://www.apple.com
	SwiftUI.Font = Font(provider: SwiftUI.(unknown context at $7fff5bb7d400).FontBox<SwiftUI.Font.(unknown context at $7fff5bbfdb68).SystemProvider>)
	NSLanguage = en
	NSPresentationIntent = [paragraph (id 1)]
}

The new AttributedString API also supports custom attributes. Custom attributes need to conform to a AttributeStringKey protocol in bare minimum. But when we would like to benefit from using the custom attribute in Markdown and also allowing to decode and encode it to data with Codable then we would need to conform to MarkdownDecodableAttributedStringKey and CodableAttributedStringKey respectively. In a simple example, let’s create a new attribute named MessageAttribute which can store a value of Message struct with id and value fields. The MessageAttribute needs to define the type it stores and a name used when encoding and decoding. In addition, we’ll need to add a new attribute scope which contains the new attribute. As we intend to use the new attribute in a SwiftUI app then we’ll add swiftUI attributes to the scope as well.

struct Message: Hashable, Codable {
let id: String
let value: String
}
struct MessageAttribute: CodableAttributedStringKey, MarkdownDecodableAttributedStringKey {
typealias Value = Message
static var name: String = "secretMessage"
}
extension AttributeScopes {
struct MyAppAttributes: AttributeScope {
let message: MessageAttribute
let swiftUI: SwiftUIAttributes
}
var myApp: MyAppAttributes.Type { MyAppAttributes.self }
}

With this set we can create attributed strings with this attribute either using markdown syntax or adding the attribute manually. Markdown syntax for custom attributes uses caret followed with square brackets and with the content in brackets after that. We also need to make sure to pass custom attribute scope into the AttributedString initializer as well. One thing what I have not figured out is how to create a completely custom appearance for custom attributes in SwiftUI views, like we can do in UIKit views.

var string = AttributedString(localized: "This contains my message attribute", including: \.myApp)
let start = string.startIndex
let end = string.characters.index(start, offsetBy: 4)
string[start..<end].myApp.message = Message(id: "message_id", value: "secret")
// print(string.runs):
// This {
// NSPresentationIntent = [paragraph (id 1)]
// NSLanguage = en
// secretMessage = Message(id: "message_id", value: "secret")
// }
// contains my message attribute {
// NSPresentationIntent = [paragraph (id 1)]
// NSLanguage = en
// }
let string = AttributedString(localized: "This contains my ^[message](secretMessage: {id: 'message_id', value: 'Hello!'}) attribute in markdown", including: \.myApp)
// print(string.runs)
// This contains my {
// NSPresentationIntent = [paragraph (id 1)]
// NSLanguage = en
// }
// message {
// NSLanguage = en
// NSPresentationIntent = [paragraph (id 1)]
// secretMessage = Message(id: "message_id", value: "Hello!")
// }
// attribute in markdown {
// NSLanguage = en
// NSPresentationIntent = [paragraph (id 1)]
// }

Summary

We took a look on AttributedString, AttributeContainer, AttributeScope, and created attributed strings with the new API. With this knowledge, we got going with the new API and can continue exploring it further. The last thing to mention is that AttributedString can be converted to and from NSAttributedString with breeze.

If this was helpful, please let me know on Mastodon@toomasvahter or Twitter @toomasvahter. Feel free to subscribe to RSS feed. Thank you for reading.

Categories
Swift SwiftUI

Subtitled button in SwiftUI

Buttons in SwiftUI are represented with a Button type. Buttons are easy to create and can be customized either with directly providing a styled label or using a ButtonStyle protocol to define the visual appearance. Quite often we can find ourselves in a situation where we need a button which has a title and also a subtitle. In this blog post I am gonna show how to create a SubtitledButton which does exactly that. We’ll also use ButtonStyle protocol to change the appearance of the button. Using buttonStyle view modifier it is easy to change the appearance of the SubtitledButton as sometimes we want to present it in different ways. In the example below we can see two SubtitledButtons where one has a plain and second a custom appearance.

SwiftUI view with two buttons what have title and subtitle. The first button has no background and the second one has blue background with rounded corners.
A SwiftUI view with two SubtitledButtons with different styles.
struct ContentView: View {
var body: some View {
VStack(spacing: 32) {
Text("Hello, world!")
SubtitledButton(title: "First Title", subtitle: "First Subtitle", action: tapAction)
.buttonStyle(PlainButtonStyle())
SubtitledButton(title: "Second Title", subtitle: "Second Subtitle", action: tapAction)
.buttonStyle(RoundedRowButtonStyle())
}.padding()
}
func tapAction() {
print("tapped")
}
}

Let’s now take a look at the SubtitledButton. It is a SwiftUI view which just incorporates a SwiftUI button with two Text values. The first Text represents the title and the second Text represents the subtitle. The title font can be changed by applying a font view modifier on the SubtitledButton. In the example below, the subtitle font is currently not configurable, although we could add another argument if needed. As the subtitle already has font view modifier applied then setting a font modifier on the whole button it does not override it.

struct SubtitledButton: View {
let title: LocalizedStringKey
let subtitle: LocalizedStringKey
let action: () -> Void
var body: some View {
Button(action: action, label: {
VStack(spacing: 4) {
Text(title)
Text(subtitle).font(.footnote)
}
})
}
}

ButtonStyle is a protocol in SwiftUI which is used for custom button appearances. In the makeBody function we can apply view modifiers to the label where the label is a view created when the Button was created.

struct RoundedRowButtonStyle: ButtonStyle {
@ViewBuilder func makeBody(configuration: Self.Configuration) -> some View {
configuration.label
.frame(maxWidth: .infinity)
.padding(8)
.background(Color.accentColor)
.cornerRadius(8)
.foregroundColor(.white)
}
}

Example Project

SwiftUISubtitledButton (Xcode 12.5)

If this was helpful, please let me know on Mastodon@toomasvahter or Twitter @toomasvahter. Feel free to subscribe to RSS feed. Thank you for reading.

Categories
iOS Swift

An overview of the time profiler in Instruments

Instruments is an application bundled with Xcode. It enables to measure application performance in variety of ways. Performance is extremely important as it keeps application responsive and in other things less CPU usage also means longer battery life. Time profiler is one of the instruments which can be used for measuring your application. What it does is that it samples the application 1000 times per second and records function backtraces in each of the sample. It gives a pretty good overview of what the application was doing when the information is aggregated. On the other hand, sampling means that we do not get full information of what was going on. We can’t distinguish if a function was running a long time, or if it was called several times when it appears in several samples.

Running an app with time profiler

When profiling an application then it is recommended to run it always on the device for accurate results. Also, we’ll need to make sure to use release configuration as it contains all the compiler optimizations and reflects the App Store build. The profile action and its configuration can be seen in Product > Scheme > Manage Schemes, selecting a scheme and clicking on the edit.

Xcode edit scheme view showing build configuration setting set to release
Profile action for SignalPath scheme.

Profiling can be started with Product > Profile (command+I) which builds the application and opens Instruments. Instruments opens profiling template view where we should select Time Profiler. Clicking on the record button in the toolbar starts the application and starts profiling it. Sometimes it might be useful to enable deferred recording mode which delays the Instruments app to render recorded samples while recording is in progress. The setting for it is under Recording tab in the preferences.

Always use deferred mode in Instruments preferences
The setting for deferred mode in Instruments preferences.

Call tree view in Instruments

While the application is running it is being sampled. In every sample Instruments captures the full backtrace of every thread. Sampled data is then aggregated and can be viewed in call tree view. Just to reiterate that sampling also means that very fast functions might not show up at all as they already stopped executing before a new sample is captured. Another thing to note is that the time in the call tree view equals to the function count in samples times the sampling time. Therefore, it is not an exact duration of the function execution. Let’s take a look at an example trace.

Call tree view in Instruments
Call tree view in Instruments.

The call tree view contains several columns: weight, self and symbol name. The weight shows the percentage of samples that the particular call tree appeared in. The self column shows the time spent in that method itself. This excludes time spent in other methods it called itself. In summary, the work the method did itself. Just to reiterate, time equals to sample count times sampling time. In the symbol name column we can navigate the tree and see which methods were called. There can be a lot of information. Also, the backtrace can be pretty long. For making it easier one can hold option while clicking on disclosure triangles which will trigger a smart expansion of the related backtraces. Another thing we can do is using call tree filtering options.

Call tree filtering options in Instruments
Call tree options.

“Separate by State” option divides the data into different app states: running, backgrounded etc. “Separate by Thread” shows data for every thread separately. This is on by default as this is most of the time what we want: to see what thread was doing what. “Invert Call Tree” reverses the tree view and shows backtraces which end up calling a specific method. In other words, when a function is called from several code paths, then this option enables to see all of those code paths. “Hide System Libraries” is what I typically enable for only revealing all of my own methods. “Flatten Recursion” makes recursive functions to show up once in the call stack and “Top Functions” reveals methods which require the most work.

Another useful view is the “Heaviest Stack Trace” view which displays the call stack which needed the most work.

Something to keep in mind is that from time to time we could encounter tail call elimination which is a compiler optimization. The downside is that in some cases it will make time profiler to show a function being called by a parent method of the actual calling method. In those cases we can use CFLAGS="-fno-optimize-sibling-calls" build setting which takes away the performance gain but gives more accurate backtraces. For learning more about it, I suggest watching the WWDC video Profiling in Depth which talks about it in much greater detail.

Summary

The time profiler is an excellent tool to look into the work app is doing. It gives a detail insight on the call stack level. If we know the basics of using the time profiler we can find really quickly the areas in the app which could be more performant. Better performance means less battery usage and snappier user interfaces for users.

If this was helpful, please let me know on Mastodon@toomasvahter or Twitter @toomasvahter. Feel free to subscribe to RSS feed. Thank you for reading.

Categories
Swift Swift Package

Measuring collections with Apple’s Swift Collections Benchmark

Apple’s swift-collections package contains data structure implementations which have more specific use-cases and therefore not fitting into the Foundation. Along with collections Swift package Apple also released swift-collections-benchmark package which implements benchmarking. As like with any other Swift package we can use the benchmarking package for our own purposes as well. Therefore, in this blog post let’s take a look on how to use the benchmarking package.

Step one is to create a new Swift package with executable target which will be used to run benchmarks. In Xcode’s File menu we can select New > Swift Package. In the created package we will want to do some changes in the Package.swift file. We’ll need to add swift-collections-benchmark dependency and change the package type to executable instead of library.

// swift-tools-version:5.4
import PackageDescription
let package = Package(
name: "SwiftBenchmark",
products: [
.executable(
name: "SwiftBenchmark",
targets: ["SwiftBenchmark"]),
],
dependencies: [
.package(url: "https://github.com/apple/swift-collections-benchmark&quot;, from: "0.0.1"),
],
targets: [
.executableTarget(
name: "SwiftBenchmark",
dependencies: [.product(name: "CollectionsBenchmark", package: "swift-collections-benchmark")])
]
)
view raw Package.swift hosted with ❤ by GitHub
Package.swift file after changing the default library template to executable.

Secondly, we need to add main.swift file to the package or use the @main keyword. In this example I went for main.swift. When that is set as well, we can start using the benchmarking package and writing benchmarks for collections. For trying out the benchmarking I am going to use raywenderlicht/swift-algorithms-club’s queue implementations. It provides two examples of queues where one is a thin wrapper around the array type and the other one is an optimized version which looks into improving performance when dequeuing elements from the queue.

Setting up a benchmark requires defining a benchmark object and adding benchmark tasks to it and then calling main() on the benchmark object. Every added task will show up as a separate line on the chart when we render results. The package has some input generators defined and also allows adding more if we need to. Check the registerInputGenerator function on the Benchmark type for more information. But OK, back to benchmarks. The snippet below shows how to define a benchmark for dequeue operation over a variety of input sizes where the max input size is currently limited to 128000.

var queueBenchmark = Benchmark(title: "Queue")
queueBenchmark.add(title: "QueueSimple", input: [Int].self, maxSize: 128_000) { input in
return { timer in
var queue = QueueSimple<Int>()
input.forEach({ queue.enqueue($0) })
timer.measure {
for _ in 0..<input.count {
let value = queue.dequeue()
blackHole(value)
}
}
}
}
queueBenchmark.add(title: "QueueOptimized", input: [Int].self, maxSize: 128_000) { input in
return { timer in
var queue = QueueOptimized<Int>()
input.forEach({ queue.enqueue($0) })
timer.measure {
for _ in 0..<input.count {
let value = queue.dequeue()
blackHole(value)
}
}
}
}
queueBenchmark.main()
view raw main.swift hosted with ❤ by GitHub

When everything is set we can go ahead and run the benchmark. First navigate to the package’s folder and use the swift run command as shown below. When benchmarking finishes we can use the generated file, in this case “results”, to render a chart.

▶ swift run -c release SwiftBenchmark run results –cycles 3
[2/2] Linking SwiftBenchmark
* Build Completed!
Running 2 tasks on 76 sizes from 1 to 1M:
QueueSimple
QueueOptimized
Output file: /Users/toomas/Desktop/SwiftBenchmark/results
Appending to existing data (if any) for these tasks/sizes.
Collecting data:
1.2.4…8…16…32…64…128…256…512…1k…2k…4k…8k…16k…32k…64k…128k…256k…512k…1M — 15.1s
1.2.4…8…16…32…64…128…256…512…1k…2k…4k…8k…16k…32k…64k…128k…256k…512k…1M — 15s
1.2.4…8…16…32…64…128…256…512…1k…2k…4k…8k…16k…32k…64k…128k…256k…512k…1M — 15.1s
Finished in 45.2s
▶ swift run -c release SwiftBenchmark render results chart.png && open chart.png
view raw run.sh hosted with ❤ by GitHub

Like expected, the optimized queue performs much better in larger input sizes. Perfect!

If this was helpful, please let me know on Mastodon@toomasvahter or Twitter @toomasvahter. Feel free to subscribe to RSS feed. Thank you for reading.

Categories
Swift Swift Package

Running tests in Swift package with GitHub actions

Some time ago I published a tiny Swift package IndexedDataStore which tackles a problem of storing data blobs on disk. It could the image data or anything else. When working with Swift packages then it is extremely easy to build and run tests on macOS but when we want to build and run tests on iOS simulator then we need to drop using swift build and swift test commands. Fortunately xcodebuild can help here and we can build and run tests without generating a project file ourselves with swift package generate-xcodeproj. Something I would like to mention about the generate-xcodeproj command is that it generates a project which does not contain resource files. The aim of this blog post is to configure a GitHub action which runs unit-tests both on macOS and iOS.

GitHub actions need to be in the repostory’s .github/workflows folder. GitHub workflows are defined in YAML files which need to be in that folder. Let’s jump into it and start creating a worflow which runs tests on macOS and iOS. GitHub workflows must define a name, in our case, name: CI. Secondly we’ll need to define when the workflow should be triggered. Running the workflow whenever pull request is created of when something was pushed to main branch will suffice.

name: CI

on:
  push:
    branches: [ main ]
  pull_request:
    branches:
      - '*'

The next step is creating a job and defining a number of steps. Jobs require a name, then which resource it needs to use. The first step is the repository checkout followed by running swiftlint which is already part of the enviornment. The linting step uses the default configuration file .swiftlint.yml at the repository root. At this point we are ready to build and run tests.

jobs:
  unit_tests:
    runs-on: macos-latest
    steps:
    - name: Repository checkout
      uses: actions/checkout@v2
    - name: Lint
      run: swiftlint

The simplest way to build and test Swift packages is to use swift build and swift test commands which builds and runs tests on macOS. Unfortunately there is not a way to use those commands and setting the deplyoment to iOS. Therefore we’ll need to use xcodebuild command instead. It will know how to deal with Swift packages and therefore we only need to define scheme and destination arguments. It also makes sense to separate building (build-for-testing) from running tests (test-without-building) as it makes it easier to see where a failure happened. We can make the xcodebuild output a little bit cleaner by using xcpretty. In addition it is also reasonable to use set -o pipefail which makes the pipeline to use an occured error code as the final code of the whole pipeline. Finally, we’ll disable any buffering by setting NSUnbufferedIO to YES.

jobs:
  unit_tests:
    runs-on: macos-latest
    steps:
    - name: Repository checkout
      uses: actions/checkout@v2
    - name: Lint
      run: swiftlint
    - name: Build for macOS
      run: swift build -v
    - name: Run macOS tests
      run: swift test -v
    - name: Build for iOS
      run: set -o pipefail && env NSUnbufferedIO=YES xcodebuild build-for-testing -scheme IndexedDataStore -destination "platform=iOS Simulator,OS=latest,name=iPhone 12" | xcpretty
    - name: Run iOS tests
      run: set -o pipefail && env NSUnbufferedIO=YES xcodebuild test-without-building -scheme IndexedDataStore -destination "platform=iOS Simulator,OS=latest,name=iPhone 12" | xcpretty

This completes our workflow and we can check in the YAML file which gets then picked up by GitHub. All the actions can be see under the Actions section on GitHub.

Summary

We looked into how to add a GitHub workflow for running tests both on macOS and iOS. Although swift build does not support building the package for iOS we could still do that with xcodebuild.

If this was helpful, please let me know on Mastodon@toomasvahter or Twitter @toomasvahter. Feel free to subscribe to RSS feed. Thank you for reading.

Categories
iOS Swift

Code coverage for Swift Packages with Fastlane

Package.swift file in Swift packages describes the package contents including other dependencies, build targets and so on. Double-clicking a Package.swift file opens Xcode with that package and one can build and run tests. When adding continues integration to a Swift package then we would like to build, test, and also create a code coverage report. Fastlane is an excellent tool for such tasks and therefore let’s take a look on how to achieve that for packages with iOS target.

Code coverage support needs to be explicitly set and this can be done by using Swift Package Manager’s generate-xcodeproj command with having code coverage turned on. SPM then creates a Xcode project which has a slightly different scheme name with “-Package” suffix. The generated project file can then be used to run tests with Fastlane’s run_tests action. After running test we can use a tool like xcov for generating an HTML page with a code coverage report. One of the great features of the xcov is the ability to force a minimum code coverage percentage.

This approach works fine when we do not have any resource files in the package which are required for running tests. The problem is that the generate-xcodeproj command creates a project file without resource files. In those cases we would need to either use a separate standalone project or workspace file which has code coverage turned on.

Down below, we can see an example Fastfile which has a lane called “test_report” which generates a project file, runs tests and uses xcov for generating code coverage report. Additionally, it will delete the generated project file and any related folders.

require 'fileutils'
default_platform(:ios)
platform :ios do
desc "Run tests and create a unit-test report"
lane :test_report do
spm(
command: 'generate-xcodeproj',
enable_code_coverage: true
)
run_tests(
project: 'SPMPackage.xcodeproj',
scheme: 'SPMPackage-Package',
device: 'iPhone 12',
output_directory: './fastlane/UnitTests',
clean: true
)
xcov(
project: 'SPMPackage.xcodeproj',
scheme: 'SPMPackage-Package',
output_directory: './fastlane/CodeCoverage',
include_targets: 'SPMPackage.framework',
minimum_coverage_percentage: 80.0
)
if ENV['CI'] != 'true'
sh 'open ./UnitTests/report.html'
sh 'open ./CodeCoverage/index.html'
end
end
before_all do
FileUtils.remove_dir './CodeCoverage', true
FileUtils.remove_dir './UnitTests', true
end
after_all do
FileUtils.remove_dir './../SPMPackage.xcodeproj', true
end
end
view raw Fastfile.rb hosted with ❤ by GitHub

If this was helpful, please let me know on Mastodon@toomasvahter or Twitter @toomasvahter. Feel free to subscribe to RSS feed. Thank you for reading.

Categories
iOS macOS Swift

Custom string interpolation in Swift

ExpressibleByStringInterpolation is a protocol which makes it possible to compose strings with expressions evaluated at runtime. Interpolated strings are created with adding a \(some code) to a string. Those expressions are evaluated and a final string is created. This protocol, among other things, enables customizing strings what are created by those expressions. At the end of the post we have created a custom interpolation type which handles encodable and string representable types.

ExpressibleByStringInterpolation is a protocol which enables a type to be initialized with string interpolation. The protocol inherits from multiple other protocols, when going from top to down then it looks like this: ExpressibleByStringLiteral, ExpressibleByExtendedGraphemeClusterLiteral, and ExpressibleByUnicodeScalarLiteral. So it is a total of 4 levels of inheritance. That is important to know because if we add the protocol to a custom type then Xcode tells us about many functions the custom type needs to implement. Many of these functions already provide default implementation.

Let’s start with adding custom types Entry add EntryStorage. The storage type just keeps a collection of entries. The entry, for now, contains a string value, but we will expand the type in a way that the storage’s add function can be called with a string interpolation: storage.add("Entry (index)"). It will be very similar to OSLogMessage in Apple’s os framework.

struct EntryStorage {
private(set) var entries: [Entry] = []
mutating func add(_ entry: Entry) {
entries.append(entry)
}
}
struct Entry {
private(set) var value: String
}

With this set, let’s add ExpressibleByStringInterpolation conformance to the Entry type along with a custom interpolation type: EntryInterpolation. ExpressibleByStringInterpolation protocol comes with an associatedtype StringInterpolation which is by default set to DefaultStringInterpolation. If we want to use custom interpolation type then we can implement the init(stringInterpolation: EntryInterpolation) with the custom type and Swift will understand that we’ll be using our own type here. No need to add typealias StringInterpolation = EntryInterpolation (although we could for clarity). The custom EntryInterpolation type needs to conform to protocol StringInterpolationProtocol. The protocol requires us to implement an init method and a appendLiteral function. The custom type will have a property for storing multiple interpolated values because it needs to represents all the expressions in a single string. For example: "Text (expression1) more text (expression2)".

struct Entry: ExpressibleByStringInterpolation {
// typealias StringInterpolation = EntryInterpolation
private(set) var value: String
init(stringLiteral value: String) {
self.value = value
}
init(stringInterpolation: EntryInterpolation) {
self.value = stringInterpolation.values.joined()
}
}
struct EntryInterpolation: StringInterpolationProtocol {
private(set) var values: [String]
init(literalCapacity: Int, interpolationCount: Int) {
self.values = []
}
mutating func appendLiteral(_ literal: StringLiteralType) {
values.append(literal)
}
}

With this implementation we can write code which looks like this:

var entryStorage = EntryStorage()
entryStorage.add("Entry 1")

Note that the add method takes an argument of the type Entry but here we are passing a string to the function. This works because the Entry type conforms to the ExpressibleByStringLiteral protocol which the ExpressibleByStringInterpolation includes.

Now we have basics set up and we can go and add additional functions to the EntryInterpolation type. At first, we’ll add a generic function enabling us to create interpolated strings with expressions which return a type conforming to the CustomStringConvertible protocol. There are numerous types which implement this protocol and therefore we get a support of interpolating each of those. For example, Int and Array types conform to it.

extension EntryInterpolation {
mutating func appendInterpolation<T: CustomStringConvertible>(_ value: T) {
values.append(value.description)
}
}
let index = 2
let items = ["Item 1", "Item 2"]
entryStorage.add("Entry \(index): items=\(items)")
// Entry 2: items=["Item 1", "Item 2"]

Sometimes we might want to pass in encodable types directly with customizable formats. Note how the interpolated expression gets a support to the custom format argument. That is because Swift converts each of the expressions to calls to appendInterpolation which can have additional arguments.

extension EntryInterpolation {
mutating func appendInterpolation<T: Encodable>(_ value: T, jsonFormat: JSONEncoder.OutputFormatting = [.prettyPrinted, .sortedKeys]) {
let encoder = JSONEncoder()
encoder.outputFormatting = jsonFormat
let data = try? encoder.encode(value)
values.append(String(data: data ?? Data(), encoding: .utf8) ?? "invalid")
}
}
struct User: Encodable {
let name: String
let age: Int
}
let user = User(name: "Appleseed", age: 20)
entryStorage.add("Entry 3: \(user, jsonFormat: .prettyPrinted)")
entryStorage.add("Entry 3: \(user, jsonFormat: .sortedKeys)")
// Entry 3: {
// "name" : "Appleseed",
// "age" : 20
//}
//Entry 3: {"age":20,"name":"Appleseed"}

It is worth taking a look on the interface of the OSLogInterpolation type and all the appendInterpolation functions it implements. As seen so far, it is pretty easy to extend a custom interpolation type with functions like these.

If this was helpful, please let me know on Mastodon@toomasvahter or Twitter @toomasvahter. Feel free to subscribe to RSS feed. Thank you for reading.

Project

SwiftStringInterpolationPlayground (Xcode 12.4)

Categories
macOS Swift SwiftUI

Reading Fastfiles with document based SwiftUI app on macOS

WWDC’20 brought an addition to SwiftUI apps which enables to create document based applications in SwiftUI. Along with DocumentGroup API two new protocols were added: FileDocument and ReferenceFileDocument. The first one is meant for value types and the latter one for class type document types. For seeing how much effort it takes to create a document based SwiftUI app, let’s create a small macOS app which reads Fastlane’s Fastfiles.

Mac app window showing a list of lanes from a Fastfile
The final applications which displays a list of lanes.

Xcode comes with a pretty nice template for document based application. For this specific case we will go with macOS’ document app template.

A template picker in Xcode showing macOS document app template being selected.
Xcode template picker.

The default template is set up in a way that it can be used for reading and writing text documents. Let’s go and modify the created app. Fastfiles in Fastlane do not have any file extensions and therefore we’ll need to use public.data Uniform Type Identifiers (UTI) type which enables the app to open it. This has a side-effect as well, now the app can open lots of other files as well, so we should probably add a validation step which makes sure we are trying to read a Fastfile. As the app is going to deal with public.data UTI types and the app itself does not define any custom UTI types then Document Types and Imported Type Identifiers in the Info.plist can be removed.

Like mentioned before, SwiftUI brought a new way of creating document based applications. Document types are presented either with value or reference type. FileDocument is a protocol which adds an init method with read support, a write method and supported UTI type declarations for reading and writing. It is a pretty compact protocol when thinking about the interface UIDcoument has. Something to keep in mind is that every implemented method in the document must be thread-safe because reading and writing always happens on background threads. But let’s take a look at the implementation of a document which represents a Fastfile document:

struct FastfileDocument: FileDocument {
let fastfileContents: String
init(contents: String) {
self.fastfileContents = contents
}
init(configuration: ReadConfiguration) throws {
// TODO: validate the file name
guard let data = configuration.file.regularFileContents else { throw CocoaError(.fileReadCorruptFile) }
guard let string = String(data: data, encoding: .utf8) else { throw CocoaError(.fileReadCorruptFile) }
fastfileContents = string
}
static var readableContentTypes: [UTType] {
return [UTType("public.data")!]
}
func fileWrapper(configuration: WriteConfiguration) throws -> FileWrapper {
let data = fastfileContents.data(using: .utf8)!
return FileWrapper(regularFileWithContents: data)
}
// MARK: Accessing Lanes
func lanes() -> [Lane] {
return FastfileParser.lanes(in: fastfileContents)
}
}
struct Lane: Equatable, Identifiable {
let name: String
let documentation: String
var id: String {
return name
}
}

The FastfileParser was covered by the previous blog post if you would like to take a look: Adding prefixMap for expensive operations in Swift. In summary, the document just reads the whole Fastfile into the memory and provides a method for parsing lanes. Note that the protocol requires to have a write method defined as well although, at least for now, we are not going to use it. Having the document created, the next step is building a small UI which shows a list of lanes.

DocumentGroup is a new scene type which manages everything around creating, viewing, and saving documents. Therefore, for viewing a document we’ll need to create a DocumentGroup for viewing and provide a SwiftUI view which can display the document. DocumentGroup takes care of showing the open panel and coordinating the view creation. The example SwiftUI app looks like this:

@main
struct LaneControlApp: App {
var body: some Scene {
DocumentGroup(viewing: FastfileDocument.self) { file in
LaneListView(viewModel: LaneListView.ViewModel(document: file.document))
}
}
}
view raw App.swift hosted with ❤ by GitHub

A list view for showing the list of lanes is pretty straight-forward: LaneListView uses the List view component and displays individual rows with the LaneRowView. The row view shows the name of the lane and the description found in the Fastfile document.

struct LaneListView: View {
@StateObject var viewModel: ViewModel
var body: some View {
List {
ForEach(viewModel.lanes) { lane in
LaneRowView(lane: lane)
}
}
.frame(minWidth: 200, minHeight: 200)
}
final class ViewModel: ObservableObject {
let lanes: [Lane]
init(document: FastfileDocument) {
lanes = document.lanes()
}
}
}
struct LaneRowView: View {
let lane: Lane
var body: some View {
VStack(spacing: 8) {
Text(lane.name)
.font(.headline)
if !lane.documentation.isEmpty {
Text(lane.documentation)
.font(.subheadline)
.multilineTextAlignment(.center)
}
}
.frame(maxWidth: .greatestFiniteMagnitude)
.foregroundColor(.white)
.padding(12)
.background(Color.accentColor)
.cornerRadius(12)
}
}

Summary

DocumentGroup, FileDocument, and ReferenceFileDocument APIs are the building blocks for building document based apps with SwiftUI. Getting a simple document based app up and running does not require much code at all.

If this was helpful, please let me know on Mastodon@toomasvahter or Twitter @toomasvahter. Feel free to subscribe to RSS feed. Thank you for reading.