LibraryContentProvider protocol in Xcode is a way for adding custom views and view modifiers to the Xcode library, which enables drag and dropping them to the SwiftUI preview. Xcode automatically looks for types implementing the protocol and then adds items to the library. It takes so little code that it makes sense to do it if you are using the library for building views.
As an example, we’ll add a custom SwiftUI view SubtitledButton to the library.
This file contains hidden or bidirectional Unicode text that may be interpreted or compiled differently than what appears below. To review, open the file in an editor that reveals hidden Unicode characters.
Learn more about bidirectional Unicode characters
The only thing we need to do is creating a new type which conforms to LibraryContentProvider and then returning the button as a LibraryItem.
This file contains hidden or bidirectional Unicode text that may be interpreted or compiled differently than what appears below. To review, open the file in an editor that reveals hidden Unicode characters.
Learn more about bidirectional Unicode characters
One of the cases where we would like to build debug and release configurations differently is when we want to enable some extra features. A concrete example could be a debug view which has a list of commands or displays additional information. In this blog post, we are going to take a look at a Xcode project which only links a local Swift package in debug builds.
The project setup
In the example project, we have an iOS app and a local Swift package “DebugFeatures”. The Swift package description also contains swiftSettings which defines a DEBUG compilation condition when the package is built with debug configuration. This is just an extra measure to make sure we do not compile any of the code in this package accidentally in release configuration.
This file contains hidden or bidirectional Unicode text that may be interpreted or compiled differently than what appears below. To review, open the file in an editor that reveals hidden Unicode characters.
Learn more about bidirectional Unicode characters
Since it is a compilation condition, then we should also wrap our code in the package with if/endif DEFINE.
This file contains hidden or bidirectional Unicode text that may be interpreted or compiled differently than what appears below. To review, open the file in an editor that reveals hidden Unicode characters.
Learn more about bidirectional Unicode characters
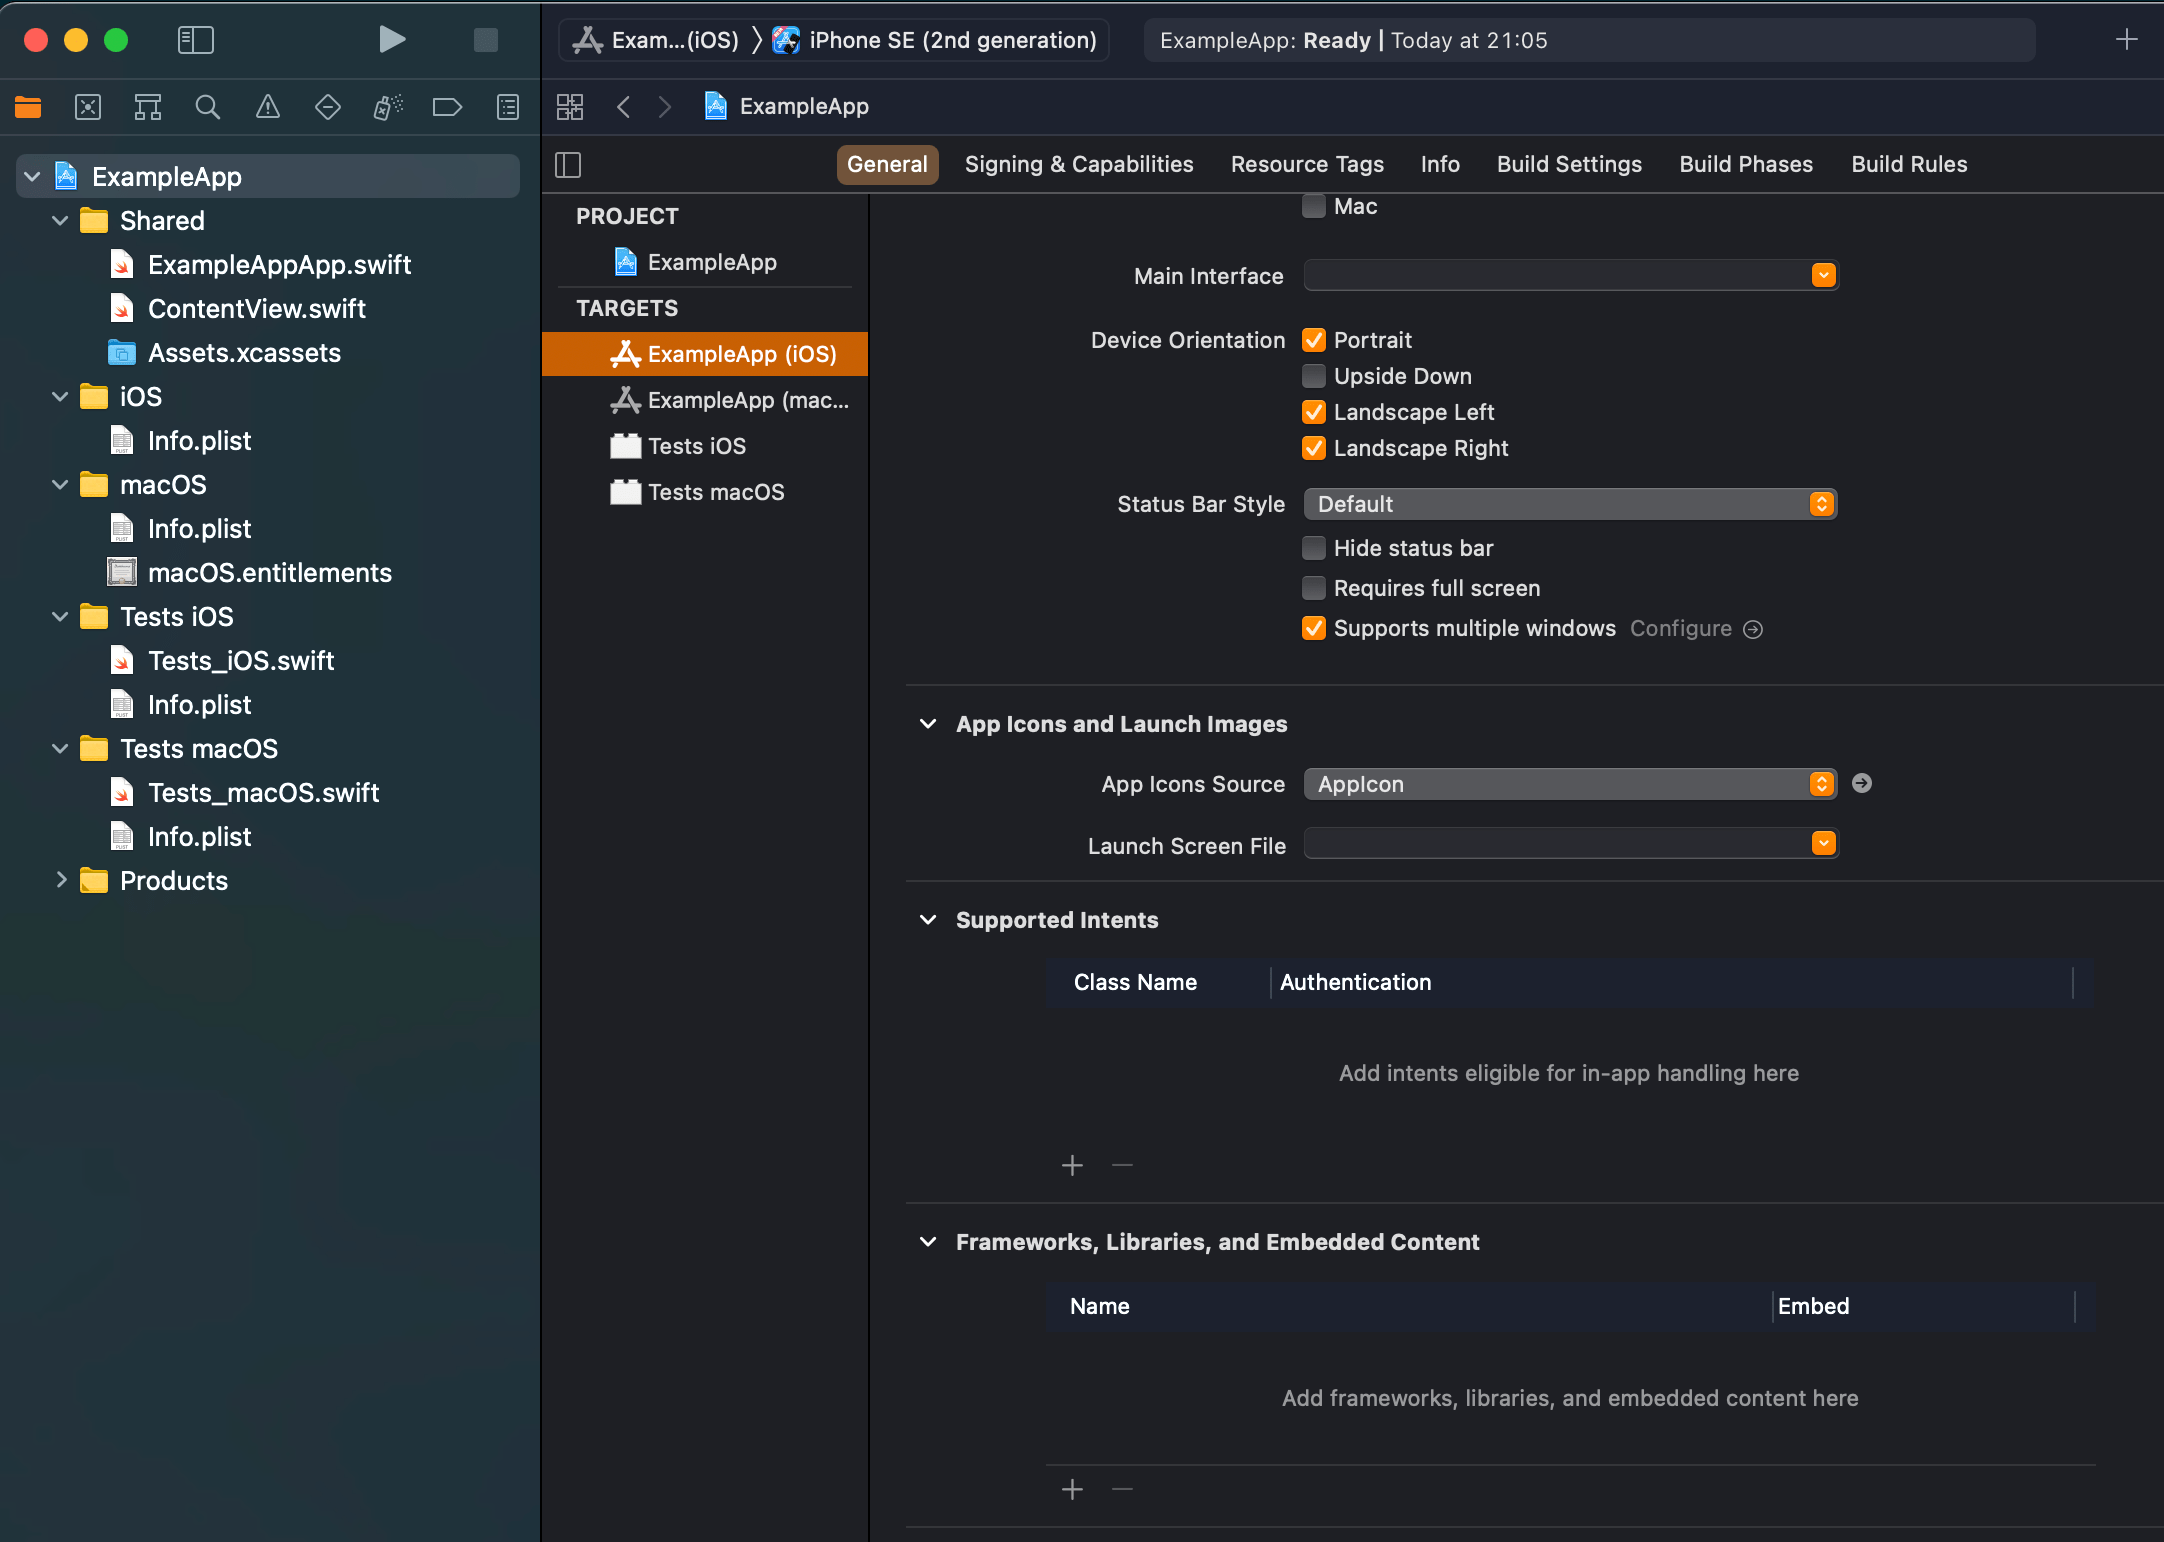
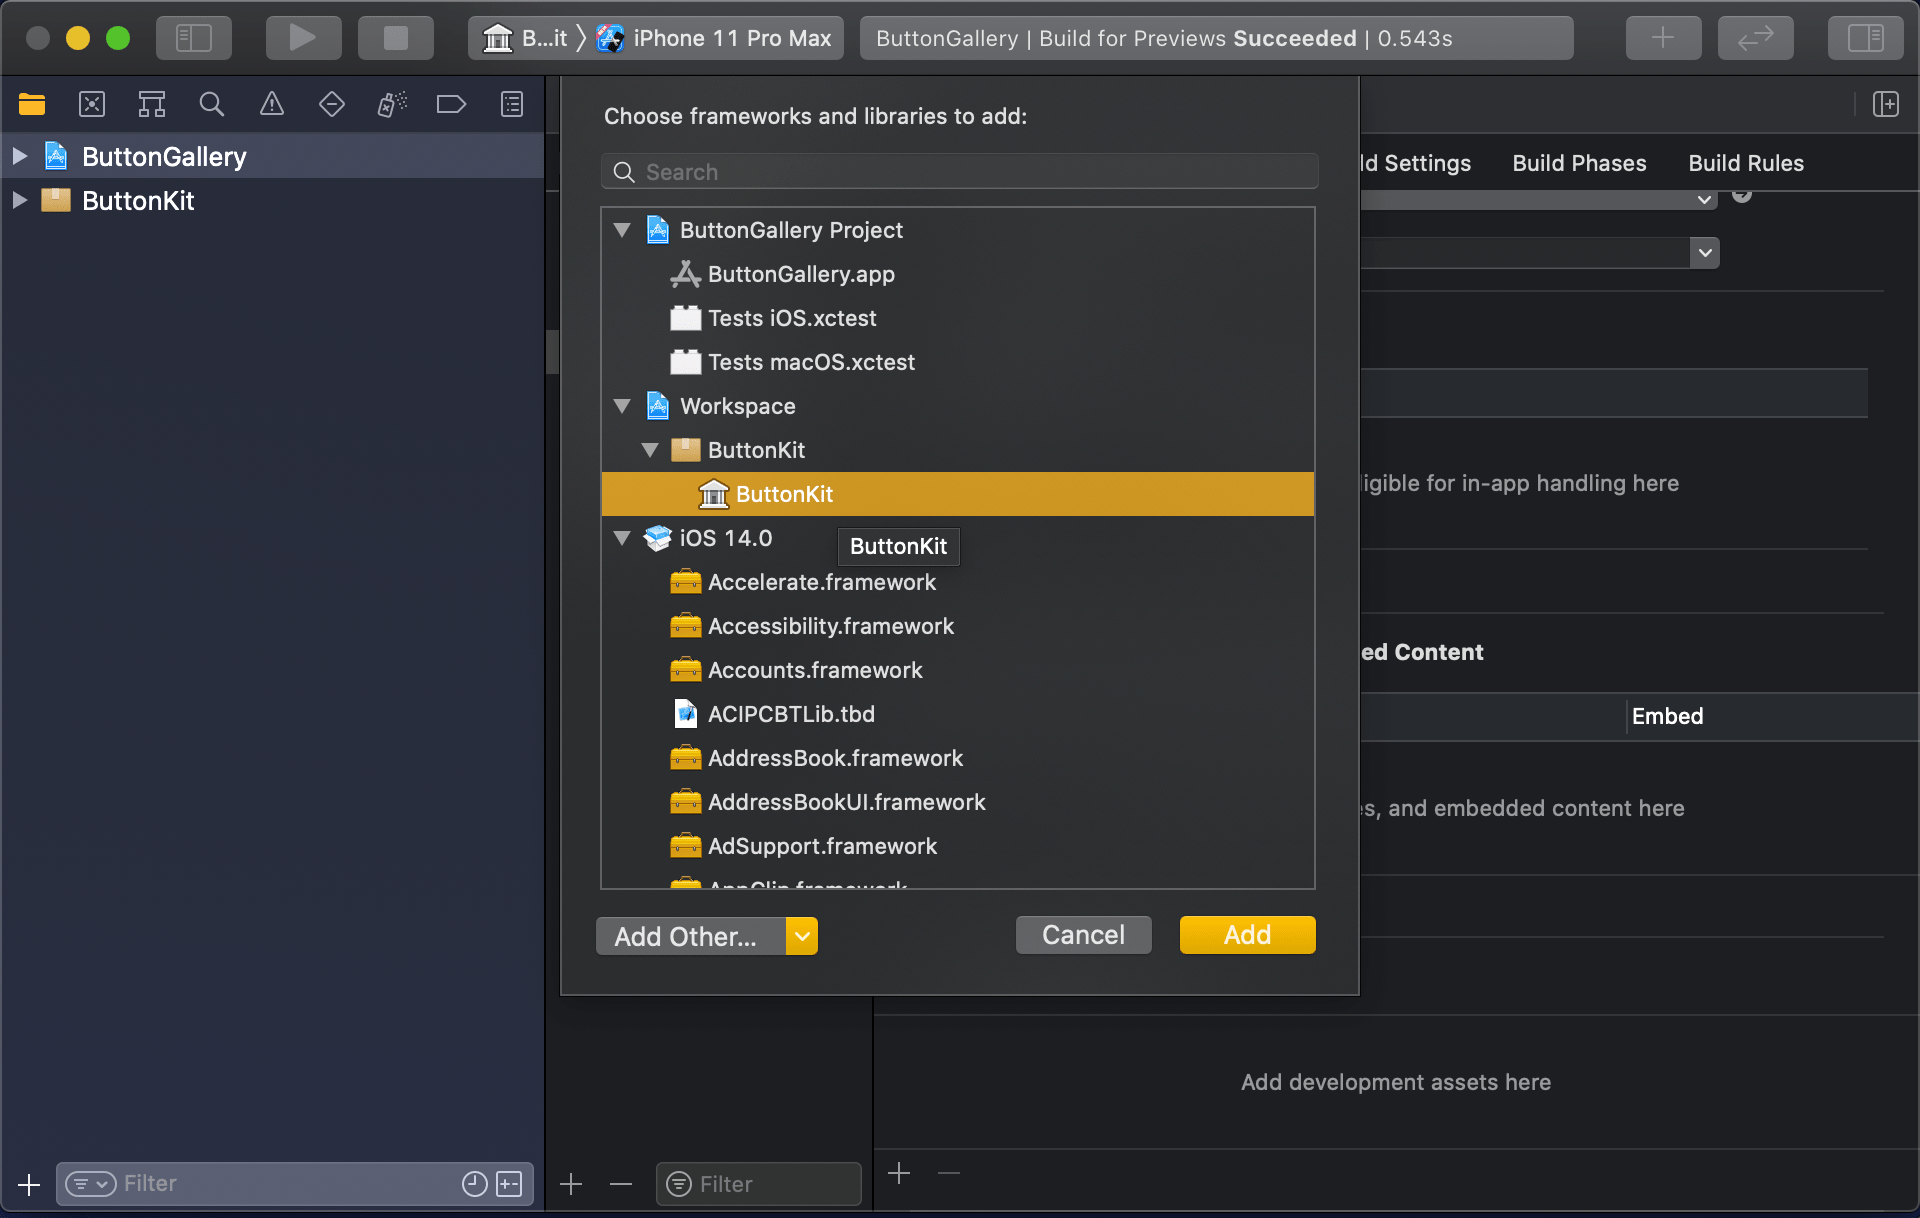
The next step is to change app project settings and make sure we do not link the package in release builds. The simplest way for this is to first add the package as the app dependency in “Frameworks, Libraries, and Embedded Content”.
App target’s libraries.
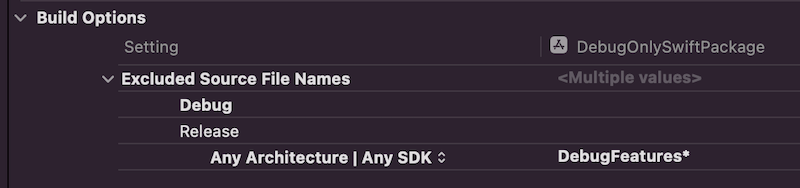
Then we’ll open build settings and look for “Excluded Source File Names” and configure release builds to ignore “DebugFeatures*”.
Build settings configured to ignore the package in release builds.
To verify this change, we can make a release build with shift+command+i (Product -> Build For -> Profiling which builds release configuration). If we check the latest build log with command+9 and clicking on the top most build item, scrolling to app target’s linker step, we can see that Xcode did not link “DebugFeatures”. Exactly what we wanted to achieve.
Output of the linker step of the app target.
Summary
This is one way how to link some package only for debug builds. Although it sounds a bit unexpected that “Excluded Source File Names” also removes the package from the linking phase, but I am happy it does since it means only changing one build setting to get it working like this.
SwiftLint is a tool for validating the style and conventions in Swift files. It is easy to integrate to a project. Minimum set up consists of installing SwiftLint and adding a build phase to your app target in Xcode. SwiftLint comes with a default list of rules, but if you would like to change the rules then it is required to create a configuration file in yaml. Let’s take a look on how to install, add build step, and use a separate configuration file with a custom set of rules.
SwiftLint is available in homebrew so the easies way is to install it with brew install swiftlint command. Next step is to add the build phase to a target. I am gonna use one of my example app which is available on GitHub: SwiftPackageAppWorkspace. This project uses a workspace and includes an app project and Swift package.
This file contains hidden or bidirectional Unicode text that may be interpreted or compiled differently than what appears below. To review, open the file in an editor that reveals hidden Unicode characters.
Learn more about bidirectional Unicode characters
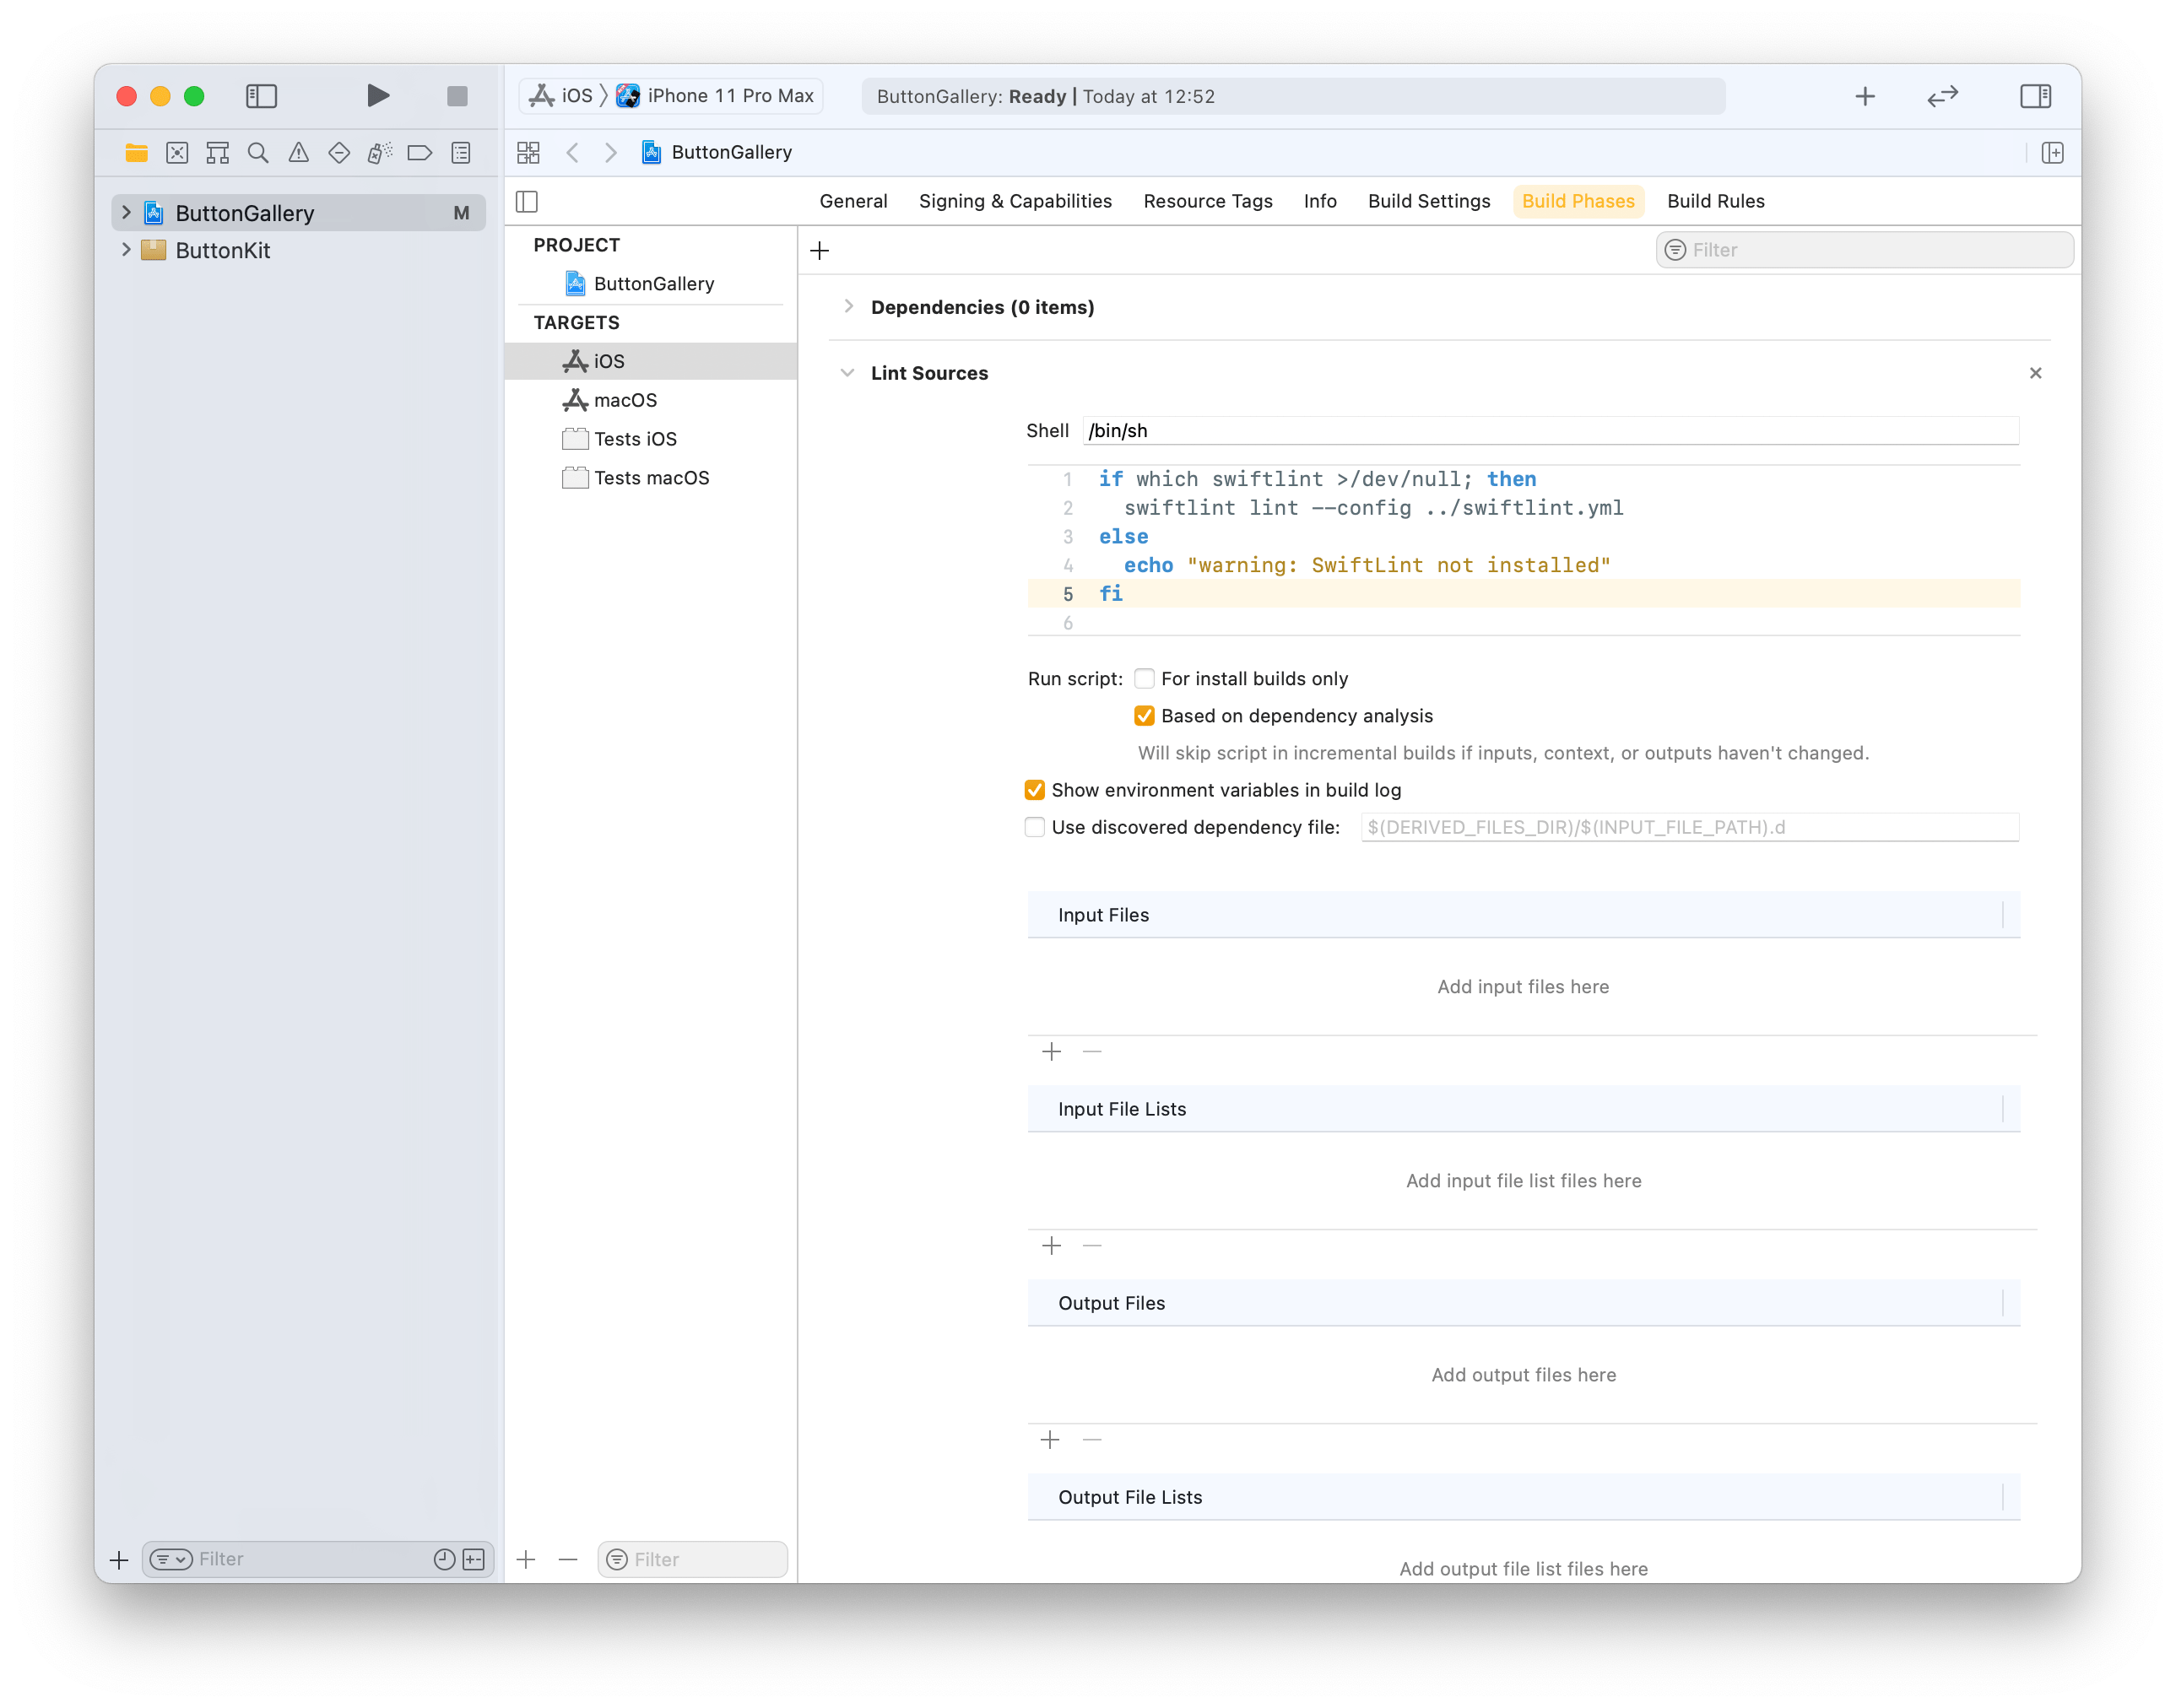
Click on the ButtonGallery project in the file navigator, then on the iOS target and build phases. Will use the + button for adding a new run script phase. Note that we already use the config argument for letting SwiftLint know where the config file exists (by default SwiftLint looks for .swiftlint.yml file in the same folder the project file is).
This file contains hidden or bidirectional Unicode text that may be interpreted or compiled differently than what appears below. To review, open the file in an editor that reveals hidden Unicode characters.
Learn more about bidirectional Unicode characters
Build phase calling swiftlint with custom configuration file in one folder up from the .xcodeproj.
Build phase which triggers swiftlint with custom configuration.
Last step is to add a custom configuration file to the repository checkout. We’ll add it to the checkout’s root folder which is the parent folder of the ButtonGallery.xcodeproj. I have went through the full list of rules available for SwiftLint and picked the ones which match with my coding style. SwiftLint has a list of default rules. The list of evaluated rules can be expanded with opt_in_rules and rules from default list can be disabled with disabled_rules list. Also I prefer to have else on a newline so I added statement_position configuration with statement_mode: uncuddled_else. Included defines a list of folder paths relative to the .xcodeproj calling swiftlint.
This file contains hidden or bidirectional Unicode text that may be interpreted or compiled differently than what appears below. To review, open the file in an editor that reveals hidden Unicode characters.
Learn more about bidirectional Unicode characters
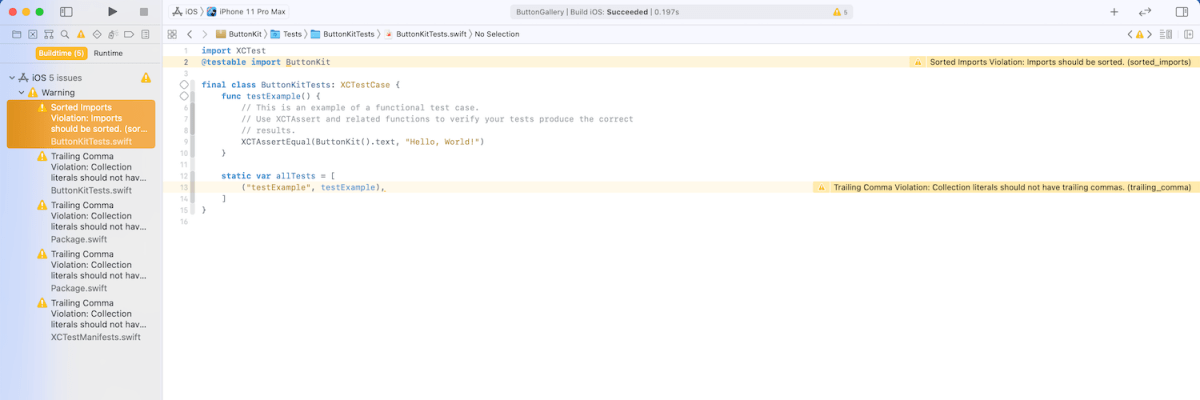
The next time the target is built it will run SwiftLint with custom configuration and show warnings and/or errors in Xcode.
Warnings generated by SwiftLint in the example project.
Summary
SwiftLint is easy to set up and helps to keep the code style consistent in projects. In additional to style SwiftLint is capable of suggesting different coding conventions like use enum instead of struct with only static functions. For making it easy to add custom configuration to new project I have set up a command alias in ~/.zshrc which looks like this: alias xcode_lint_add='cp ~/Dev/swiftlint.yml swiftlint.yml && mate swiftlint.yml' Run xcode_lint_add in the root of the cloned project.
Git hooks are scripts written in any scripting language and are triggered when important actions occur. Hooks are stored in the repository’s .git/hooks folder. The script needs to have an appropriate filename without a path extension and also have executable permissions. Push event is an excellent time for triggering unit-tests and making sure local changes have not broken any. Therefore we’ll look into how to create a pre-push script for an iOS project in Swift.
Quick introduction to scripts written in Swift
Setting up a simple script in Swift follows steps familiar from other languages. The script file needs to start with #!/usr/bin/swift followed by the actual script. A simple example script can look like this.
This file contains hidden or bidirectional Unicode text that may be interpreted or compiled differently than what appears below. To review, open the file in an editor that reveals hidden Unicode characters.
Learn more about bidirectional Unicode characters
The command for running the script is swift Script.swift (if the filename is Script.swift). Another way is making the script executable by adding executable permissions to the file by running chmod +x Script.swift command. Then the script can be run with ./Script.swift (makes sense to drop the file extension).
Building a Xcode project for testing
The pre-push script contains of 3 steps: building the project for testing, running tests, and finally printing out the code coverage results. The first step catches build errors, the second step test failures, and the third step prints out code coverage results. Code coverage can be enabled in the scheme’s test action or adding -enableCodeCoverage YES to the xcodebuild command. Before we jump into creating a xcodebuild command with correct arguments then we’ll need to tackle the problem of calling the xcodebuild command line application from the Swift script. Command line applications can be invoked with the Foundation’s Process class. We’ll add an extension which deals with launching a specified command with zsh and printing out the standard output and error.
This file contains hidden or bidirectional Unicode text that may be interpreted or compiled differently than what appears below. To review, open the file in an editor that reveals hidden Unicode characters.
Learn more about bidirectional Unicode characters
The next step in the script is to define the project related configuration and create the xcodebuild command. All the user defined arguments are wrapped in quotes for avoiding any issues with whitespaces. The command is pretty straight-forward. If there are any build errors then the result code is not equal to 0. Then we can use the same error code for exiting the Swift script with exit() function.
This file contains hidden or bidirectional Unicode text that may be interpreted or compiled differently than what appears below. To review, open the file in an editor that reveals hidden Unicode characters.
Learn more about bidirectional Unicode characters
The command used for running unit-tests is fairly similar. Instead of build-without-testing we are using test-without-building argument and additionally provide a path where the result bundle is written to. This bundle contains information about the test run. Note that this path must not exist, otherwise xcodebuild stops with an error. Therefore we delete the existing file before running the command. Moreover, when there is a failure, we’ll clean up the path as well – pre-push script should not leave any temporary files.
This file contains hidden or bidirectional Unicode text that may be interpreted or compiled differently than what appears below. To review, open the file in an editor that reveals hidden Unicode characters.
Learn more about bidirectional Unicode characters
Last step is optional but it is nice to see code coverage information when pushing changes to a server. Xcode provides a command line application for viewing coverage data in human readable form. One of the options is printing out code coverage per target which gives a nice and concise overview.
This file contains hidden or bidirectional Unicode text that may be interpreted or compiled differently than what appears below. To review, open the file in an editor that reveals hidden Unicode characters.
Learn more about bidirectional Unicode characters
We looked into how to create a pre-push script in Swift. It called other command line applications for building the project, running the tests, and printing out code coverage information. The full script is available below, feel free to copy-paste it to your projects. The one last thing to consider is adding an alias in Terminal for easy installation: alias xcode_pre_push_add='cp ~/Dev/pre-push .git/hooks/pre-push && mate .git/hooks/pre-push' This just copies it from predefined location to the repository checkout and opens it in an editor for setting project related settings (replace mate with any editor).
This file contains hidden or bidirectional Unicode text that may be interpreted or compiled differently than what appears below. To review, open the file in an editor that reveals hidden Unicode characters.
Learn more about bidirectional Unicode characters
In the previous post we looked into how to separate code with local Swift packages within a project. This time let’s create a Swift package, publish it on GitHub, and add it to a separate project. We’ll create a package which extends UIImage and enables calculating color contrast ratios. Color contrast is important factor for keeping text readable in apps.
Creating a Swift package
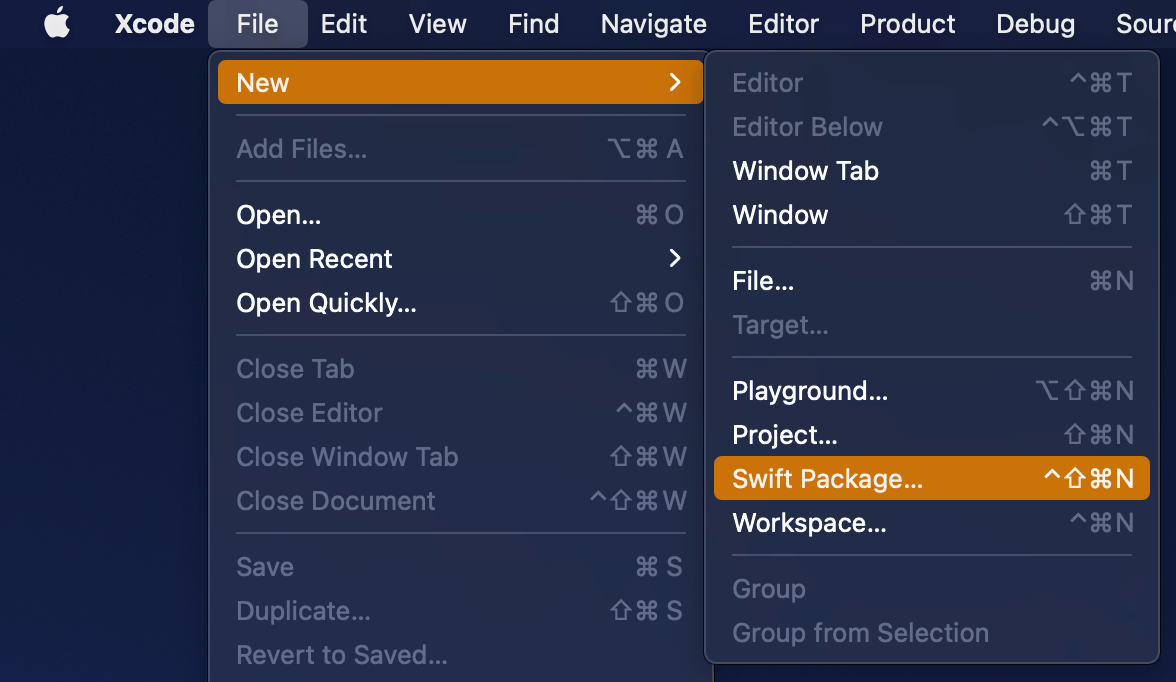
Open Xcode and select “Swift Package” item from the File > New menu. We’ll set the name of the package to “ColorContrastRatio”.
Selecting a new Swift Package.
Saving a new Swift package.
Xcode’s template of new Swift packages is configured to have a basic hello world example with an unit-test. Before we change the package’s implementation, we’ll add minimum platform versions to the Package.swift file, in other words, minimum deployment target.
This file contains hidden or bidirectional Unicode text that may be interpreted or compiled differently than what appears below. To review, open the file in an editor that reveals hidden Unicode characters.
Learn more about bidirectional Unicode characters
Next step is to implement functionality of the package. We’ll keep the package simple and make it UIKit only which can be built for iOS and macCatalyst apps. Package is adding an UIColor extension and providing functionality for calculating relative luminance and contrast ratio. Functionality is set, next step is to publish it.
This file contains hidden or bidirectional Unicode text that may be interpreted or compiled differently than what appears below. To review, open the file in an editor that reveals hidden Unicode characters.
Learn more about bidirectional Unicode characters
First step is to go to GitHub and adding a new repository. I chose to include an automatically created license file, cloned the repository on my mac and then moved the code we added in the previous step to that checkout, then committed and pushed. Alternative is to add a remote to your local git repository. Either way is fine as long as our project ends up on GitHub. In addition, will add a tag which will mark the first release 0.1.0. Tags can be added by running those commands in Terminal:
Adding the published Swift package to another project
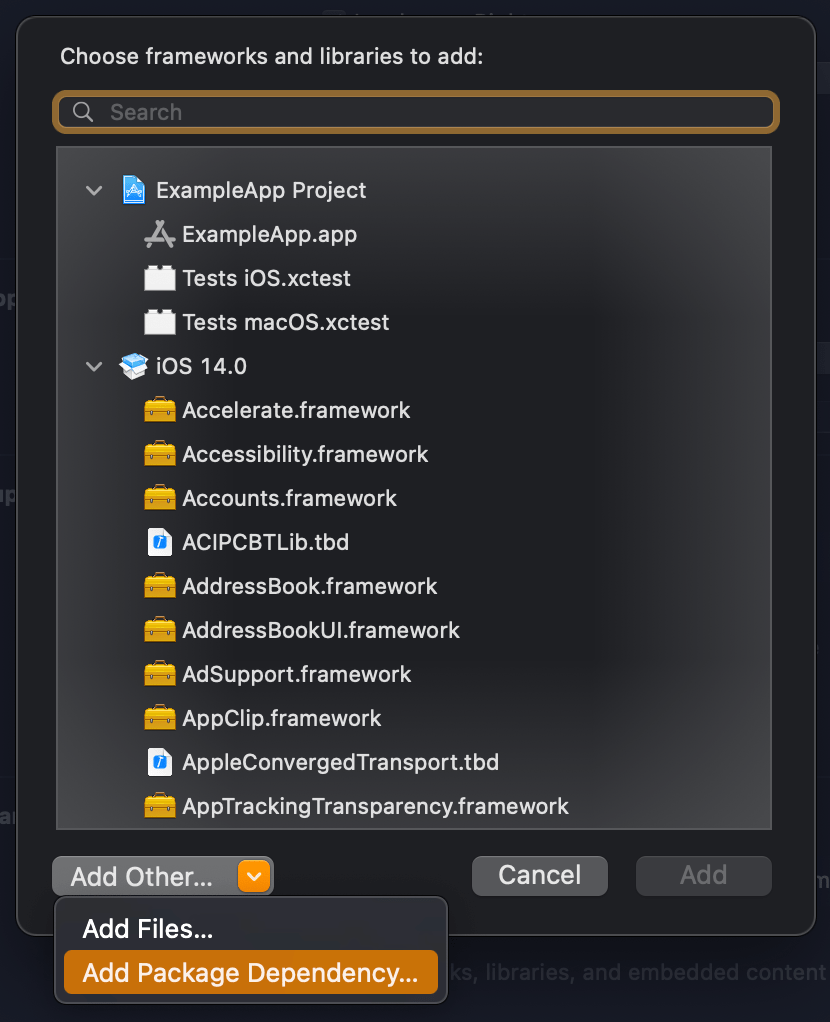
We published our package on GitHub and it requires only a few steps for adding it to an existing project. In an existing project, open the target settings and click on the plus button in the “Frameworks, Libraries, and Embedded Content”. In the opened view, click on the “Add Other” and select “Add Package Dependency”. Then we can paste the package’s GitHub url (https://github.com/laevandus/ColorContrastRatio) to the search field and complete the flow. From then on, it is just a matter of importing the new package and using it in the main project. Described steps are shown below:
Selecting the target where to the package is added.Selecting “Add Package Dependency” which allows adding Swift package.Searching for the Swift package by url.Setting the package update rule.Choosing products from the package.Finished example application using the Swift package’s color contrast ratio function.
This file contains hidden or bidirectional Unicode text that may be interpreted or compiled differently than what appears below. To review, open the file in an editor that reveals hidden Unicode characters.
Learn more about bidirectional Unicode characters
We created a Swift package and a repository on GitHub. Then we proceed with making the first release by adding a git tag. After that, we went ahead and added the package to another example project.
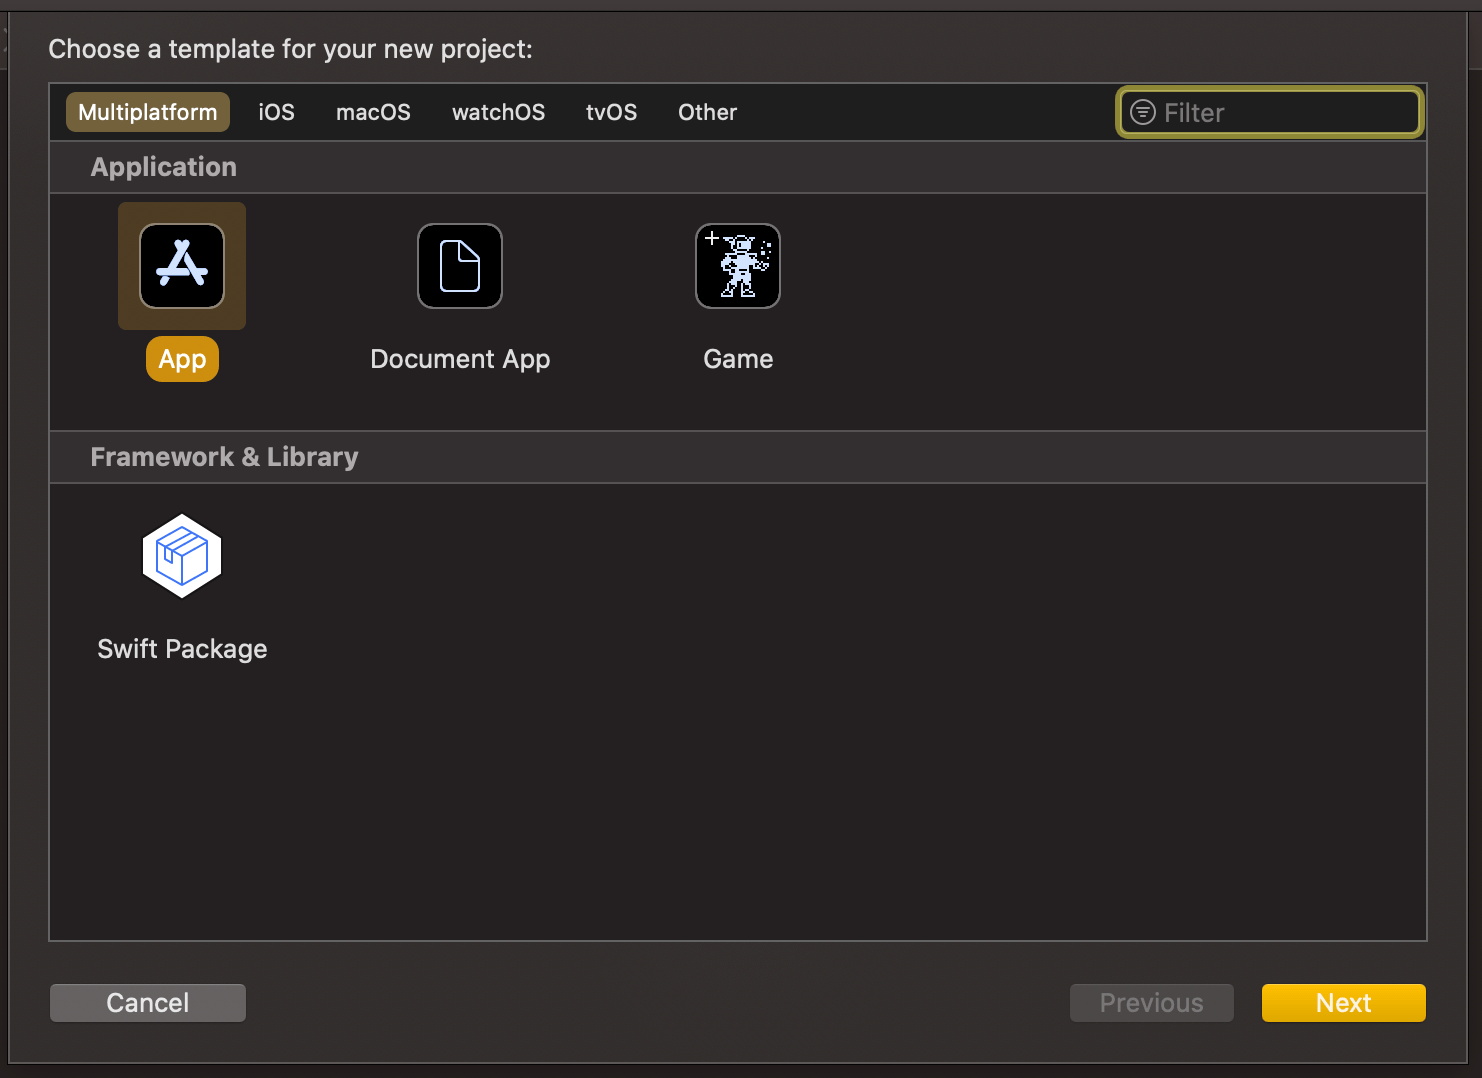
Xcode 12 comes with Swift toolchain 5.3 which brings resource and localisation support to Swift packages. Nice thing is that Swift package support only depends on the toolchain’s version and does not have additional OS requirements. At the same time, let’s keep in mind that OS requirements come from the code we actually add to the package. This means that it is a good time to start using Swift packages for separating code into separate libraries and stop using separate framework projects in a workspace. Additional benefit is that, if needed, it is pretty easy to move the package out of the workspace and creating a sharable package what can be publish and reused in other projects. But for now, let’s take a look on how to set up a new workspace with an app project and a Swift package which represents a design library with custom button style.
File structure of the workspace
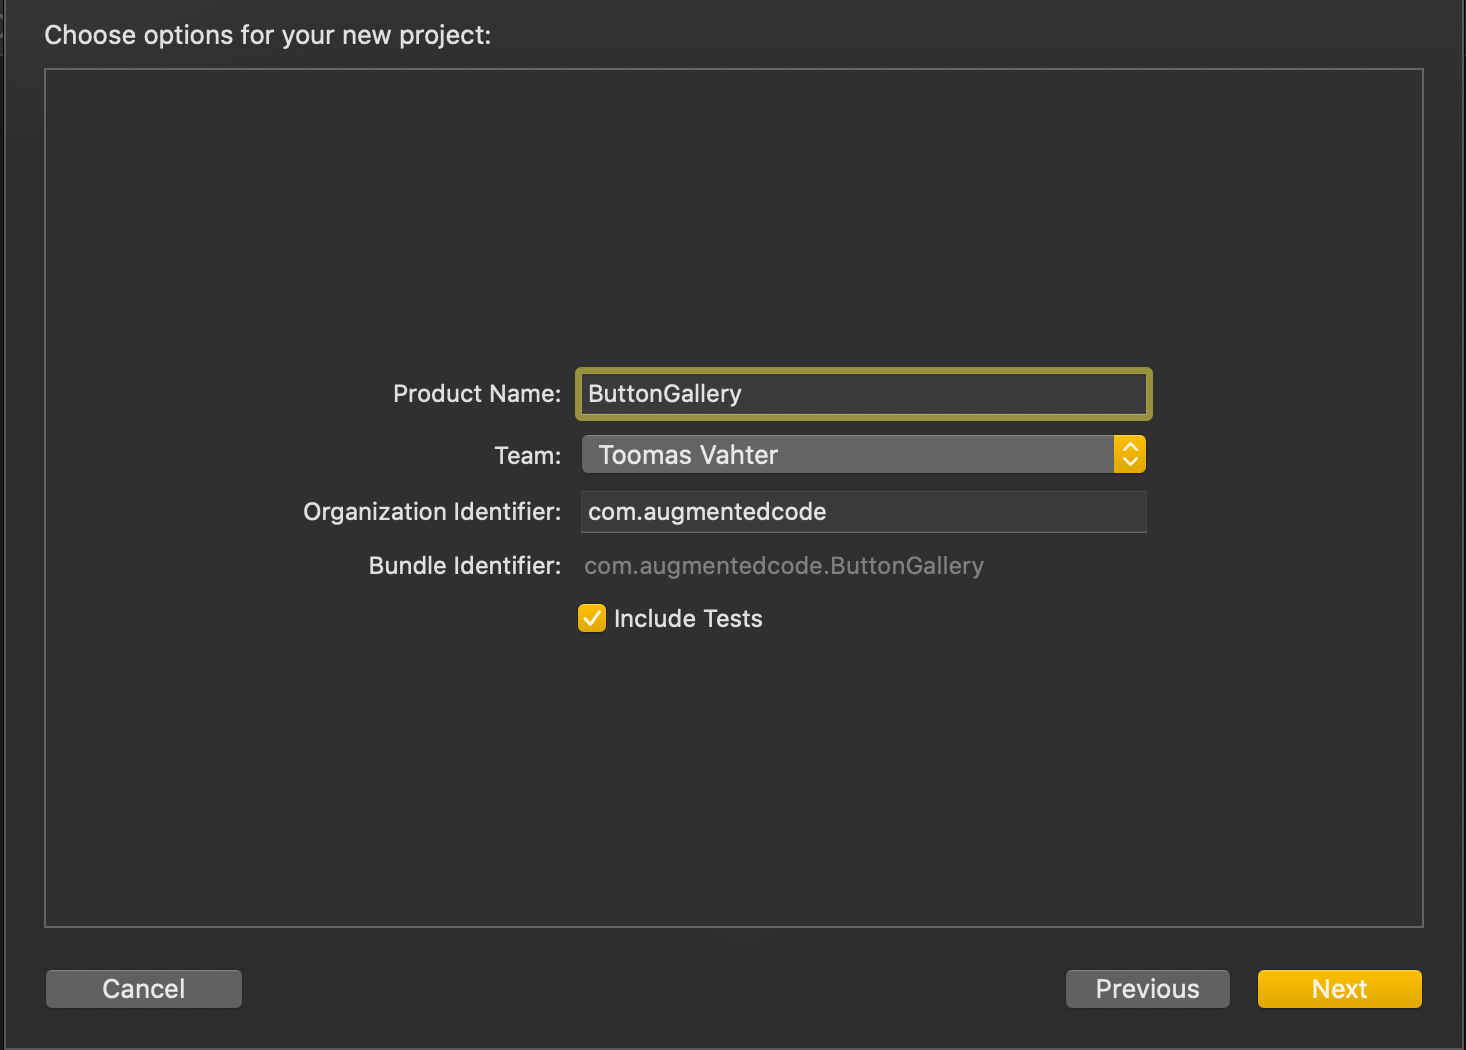
The app project will have a name “ButtonGallery” and the Swift package will have a name “ButtonKit”. But first, let’s create a folder named “SwiftPackageAppWorkspace” which is the root folder of the project. The app project and the Swift package will go to that folder in separate folders.
Adding the workspace, the app project, and the Swift package
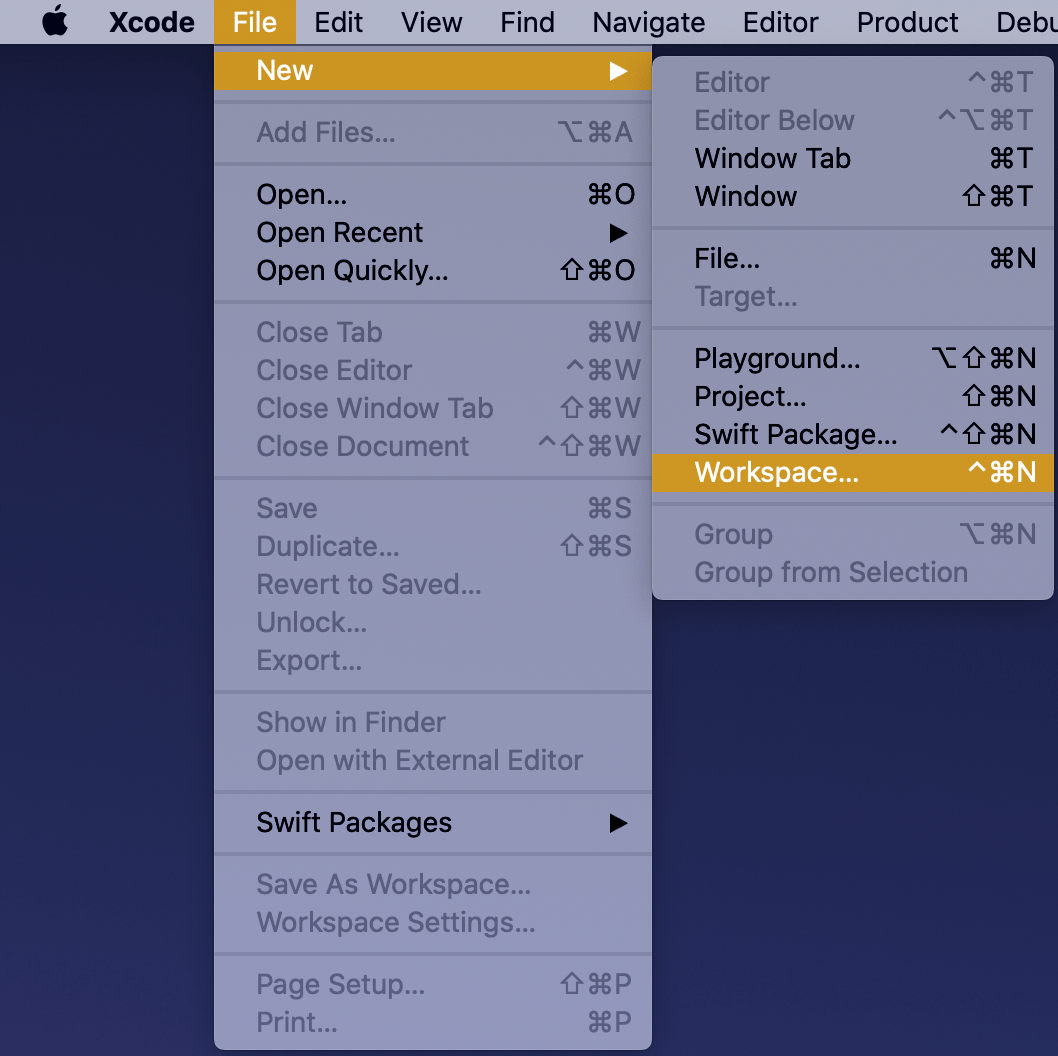
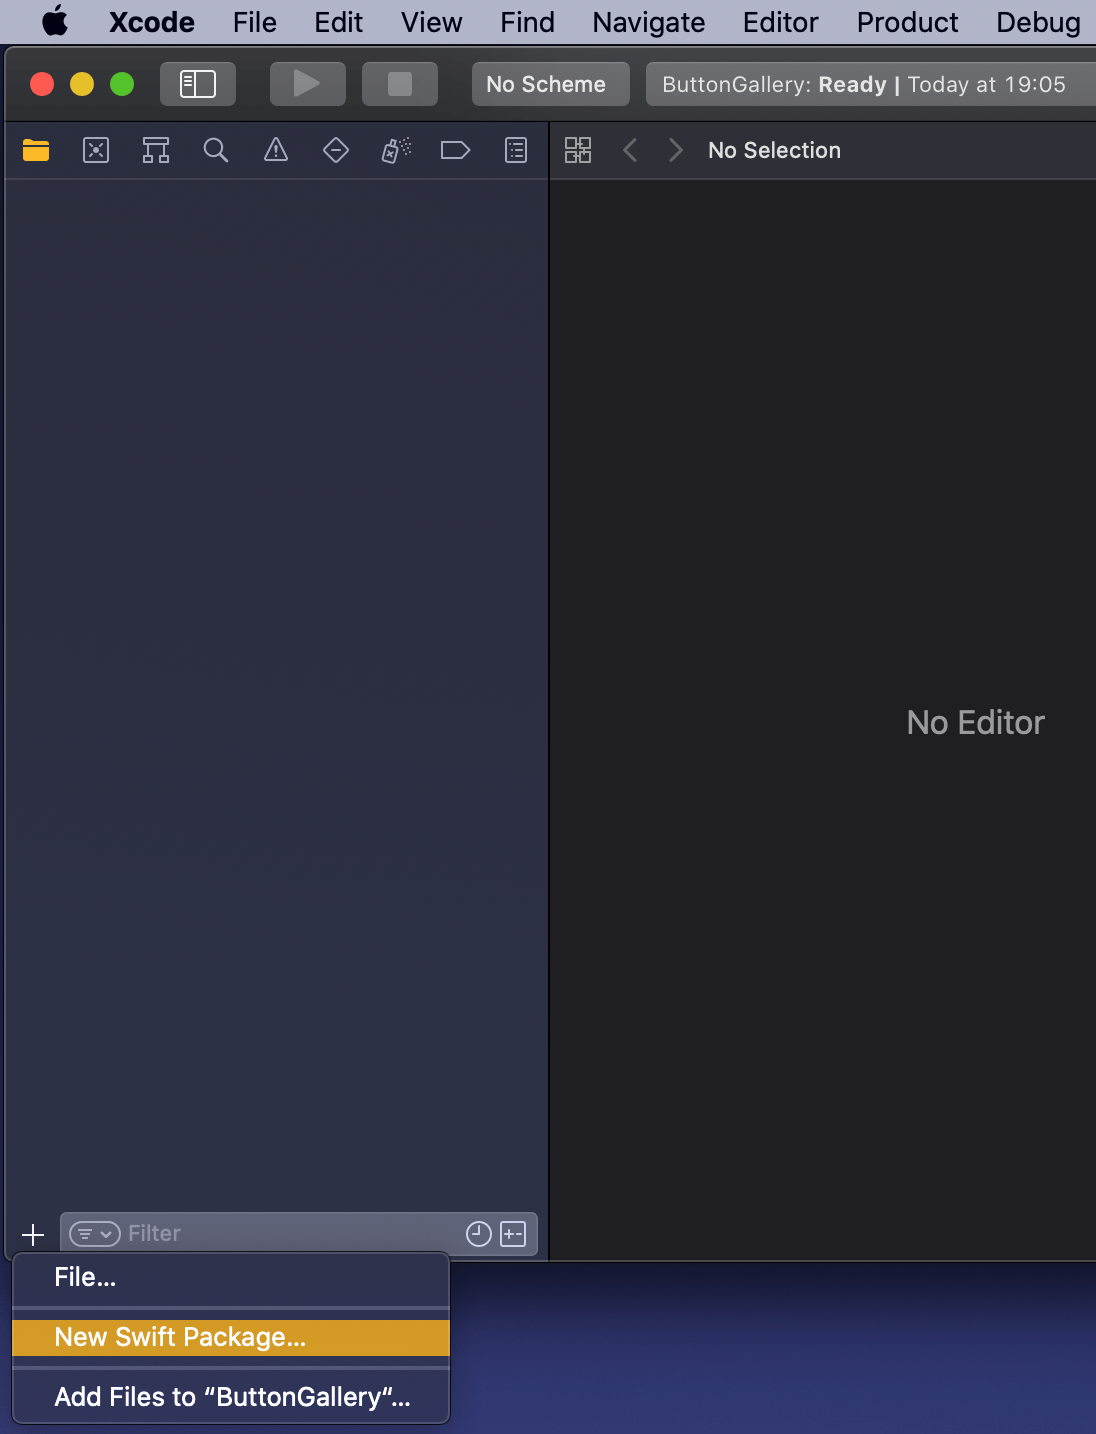
New workspace can be created by selecting the Workspace menu item in File>New menu in the Xcode. Save the workspace in the “SwiftPackageAppWorkspace” folder what we created just before. Xcode opens the created workspace after clicking on save and then the next step is to add a new Swift package. Easiest is to use the plus button at the bottom of the left corner, selecting “New Swift Package”, and saving the package in the “SwiftPackageAppWorkspace” folder. Uncheck the option on the save panel for creating a git repository because the git repository should be added in the “SwiftPackageAppWorkspace” instead (we skipped this step). Third step is to add the app project by using File>New menu. Xcode also offers an option to add the new project to the workspace. Therefore make sure “Add to” and “Group” have the workspace selected on the save panel. Described steps are shown below.
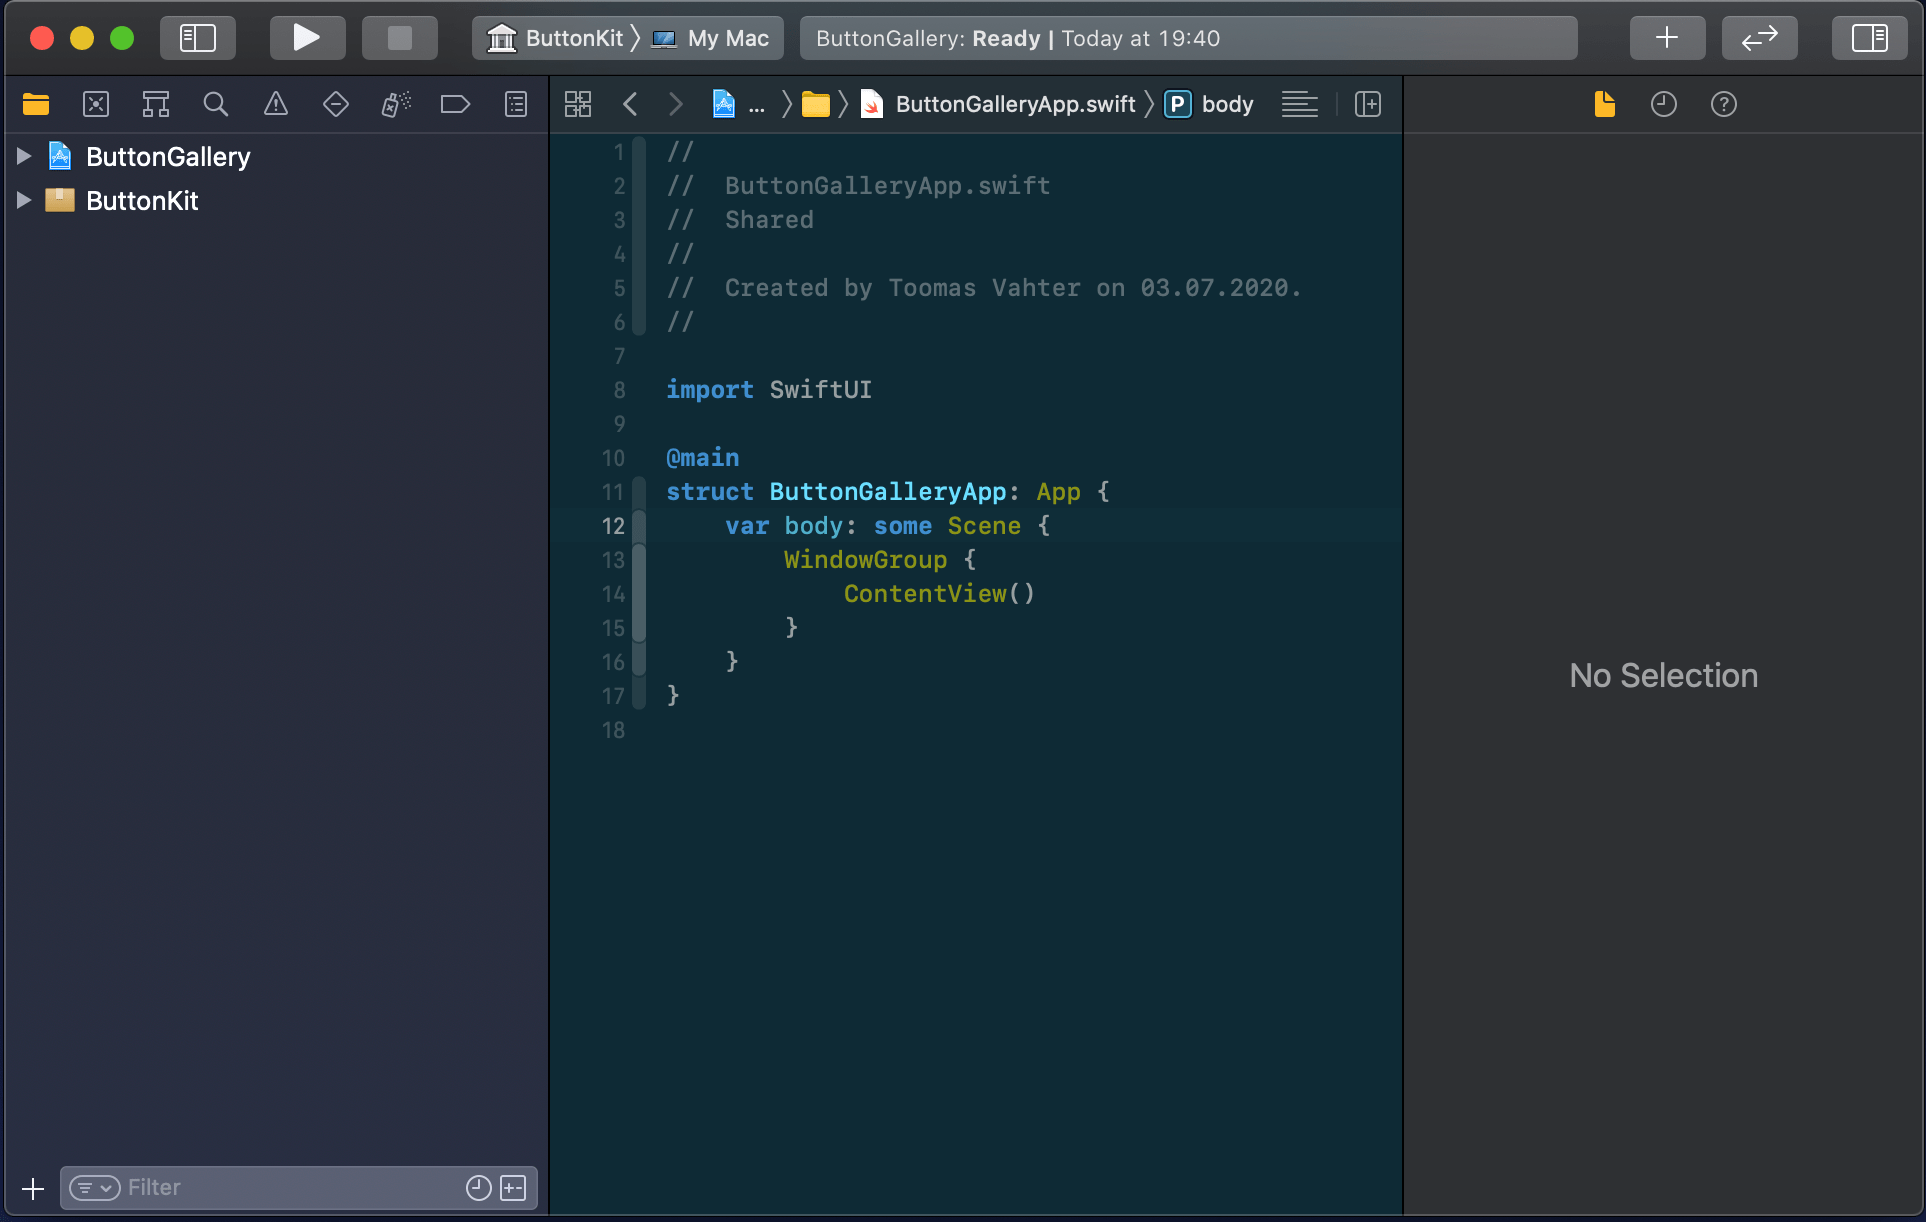
Selecting a new workspace in the main menu.Using the plus button in the workspace for creating a new package.Saving Swift package in the root folder.Adding a new Xcode project.Selecting template for the project.Adding a name to the app project.Saving a new app project and adding to an existing workspace.Workspace with a Swift package and an app project.
Linking the Swift package in the app project
Swift package needs to be added to the app target: select “ButtonGallery” in the project navigator, click on the iOS target, General, and then on the plus button in the “Frameworks, Libraries, and Embedded Content” section, select the “ButtonKit” library.
Navigating to iOS target’s general settings.Linking with the ButtonKit.
Now the workspace is configured but there is not any useful code in the “ButtonKit”. Let’s fix that next and add a FunkyButtonStyle.swift to the package and set minimum platforms in the package manifest because we’ll use SwiftUI in the implementation and it has minimum platform requirements. Because FunkyButtonStyle is in a separate module and by default access control is set to internal, then we’ll need to make it public before it can be imported to the app target.
This file contains hidden or bidirectional Unicode text that may be interpreted or compiled differently than what appears below. To review, open the file in an editor that reveals hidden Unicode characters.
Learn more about bidirectional Unicode characters
This file contains hidden or bidirectional Unicode text that may be interpreted or compiled differently than what appears below. To review, open the file in an editor that reveals hidden Unicode characters.
Learn more about bidirectional Unicode characters
This file contains hidden or bidirectional Unicode text that may be interpreted or compiled differently than what appears below. To review, open the file in an editor that reveals hidden Unicode characters.
Learn more about bidirectional Unicode characters
ContentView in the app target which imports ButtonKit and uses its FunkyButtonStyle.
Summary
We created a new workspace what contains a Swift package and an app project. We looked into how to provide functionality in the package and making it available for the main app target.
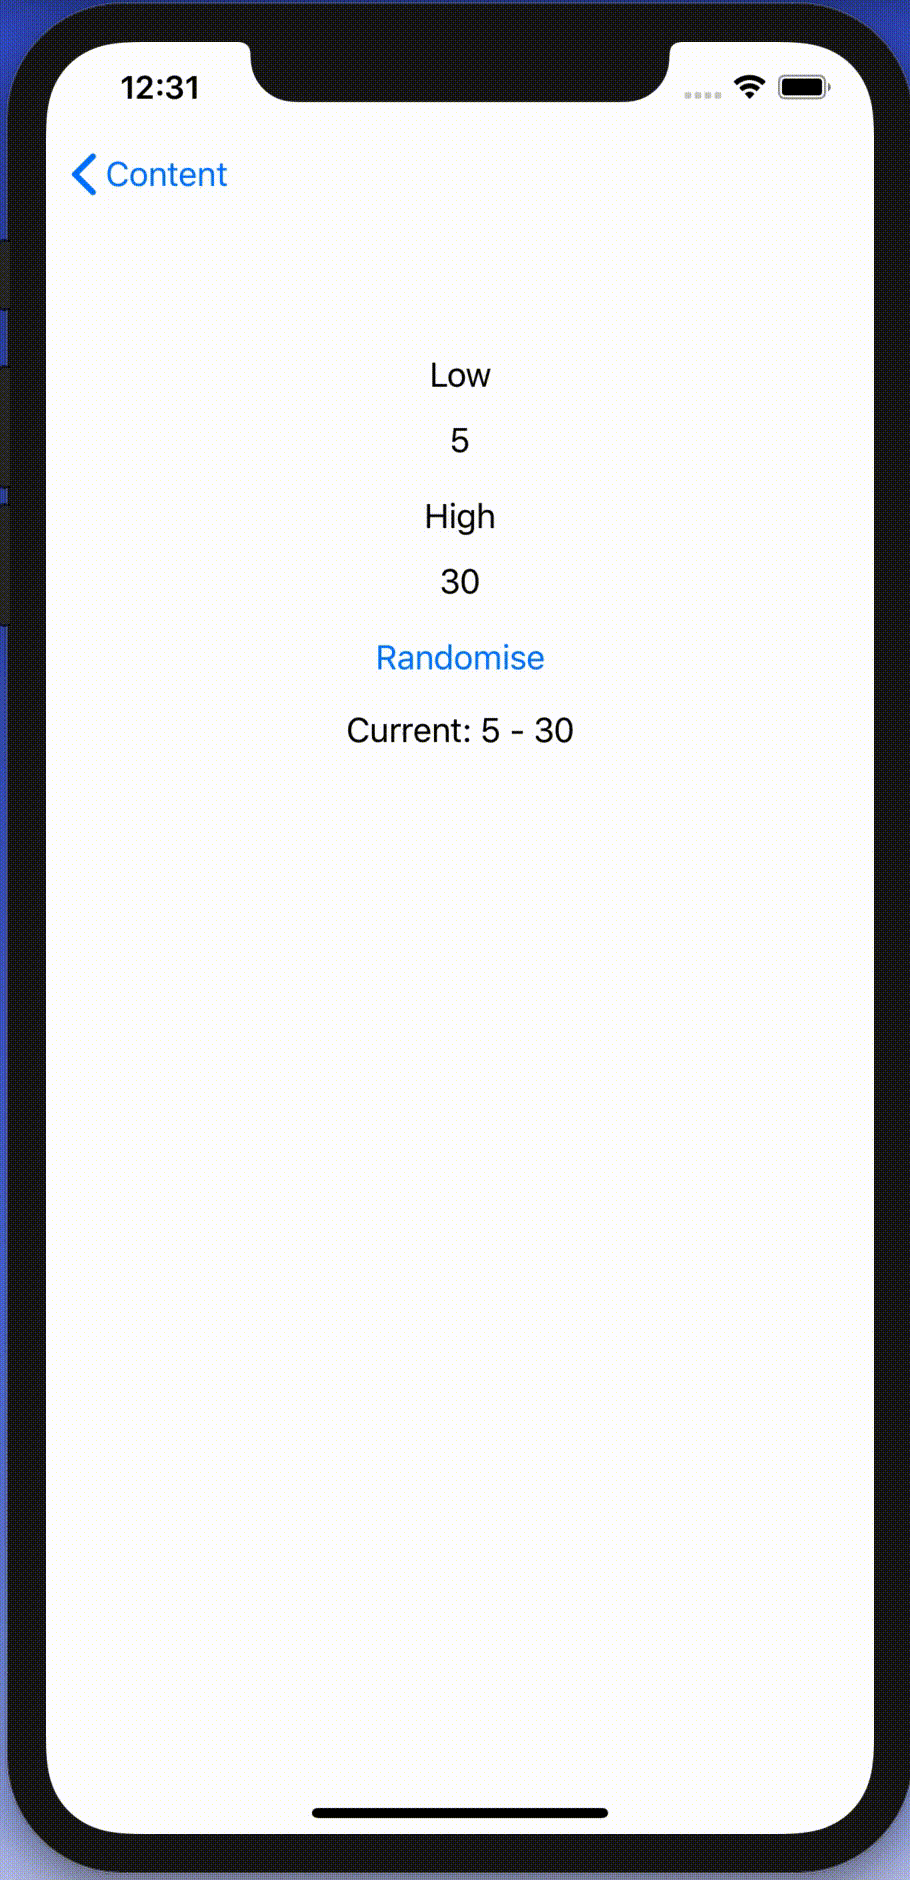
I was looking into creating a view which has TextField with NumberFormatter. Typed text would show up in a separate label and when trying to enter non-numbers, the TextField would reject those characters. Although TextField component in SwiftUI has generic initialiser init(_:value:formatter:onEditingChanged:onCommit:) it does not seem to do what we need. Value binding does not update while typing, non-number characters are not discarded, and string is not reloaded when view reloads with different model data. Therefore, I decided to create a wrapper around TextField which deals with transforming numbers to strings and implements all the before mentioned features.
End result after creating a custom NumberTextField.
Content view with temperature limits
Example use-case is basic view for editing temperature limits where model type will force high value to be at least 10 units higher compared to low value. The model type also have separate properties for getting NSNumber instances what we use later (such conversion could also happen on SwiftUI level).
This file contains hidden or bidirectional Unicode text that may be interpreted or compiled differently than what appears below. To review, open the file in an editor that reveals hidden Unicode characters.
Learn more about bidirectional Unicode characters
Model type storing temperature limits which are forced to have 10 unit difference.
Content view has text fields, button for randomising limits and label for displaying current values. NumberTextField is a custom view which implements all the features what we listed in the beginning of the post.
This file contains hidden or bidirectional Unicode text that may be interpreted or compiled differently than what appears below. To review, open the file in an editor that reveals hidden Unicode characters.
Learn more about bidirectional Unicode characters
View with custom NumberTextFields bound to temperature limits.
Creating NumberTextField with NSNumber binding and NumberFormatter
NumberTextField is a wrapper around TextField and internally handles NSNumber to String and String to NSNumber transformations. Transformations happen inside a separate class called StringTransformer which stores editable string in @Published property. @Published property is first populated with string value by transforming NSNumber to String using the formatter. Changes made by user are captured by subscribing to stringValue publisher (@Published properties provide publishers). String to NSNumber transformation is tried when user edits the string: if successful, NSNumber is send back to model using the value binding, if fails, stringValue is set back to previous value. Note that dropFirst skips initial update when setting up sink and receive operator is used for scheduling updates at later time when SwiftUI has finished current layout update cycle.
This file contains hidden or bidirectional Unicode text that may be interpreted or compiled differently than what appears below. To review, open the file in an editor that reveals hidden Unicode characters.
Learn more about bidirectional Unicode characters
NumberTextField transforming NSNumber to String using NumberFormatter and vice versa.
Summary
TextField’s formatter initialiser does not seem to be operating as expected and therefore we built a custom view. It handles number to string transformations and refreshes the view when string can’t be transformed to number. Hopefully future SwiftUI iterations will fix the init(_:value:formatter:onEditingChanged:onCommit:) initialiser and NumberTextField is not needed at all.
Creating screenshots manually for App Store is time consuming because of the number of devices and localisations. Moreover, as soon as UI changes we would need to update screenshots again. Therefore, it is best to automate the process. One way is to use fastlane and creating nice device framed screenshots with additional localised text. This time we’ll see how to add fastlane to existing project, setting up UI-testing target, scheme for App Store screenshot tests, and framing screenshots with additional text.
End result of a framed screenshot with additional text.
Installing required tools
First step is installing fastlane and as frameit command requires imagemagick, let’s install it now as well. When using homebrew installation goes as: brew install fastlane imagemagick.
Adding UI-testing target
Fastlane uses UI-tests for displaying views and then capturing screenshots. If project does not have UI-testing target set up, then this is the first step. In Xcode, open add target view (File > New > Target), choose UI-Testing Bundle and add it to the project. In our case the testing target’s name is FastlaneAppStoreScreenshotsUITests.
Support files for capturing screenshots
First thing we’ll do with fastlane is running the fastlane snapshot init command in the project folder. It will generate 2 files: Snapfile and SnapshotHelper.swift. First one contains configuration for snapshot command: devices, locales etc. Helper file we’ll move to UI-testing target: first drag it to testing target folder (FastlaneAppStoreScreenshotsUITests) and then to Xcode’s file navigator. Make sure to add it to the UI-testing target. Create subfolder named fastlane and move Snapfile to there. We’ll modify it a little bit later.
Project structure after adding UI-testing target and supporting SnapshotHelper.swift
Adding UI-test case for screenshots
We are going to define tests generating App Store screenshots in a separate XCTestCase. In Xcode, add a new UI-test case class (File > New File > UI-Test Case Class) and name it to AppStoreScreenshotUITests.
Best is when it is possible to record a UI-test which does not need any special configuration: launch the app, tap here and there, take a screeshot. In more complicated apps, we need to use launch arguments and configuring the app when it launches based on the launch arguments. In document based apps it might be needed to bundle example files in the app and then using launch arguments for choosing the file to open when running the test.
Firstly, let’s add 3 UI-tests which will cover 3 different views and calling the function snapshot(“file_name”) which is part of the SnapshotHelper.swift and handles creating screenshots and storing them in the folder specified by Snapfile.
final class AppStoreScreenshotUITests: XCTestCase {
    private var app: XCUIApplication!

    override func setUpWithError() throws {
        continueAfterFailure = false
        app = XCUIApplication()
        // Example of passing in launch arguments which can be read in the app
        // by calling CommandLine.arguments.contains("--uitesting")
        // app.launchArguments.append("--uitesting")
        setupSnapshot(app)
        app.launch()
    }

    override func tearDownWithError() throws {
        app = nil
    }

    func testScreenshot1() throws {
        snapshot("1-mainview")
    }

    func testScreenshot2() throws {
        XCTAssertTrue(app.buttons["Button1"].waitForExistence(timeout: 10))
        app.buttons["Button1"].tap()
        snapshot("2-sheet1")
    }

    func testScreenshot3() throws {
        XCTAssertTrue(app.buttons["Button2"].waitForExistence(timeout: 10))
        app.buttons["Button2"].tap()
        snapshot("3-sheet2")
    }
}
Separate scheme for App Store screenshots
UI-tests are set up for App Store screenshots, next is to add a separate scheme and adding those tests to the Test action. This scheme is the one fastlane is going to use for running tests.
For adding a new scheme, open manage schemes view (Product > Scheme > Manage Schemes). Click on the + button, select the app target and name it to AppStoreScreenshots.
AppStoreScreenshots scheme in Manage Scheme view.
After that, select the scheme and click on the Edit, open Test action and select only App Store tests. Also make sure the Shared checkbox is selected for allowing fastlane to run it.
Selecting tests in Test action for AppStoreScreenshots schemes.
Configuring Snapfile
Snapfile contains configuration for the snapshot command. There we define all the devices, locales, scheme name, location where to store generated screenshots etc. For getting started, we can start with one locale and two devices. We also need to select the scheme we added before.
App Store screen generation contains of two main steps: capturing screenshots and framing those. Fastfile allows us to create custom commands, lanes, and it is useful of adding one for app store screenshots. Create a file named Fastfile and add it to previously created Fastlane folder.
default_platform(:ios)

platform :ios do
  desc 'Generate App Store screenshots'
  lane :app_store_screenshots do
    capture_screenshots(
      clean: true
    )
    frame_screenshots
  end
end
Running fastlane app_store_screenshots will then generate screenshots and create framed versions as well. If you run it now, you’ll get screenshots with and without device frames.
Adding titles and keyword to framed screenshots
Now we have nice framed screenshots, only what is missing is adding some text to all the screenshots. If we ran fastlane app_store_screenshots in the previous step we can see that AppStoreScreenshots folder has appeared and taken screenshots are in the en-US folder. Adding text and background to each of the screenshot requires a couple of steps.
First we’ll create Framefile.json file in the AppStoreScreenshots folder which contains of configuration for frameit.
Default dictionary contains shared settings for every frame operation. We can customise by adding data array which contains screenshot specific configuration (more). Filter in data dictionaries are used for matching the configuration to screenshot files (filenames used in UI-tests). In this example we have different backgrounds for every screenshot (background files are in the same AppStoreScreenshots folder). Fonts are configured by adding a path to Framefile.json and storing fonts in a subfolder.
Localised titles and keywords are handled with strings files. We’ll need to add title.strings and keyword.strings to the locale folder, in our case, en-US. Keys in strings files work the same way as filters in Framefile.json, therefore partial match with filename works. Example strings file for title.strings is shown here:
I suggest creating strings files with Xcode making sure the file encoding is correct. If we run the fastlane app_store_screenshots command again, we’ll get nice framed screenshots with additional text.
Summary
Automating App Store screenshots with fastlane is not difficult to set up. The most difficult part in this process is writing UI-tests and providing proper data in the app which is highly app specific.
Everything can’t go exactly as planned and therefore, at some point, there is a need for presenting localized error messages to the user. Let’s take a look at how to add custom error type what provides error description, failure reason and recovery suggestion and presenting it in SwiftUI view.
Adding custom error type
Custom error type is needed when we want to propagate errors using Swift’s error handling mechanism. Custom error types need to, at minimum, conform to Error protocol which defines localizedDescription property. If we would like to provide more information to users, including recovery suggestions, then we need to use LocalizedError instead. LocalizedError inherits from Error and defines additional properties which are intended for describing the error further. Note that LocalizedError is very similar to NSError: errorDescription, failureReason, recoverySuggestion, helpAnchor are all represented by NSError.UserInfoKey.
In the example app we’ll use LoginError currently definiing only one error: incorrectPassword.
enum LoginError: LocalizedError {
    case incorrectPassword // invalidUserName etc

    var errorDescription: String? {
        switch self {
        case .incorrectPassword:
            return "Failed logging in account"
        }
    }

    var failureReason: String? {
        switch self {
        case .incorrectPassword:
            return "Entered password was incorrect"
        }
    }

    var recoverySuggestion: String? {
        switch self {
        case .incorrectPassword:
            return "Please try again with different password"
        }
    }
}
Presenting error in SwiftUI
Custom error defined, the next step is to present the error using SwiftUI’s alert view modifier: alert(isPresented:content:). Alert view modifier requires boolean binding and Alert container defining title, optional message, and buttons. In the example below, error is handled by the view model and Alert itself is created using convenience initializer which we’ll look at a bit later. Convenience initializer makes the view implementation more readable and reduces code duplication.
Alert view modifier requires a boolean binding controlling if the alert is visible or not. When alert is dismissed, SwiftUI automatically calls the binding with false, indicating that the alert should not be visible anymore. Note that force unwrap is safe here because view model makes sure isPresentingAlert never returns true when underlying error is nil.
final class ContentViewModel: ObservableObject {
    @Published private(set) var activeError: LocalizedError?

    var isPresentingAlert: Binding<Bool> {
        return Binding<Bool>(get: {
            return self.activeError != nil
        }, set: { newValue in
            guard !newValue else { return }
            self.activeError = nil
        })
    }

    func showAlertView() {
        activeError = LoginError.incorrectPassword
    }
}
Boolean binding is created manually and implemented in such way that when activeError is set, isPresentingAlert returns true. When alert is dismissed, set will clear the current active error. This approach makes it simple to handle any errors conforming to LocalizedError in the view model. Like mentioned before, LocalizedError enables us to add detailed information about the alert and we can use that when creating the Alert. Let’s take a look on it next.
Alert’s extension has initializers both for LocalizedError and NSError. NSError is used a lot in Objective-C frameworks so there is high probability that we need to present NSError in the future as well. Here, we can use Swift language’s built-in support of converting Swift error type to NSError and therefore we can implement convenience method only once for NSError. LocalizedError can be bridged to NSError and Swift compiler takes care of keeping the information about the error. In this implementation, I decided to include both the failureReason and recoverySuggestion when creating the message for Alert. This enables custom error types to choose how much information they provide (choosing which properties return text). Moreover, it is better to show as much information about the error as possible.
LoginError.incorrectPassword presented by Alert in SwiftUI
Summary
We created a custom error type and used LocalizedError instead of Error for making it suitable for displaying as an alert. We looked into how to use alert view modifier and MVVM together and introduced design pattern for easy alert presentation. If you need action sheet, then follow similar steps but use actionSheet view modifier with ActionSheet container.
CoreData is Apple’s object graph and persistence framework. It provides data sources for synchronising data with view. Let’s take a look on how to use those data sources in SwiftUI views. Starting with NSFetchedResultsController what is used for list and collection views, after that observing NSManagedObject directly from SwiftUI view and lastly subscribing to managed object context notifications.
NSFetchedResultsController
NSFetchedResultsController is used for providing data in table and collection views. It supports sorting and filtering data and arranging data into sections. We can use delegate for getting change callbacks. NSFetchedResultsControllerDelegate contains several methods:
This file contains hidden or bidirectional Unicode text that may be interpreted or compiled differently than what appears below. To review, open the file in an editor that reveals hidden Unicode characters.
Learn more about bidirectional Unicode characters
In SwiftUI we are not going to directly manipulate views. Only what we need to do is letting SwiftUI view know that data is about to change. Let’s take a look on simple app with list of items stored by CoreData. Data is represented by ColorItem where only stored value is hex string of the color (e.g. #AA22BB).
This file contains hidden or bidirectional Unicode text that may be interpreted or compiled differently than what appears below. To review, open the file in an editor that reveals hidden Unicode characters.
Learn more about bidirectional Unicode characters
ColorItems are managed by ContentView’s view model. View model creates NSFetchedResultsController, performs fetch and provides array of fetched ColorItems to the SwiftUI’s List. In addition, view model is delegate of the NSFetchedResultsController (requires view model to be NSObject subclass). As view model is ObservableObject, we can very easily let SwiftUI view know that it should refresh. We need to do two things: firstly, implementing controllerWillChangeContent delegate method and calling send() on objectWillChange publisher. Secondly, view model property must use @ObservedObject property wrapper in SwiftUI view. Result is that SwiftUI view subscribes to objectWillChange publisher and refreshes whenever publisher emits an event.
This file contains hidden or bidirectional Unicode text that may be interpreted or compiled differently than what appears below. To review, open the file in an editor that reveals hidden Unicode characters.
Learn more about bidirectional Unicode characters
And finally let’s see the ContentView implementation. NSManagedObject has objectID property what we can use in List for identifying every ColorItem. Cell is custom view what we’ll take a look at next.
This file contains hidden or bidirectional Unicode text that may be interpreted or compiled differently than what appears below. To review, open the file in an editor that reveals hidden Unicode characters.
Learn more about bidirectional Unicode characters
NSManagedObject implements ObservableObject protocol and therefore it is possible to use it together with @ObservedObject property wrapper and getting SwiftUI view refreshed automatically when any of the ColorItem properties change. NSFetchedResultsController required a little bit of code for setting up delegate but that is not the case with NSManagedObject.
This file contains hidden or bidirectional Unicode text that may be interpreted or compiled differently than what appears below. To review, open the file in an editor that reveals hidden Unicode characters.
Learn more about bidirectional Unicode characters
In addition, if there are cases where we would like to observe specific property, then Combine provides publisher for key path. Because NSManagedObject supports key-value observing we can use the publisher and subscribe to individual property changes.
This file contains hidden or bidirectional Unicode text that may be interpreted or compiled differently than what appears below. To review, open the file in an editor that reveals hidden Unicode characters.
Learn more about bidirectional Unicode characters
When we need to observe changes in persistent store we can observe notifications sent by the framework. As NotificationCenter supports publishers, we can subscribe to it, unpack data from notification and do something with the data. For making this easier we can introduce a separate type. It will unpack the user info dictionary and filter by type. This allows to easily observe, for example, ColorItem insertions. Or, if we would like to receive every possible change, we can specify NSManagedObject as the generic type.
This file contains hidden or bidirectional Unicode text that may be interpreted or compiled differently than what appears below. To review, open the file in an editor that reveals hidden Unicode characters.
Learn more about bidirectional Unicode characters
We took a look at how to use NSFetchedResultsController and NSManagedObject in SwiftUI views. We saw that integrating NSFetchedResultsController requires only a little bit of code and using NSManagedObject even less. In addition, we looked at subscribing to CoreData notifications and unpacking notification payload.