One of the really common layouts I have needed to implement with collection view is a simple flow layout but with fixed spacings. Apple provides us UICollectionViewFlowLayout, but the sad part is that it has dynamic spacing between items. Everything is there but not quite. Before UICollectionViewCompositionalLayout, one needs to create a subclass of the flow layout and then fixing spacings manually, which is pretty cumbersome to do. Therefore, let’s instead see what it takes to implement a simple self-sizing flow layout with fixed spacings when using UICollectionViewCompositionalLayout. The end goal is visible below, where we have a single section with 7 items.
Flow layout with fixed spacings.
UICollectionViewCompositionalLayout was created to be a flexible layout which allows building all sorts of layouts quickly. Data in that layout is divided into sections, where each section can have one or more groups of items. Grouping allows creating more complex layouts, where each group describes how items in the group are laid out in relation to each other. But in our case we have something really simple in mind, which is having self-sizing items which we can configure with NSCollectionLayoutSize and passing estimated dimensions. Then the next step is creating NSCollectionLayoutItem with that layout size and with some space around the item. The edge spacing with fixed edges gives us the wanted fixed spacing between items. After that, we’ll create NSCollectionLayoutGroup with horizontal layout direction and with a layout size which takes max width, but height is fitted based on item sizes. Creating layouts like this is so much better compared to subclassing UICollectionViewLayout and then calculating frames one by one. Down below is the configured layout object, which has fixed spacing and items are self-sizing.
This file contains hidden or bidirectional Unicode text that may be interpreted or compiled differently than what appears below. To review, open the file in an editor that reveals hidden Unicode characters.
Learn more about bidirectional Unicode characters
I have numerous times needed to show some sort of collection view which adjusts its height based on the content. Most of the time it has been a dynamic list within some more complex scrollable UI. Therefore, in this post, we’ll take a look at how to set up a collection view which has its height set to the content height. On the screenshot below, we have a collection view with light grey background and two sections.
Collection view with height fitting size.
The approach for making this working is pretty simple, which involves adding a height constraint with the constant value set to collection view content height. Content height can be retrieved from the layout object. The constraint’s constant value can be updated in viewWillLayoutSubviews.
This file contains hidden or bidirectional Unicode text that may be interpreted or compiled differently than what appears below. To review, open the file in an editor that reveals hidden Unicode characters.
Learn more about bidirectional Unicode characters
WWDC’21 brought new APIs for creating attributed strings. AttributedString is a new value type which provides a type-safe API for dealing with attributes, its also localizable, supports limited amount of Markdown syntax, and can be even archived and unarchived thanks to the Codable support. In this blog post, we’ll take a look at the new API and will compose some attributed strings.
An AttributedString with attributes applied to multiple ranges.
The attributed string visible above contains multiple attributes starting with background color attribute and finishing with a link attribute. In the snippet below we can find different ways how to set attributes: searching for a range, manually creating a range, using AttributedContainer for setting multiple attributes at once, and also setting attributes to the whole string. As this string is displayed in a SwiftUI view then all the used attributes are part of the SwiftUI attribute scope.
This file contains hidden or bidirectional Unicode text that may be interpreted or compiled differently than what appears below. To review, open the file in an editor that reveals hidden Unicode characters.
Learn more about bidirectional Unicode characters
If we would like to see the ranges attributes were set to, we can use the runs API. A single run is a set of attributes shared by a single range. If we print all the runs, in this case 9, then it would look like this:
The {
	NSLanguage = en
	NSPresentationIntent = [paragraph (id 1)]
	SwiftUI.Font = Font(provider: SwiftUI.(unknown context at $7fff5bb7d400).FontBox<SwiftUI.Font.(unknown context at $7fff5bbfdb68).SystemProvider>)
	SwiftUI.BackgroundColor = indigo
}
 quick  {
	SwiftUI.Font = Font(provider: SwiftUI.(unknown context at $7fff5bb7d400).FontBox<SwiftUI.Font.(unknown context at $7fff5bbfdb68).SystemProvider>)
	NSLanguage = en
	NSPresentationIntent = [paragraph (id 1)]
}
brown {
	NSPresentationIntent = [paragraph (id 1)]
	NSLanguage = en
	SwiftUI.Font = Font(provider: SwiftUI.(unknown context at $7fff5bb7d400).FontBox<SwiftUI.Font.(unknown context at $7fff5bbfdb68).SystemProvider>)
	SwiftUI.ForegroundColor = brown
}
 fox  {
	SwiftUI.Font = Font(provider: SwiftUI.(unknown context at $7fff5bb7d400).FontBox<SwiftUI.Font.(unknown context at $7fff5bbfdb68).SystemProvider>)
	NSLanguage = en
	NSPresentationIntent = [paragraph (id 1)]
}
jumps {
	SwiftUI.UnderlineColor = cyan
	NSLanguage = en
	SwiftUI.Kern = 5.0
	SwiftUI.BaselineOffset = 4.0
	SwiftUI.Font = Font(provider: SwiftUI.(unknown context at $7fff5bb7d400).FontBox<SwiftUI.Font.(unknown context at $7fff5bbfdb68).SystemProvider>)
	NSPresentationIntent = [paragraph (id 1)]
	NSUnderline = NSUnderlineStyle(rawValue: 256)
}
 over the  {
	SwiftUI.Font = Font(provider: SwiftUI.(unknown context at $7fff5bb7d400).FontBox<SwiftUI.Font.(unknown context at $7fff5bbfdb68).SystemProvider>)
	NSLanguage = en
	NSPresentationIntent = [paragraph (id 1)]
}
lazy {
	SwiftUI.StrikethroughColor = yellow
	SwiftUI.Font = Font(provider: SwiftUI.(unknown context at $7fff5bb7d400).FontBox<SwiftUI.Font.(unknown context at $7fff5bbfdb68).SystemProvider>)
	NSLanguage = en
	NSPresentationIntent = [paragraph (id 1)]
	NSStrikethrough = NSUnderlineStyle(rawValue: 1)
}
  {
	SwiftUI.Font = Font(provider: SwiftUI.(unknown context at $7fff5bb7d400).FontBox<SwiftUI.Font.(unknown context at $7fff5bbfdb68).SystemProvider>)
	NSLanguage = en
	NSPresentationIntent = [paragraph (id 1)]
}
dog {
	NSLink = https://www.apple.com
	SwiftUI.Font = Font(provider: SwiftUI.(unknown context at $7fff5bb7d400).FontBox<SwiftUI.Font.(unknown context at $7fff5bbfdb68).SystemProvider>)
	NSLanguage = en
	NSPresentationIntent = [paragraph (id 1)]
}
The new AttributedString API also supports custom attributes. Custom attributes need to conform to a AttributeStringKey protocol in bare minimum. But when we would like to benefit from using the custom attribute in Markdown and also allowing to decode and encode it to data with Codable then we would need to conform to MarkdownDecodableAttributedStringKey and CodableAttributedStringKey respectively. In a simple example, let’s create a new attribute named MessageAttribute which can store a value of Message struct with id and value fields. The MessageAttribute needs to define the type it stores and a name used when encoding and decoding. In addition, we’ll need to add a new attribute scope which contains the new attribute. As we intend to use the new attribute in a SwiftUI app then we’ll add swiftUI attributes to the scope as well.
This file contains hidden or bidirectional Unicode text that may be interpreted or compiled differently than what appears below. To review, open the file in an editor that reveals hidden Unicode characters.
Learn more about bidirectional Unicode characters
With this set we can create attributed strings with this attribute either using markdown syntax or adding the attribute manually. Markdown syntax for custom attributes uses caret followed with square brackets and with the content in brackets after that. We also need to make sure to pass custom attribute scope into the AttributedString initializer as well. One thing what I have not figured out is how to create a completely custom appearance for custom attributes in SwiftUI views, like we can do in UIKit views.
This file contains hidden or bidirectional Unicode text that may be interpreted or compiled differently than what appears below. To review, open the file in an editor that reveals hidden Unicode characters.
Learn more about bidirectional Unicode characters
This file contains hidden or bidirectional Unicode text that may be interpreted or compiled differently than what appears below. To review, open the file in an editor that reveals hidden Unicode characters.
Learn more about bidirectional Unicode characters
We took a look on AttributedString, AttributeContainer, AttributeScope, and created attributed strings with the new API. With this knowledge, we got going with the new API and can continue exploring it further. The last thing to mention is that AttributedString can be converted to and from NSAttributedString with breeze.
Apple’s swift-collections package contains data structure implementations which have more specific use-cases and therefore not fitting into the Foundation. Along with collections Swift package Apple also released swift-collections-benchmark package which implements benchmarking. As like with any other Swift package we can use the benchmarking package for our own purposes as well. Therefore, in this blog post let’s take a look on how to use the benchmarking package.
Step one is to create a new Swift package with executable target which will be used to run benchmarks. In Xcode’s File menu we can select New > Swift Package. In the created package we will want to do some changes in the Package.swift file. We’ll need to add swift-collections-benchmark dependency and change the package type to executable instead of library.
This file contains hidden or bidirectional Unicode text that may be interpreted or compiled differently than what appears below. To review, open the file in an editor that reveals hidden Unicode characters.
Learn more about bidirectional Unicode characters
Package.swift file after changing the default library template to executable.
Secondly, we need to add main.swift file to the package or use the @main keyword. In this example I went for main.swift. When that is set as well, we can start using the benchmarking package and writing benchmarks for collections. For trying out the benchmarking I am going to use raywenderlicht/swift-algorithms-club’s queue implementations. It provides two examples of queues where one is a thin wrapper around the array type and the other one is an optimized version which looks into improving performance when dequeuing elements from the queue.
Setting up a benchmark requires defining a benchmark object and adding benchmark tasks to it and then calling main() on the benchmark object. Every added task will show up as a separate line on the chart when we render results. The package has some input generators defined and also allows adding more if we need to. Check the registerInputGenerator function on the Benchmark type for more information. But OK, back to benchmarks. The snippet below shows how to define a benchmark for dequeue operation over a variety of input sizes where the max input size is currently limited to 128000.
This file contains hidden or bidirectional Unicode text that may be interpreted or compiled differently than what appears below. To review, open the file in an editor that reveals hidden Unicode characters.
Learn more about bidirectional Unicode characters
When everything is set we can go ahead and run the benchmark. First navigate to the package’s folder and use the swift run command as shown below. When benchmarking finishes we can use the generated file, in this case “results”, to render a chart.
This file contains hidden or bidirectional Unicode text that may be interpreted or compiled differently than what appears below. To review, open the file in an editor that reveals hidden Unicode characters.
Learn more about bidirectional Unicode characters
Swift Foundation contains a lot of useful functions on collection types. In the context of this blog post we are interested in map(_:) and prefix(while:). Map is used for transforming collection elements and prefix(while:) for getting a sequence containing initial elements until the predicate is true. In some cases the predicate used in the prefix(while:) can be expensive, or we just want to combine the information in prefix and map functions. One of such examples is when we use NSRegularExpression. More specifically, let’s take an example of processing a list of strings while the regular expression has matches and then extracting a range from the string. A concrete example could be parsing Fastlane’s Fastfile for visualization purposes.
Fastlane is used a lot in the iOS community for automating development related tasks. Lanes are added to a Fastfile where every individual lane has a name and optionally a description.
This file contains hidden or bidirectional Unicode text that may be interpreted or compiled differently than what appears below. To review, open the file in an editor that reveals hidden Unicode characters.
Learn more about bidirectional Unicode characters
If we would like to extract the lane name and description from the Fastfile then we can use regular expressions. The flow could be something like this: firstly, we can read the Fastfile contents, divide the file into lines and match lines with regular expressions. Second step is finding lines which contain a lane keyword. Then we could loop over preceding lines and collect lines which contain description. All in all, the logic for getting description could look like this:
This file contains hidden or bidirectional Unicode text that may be interpreted or compiled differently than what appears below. To review, open the file in an editor that reveals hidden Unicode characters.
Learn more about bidirectional Unicode characters
Now when we have seen a case where prefixMap can be useful, it is time to look into how it is implemented. The transform passed into the prefixMap function can return nil and the nil value means that the looping should be stopped and all the transformed elements should be returned. And yes, the implementation is pretty straight-forward.
This file contains hidden or bidirectional Unicode text that may be interpreted or compiled differently than what appears below. To review, open the file in an editor that reveals hidden Unicode characters.
Learn more about bidirectional Unicode characters
Foundation types can be extended with new functions easily. Although we could use prefix(while:) first followed with a map(_:) but sometimes we’ll just need to combine functionalities into a single function.
I was looking at formatters provided by Foundation framework and this time I would like to put some attention on MeasurementFormatter. Like the name says, it is used for creating localized strings of some sort of measurements. Measurements are represented by a generic struct Measurement where the generic UnitType describes the unit represented by it. Apple provides an Unit subclass Dimension which in turn has a many subclasses on its own. At the time of writing there are 22 dimensional units available with each of those having multitude of related units. For example, UnitDuration provides units for seconds, minutes, and hours. The full list of Apple provided dimensions are available in a table here: Dimension.
Using MeasurementFormatter
MeasurementFormatter is simple to use. If we change the unitStyle property then we can configure how the unit is spelled in the localized string.
This file contains hidden or bidirectional Unicode text that may be interpreted or compiled differently than what appears below. To review, open the file in an editor that reveals hidden Unicode characters.
Learn more about bidirectional Unicode characters
MeasurementFormatter also has an unitOptions property which controls the way how the final string is composed when taking account the current locale. For example, if locale is set to en_US then UnitTemperature measurement is formatted in Fahrenheits. If locale is set to en_GB then the measurement returns Celsius.
This file contains hidden or bidirectional Unicode text that may be interpreted or compiled differently than what appears below. To review, open the file in an editor that reveals hidden Unicode characters.
Learn more about bidirectional Unicode characters
MeasurementFormatter selecting output unit based on the locale.
In case we would like to make sure the same unit is used, then we can use the providedUnit option.
This file contains hidden or bidirectional Unicode text that may be interpreted or compiled differently than what appears below. To review, open the file in an editor that reveals hidden Unicode characters.
Learn more about bidirectional Unicode characters
Another thing to note is that the Measurement type also supports comparing measurements and mathematical operations. For example, we can add two measurements.
This file contains hidden or bidirectional Unicode text that may be interpreted or compiled differently than what appears below. To review, open the file in an editor that reveals hidden Unicode characters.
Learn more about bidirectional Unicode characters
MeasurementFormatter is built in a way that it can support custom units as well. We could create a pseudo unit for a children’s game named UnitBanana.
This file contains hidden or bidirectional Unicode text that may be interpreted or compiled differently than what appears below. To review, open the file in an editor that reveals hidden Unicode characters.
Learn more about bidirectional Unicode characters
MeasurementFormatter and Measurement types create a powerful combination which can be used for creating localized strings of values with an unit. Next time when you need to present a value with an unit, then check out the MeasurementFormatter first.
Just a couple of weeks ago I wrote about resizing images on iOS: Resizing UIImages with aspect fill on iOS. As I am currently building a macOS, iOS, watchOS app I realized that I need a multiplatform image resizer. As this app deals with full size photos then I need to resize those photos for avoiding excessive memory usage. Apple’s CoreGraphics framework provides APIs what are compatible with all the before mentioned platforms. Therefore, let’s revisit the image scaler created in Resizing UIImages with aspect fill on iOS and let’s refactor it to use purely multiplatform supported CGImages.
We’ll skip the part which discusses calculating a rectangle in the original image which is then resized for assuring the image is resized equally on both axes. It is important because the aspect ratio of the original image most of the time does not equal to the aspect ratio of the target size. Let’s now take a look at cropping and resizing the original image. Cropping is easy to do because CGImage already has a convenient cropping(to:) method. On the other hand, resizing requires setting up a CGContext with the same parameters as the cropped image but the pixel size must be set to the target size. When we now draw the cropped image to the context, then CoreGraphics takes care of resizing the image.
This file contains hidden or bidirectional Unicode text that may be interpreted or compiled differently than what appears below. To review, open the file in an editor that reveals hidden Unicode characters. Learn more about bidirectional Unicode characters
I have created a multiplatform sample app which just has a single SwiftUI view shared with iOS and macOS (it is not a Mac Catalyst app). Because we use CGImages then all the code can be shared. The view just loads a full size photo, scales it, and displays it. In the example view we have resized the image by taking account the current displayScale. Depending on the displayScale value we need to make the pixel size of the CGImage larger by the factor of the displayScale. For example, if the point size is 200×200 points, displayScale is 3.0, then the pixel size of the CGImage needs to be 600×600. This will give us a nice and crisp end result when the image is rendered.
This file contains hidden or bidirectional Unicode text that may be interpreted or compiled differently than what appears below. To review, open the file in an editor that reveals hidden Unicode characters. Learn more about bidirectional Unicode characters
CoreGraphics is available on multiple Apple platforms and it provides tools for cropping and resizing images. With just a little bit of refactoring we have turned UIImage based image scaler into CoreGraphics backed scaler which can be used on multiple platforms.
Jazzy is an excellent tool for generating API documentation for Swift and Objective-C projects. Let’s take a look how to generate and publish API documentation in GitHub with Jazzy.
Installing Jazzy
Installation: sudo gem install jazzy
Jazzy config file for a Swift package
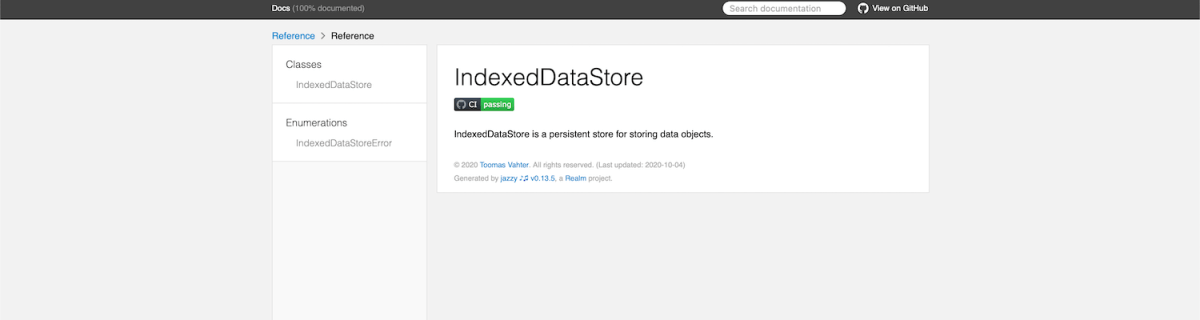
Configuration options can be passed into Jazzy directly with the command or adding them to the a file, by default it is .jazzy.yaml. We’ll use the default path as then we can run Jazzy without any command line arguments: the configuration is read from the configuration file. For seeing all the available configuration options run jazzy config -h. Just note that the configuration file expects snakecase (build-tool-arguments becomes build_tool_arguments). Let’s take a look on Swift package IndexedDataStore which can be built both for macOS and iOS. It has some additional functions for iOS and therefore it is preferred to build iOS target when running Jazzy. Otherwise API documentation would not contain those public functions meant for iOS. Typically Swift package is built using swift build command. The current state is that there is no easy way for just specifying the target OS to the swift build command. What we can do instead is using xcodebuild command which knows how to build Swift packages as well. We’ll just need to specify the scheme, sdk, and destination arguments. If we now run jazzy command without any arguments, it will read the configuration file, and generate API documentation which includes functions which require UIKit.
This file contains hidden or bidirectional Unicode text that may be interpreted or compiled differently than what appears below. To review, open the file in an editor that reveals hidden Unicode characters.
Learn more about bidirectional Unicode characters
Configuration file for Jazzy which builds documentation for iOS.
GitHub action for publish API documentation
Thankfully there is a GitHub action available for publishing API documentation with Jazzy. We can set up a GitHub action with a name PublishDocumentation and store it in the repository’s .github/workflows folder.
This file contains hidden or bidirectional Unicode text that may be interpreted or compiled differently than what appears below. To review, open the file in an editor that reveals hidden Unicode characters.
Learn more about bidirectional Unicode characters
GitHub action which publishes API documentation to GitHub pages.
The GitHub action is triggered either manually or when publishing a release. Manual trigger is called workflow_dispatch and when it is set, GitHub webpage will display a “Run workflow” button. This is very handy when testing GitHub actions. Another thing to note is that publish-jazzy-docs requires repository access because it needs to write the documentation files to the gh-pages branch. For giving repository access we’ll need to set up personal access token with repo scope. Secondly, we’ll need to paste the created token to the repository’s secrets. In this example, we have added a secret named ACCESS_TOKEN and the value is the personal access token. Now, if we have committed and pushed the GitHub action then we can open the repository on GitHub.com, navigate to actions, selecting PublishDocumentation, and using Run workspace button for triggering the wokrflow. If everything goes well, then the workspace creates a gh-pages branch which in turn creates a new GitHub page. In this case the URL to the new GitHub page looks like: https://laevandus.github.io/IndexedDataStore/ (link). This is what we wanted to achieve, API documentation publiched on GitHub.
Summary
We set up Jazzy for a Swift package and used it to generate API documentation. Generated API documentation was published to a GitHub page.
Git hooks are scripts written in any scripting language and are triggered when important actions occur. Hooks are stored in the repository’s .git/hooks folder. The script needs to have an appropriate filename without a path extension and also have executable permissions. Push event is an excellent time for triggering unit-tests and making sure local changes have not broken any. Therefore we’ll look into how to create a pre-push script for an iOS project in Swift.
Quick introduction to scripts written in Swift
Setting up a simple script in Swift follows steps familiar from other languages. The script file needs to start with #!/usr/bin/swift followed by the actual script. A simple example script can look like this.
This file contains hidden or bidirectional Unicode text that may be interpreted or compiled differently than what appears below. To review, open the file in an editor that reveals hidden Unicode characters.
Learn more about bidirectional Unicode characters
The command for running the script is swift Script.swift (if the filename is Script.swift). Another way is making the script executable by adding executable permissions to the file by running chmod +x Script.swift command. Then the script can be run with ./Script.swift (makes sense to drop the file extension).
Building a Xcode project for testing
The pre-push script contains of 3 steps: building the project for testing, running tests, and finally printing out the code coverage results. The first step catches build errors, the second step test failures, and the third step prints out code coverage results. Code coverage can be enabled in the scheme’s test action or adding -enableCodeCoverage YES to the xcodebuild command. Before we jump into creating a xcodebuild command with correct arguments then we’ll need to tackle the problem of calling the xcodebuild command line application from the Swift script. Command line applications can be invoked with the Foundation’s Process class. We’ll add an extension which deals with launching a specified command with zsh and printing out the standard output and error.
This file contains hidden or bidirectional Unicode text that may be interpreted or compiled differently than what appears below. To review, open the file in an editor that reveals hidden Unicode characters.
Learn more about bidirectional Unicode characters
The next step in the script is to define the project related configuration and create the xcodebuild command. All the user defined arguments are wrapped in quotes for avoiding any issues with whitespaces. The command is pretty straight-forward. If there are any build errors then the result code is not equal to 0. Then we can use the same error code for exiting the Swift script with exit() function.
This file contains hidden or bidirectional Unicode text that may be interpreted or compiled differently than what appears below. To review, open the file in an editor that reveals hidden Unicode characters.
Learn more about bidirectional Unicode characters
The command used for running unit-tests is fairly similar. Instead of build-without-testing we are using test-without-building argument and additionally provide a path where the result bundle is written to. This bundle contains information about the test run. Note that this path must not exist, otherwise xcodebuild stops with an error. Therefore we delete the existing file before running the command. Moreover, when there is a failure, we’ll clean up the path as well – pre-push script should not leave any temporary files.
This file contains hidden or bidirectional Unicode text that may be interpreted or compiled differently than what appears below. To review, open the file in an editor that reveals hidden Unicode characters.
Learn more about bidirectional Unicode characters
Last step is optional but it is nice to see code coverage information when pushing changes to a server. Xcode provides a command line application for viewing coverage data in human readable form. One of the options is printing out code coverage per target which gives a nice and concise overview.
This file contains hidden or bidirectional Unicode text that may be interpreted or compiled differently than what appears below. To review, open the file in an editor that reveals hidden Unicode characters.
Learn more about bidirectional Unicode characters
We looked into how to create a pre-push script in Swift. It called other command line applications for building the project, running the tests, and printing out code coverage information. The full script is available below, feel free to copy-paste it to your projects. The one last thing to consider is adding an alias in Terminal for easy installation: alias xcode_pre_push_add='cp ~/Dev/pre-push .git/hooks/pre-push && mate .git/hooks/pre-push' This just copies it from predefined location to the repository checkout and opens it in an editor for setting project related settings (replace mate with any editor).
This file contains hidden or bidirectional Unicode text that may be interpreted or compiled differently than what appears below. To review, open the file in an editor that reveals hidden Unicode characters.
Learn more about bidirectional Unicode characters
A while ago I wrote about using MVVM in a SwiftUI project. During the WWDC’20 Apple announced @StateObject property wrapper which is a nice addition in the context of MVVM. @StateObject makes sure that only one instance is created per a view structure. This enables us to use @StateObject property wrappers for class type view models which eliminates the need of managing the view model’s lifecycle ourselves.
Comparing @StateObject and @ObservableObject for view model property
The most common flow in MVVM is creating and configuring a view model, which includes injecting dependencies, and then passing it into a view. This creates a question in SwiftUI: how to manage the lifecycle of the view model when view hierarchy renders and view structs are recreated. @StateObject property wrapper is going to solve this question in a nice and concise way. Let’s consider an example code.
This file contains hidden or bidirectional Unicode text that may be interpreted or compiled differently than what appears below. To review, open the file in an editor that reveals hidden Unicode characters.
Learn more about bidirectional Unicode characters
ContentView is a simple view which has a view model managing the view state and DependencyContainer used for injecting a dependency to the BottomBarViewModel when it is created. As we can see, ContentView’s view model is managed by @StateObject property wrapper. This means that ContentViewModel is created once although ContentView can be recreated several times. BottomBarView has a little bit more complex setup where the view model requires external dependency managed by the DependencyContainer. Therefore, we’ll need to create the view model with a dependency and then initialize BottomBarView with it. BottomBarView’s view model property is also annotated with @StateObject property wrapper.
This file contains hidden or bidirectional Unicode text that may be interpreted or compiled differently than what appears below. To review, open the file in an editor that reveals hidden Unicode characters.
Learn more about bidirectional Unicode characters
Magical aspect here is that when the ContentView’s body is accessed multiple times then BottomBarViewModel is not recreated when the BottomBarView struct is initialized. Exactly what we need – view will manage the lifecycle of its view model. This can be verified by adding a print to view model initializers and logging when ContentView’s body is accessed. Here is example log which compares BottomBarView’s view model property when it is annotated with @StateObject or @ObservableObject. Note how view model is not created multiple times when BottomBarView uses @StateObject.
BottomBarView uses @StateObject for its view model property
SwiftUIStateObject.ContentViewModel init()
1 ContentView.body accessed
SwiftUIStateObject.BottomBarViewModel init(entryStore:)
Triggering ContentView refresh
2 ContentView.body accessed
Triggering ContentView refresh
3 ContentView.body accessed

BottomBarView uses @ObservableObject for its view model property
SwiftUIStateObject.ContentViewModel init()
1 ContentView.body accessed
SwiftUIStateObject.BottomBarViewModel init(entryStore:)
Triggering ContentView refresh
2 ContentView.body accessed
SwiftUIStateObject.BottomBarViewModel init(entryStore:)
Triggering ContentView refresh
3 ContentView.body accessed
SwiftUIStateObject.BottomBarViewModel init(entryStore:)
Summary
WWDC’20 brought us @StateObject which simplifies handling view model’s lifecycle in apps using MVVM design pattern.