Categories
iOS Swift SwiftUI

MVVM and @dynamicMemberLookup in Swift

View models in MVVM are responsible of making the model suitable for presenting by a view. Quite often model objects themselves have properties which can be directly presented by the view. SE-0195 added dynamic member lookup types. Using @dynamicMemberLookup we can add all the model object’s properties to the view model itself. Result, model.name is also accessible by calling name on the view model.

View model with @dynamicMemberLookup

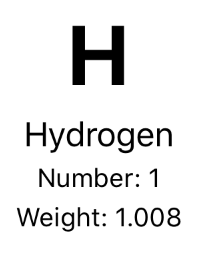
Example app presents chemical element: symbol, name, atomic number, and atomic weight. Model object’s properties which can be displayed without transformations are symbol and name. Atomic number and weight are transformed and label is prepended to a value.

View presenting properties of a chemical element.
struct ChemicalElement {
    let name: String // Hydrogen
    let symbol: String // H
    let atomicNumber: Int // 1
    let atomicWeight: Double // 1.008
}

View model is initialised with an instance of chemical element. What we would like to have is accessing all the data by asking it from view model: viewModel.name, viewModel.symbol, viewModel.numberDescription, viewModel.weightDescription. Dynamic member lookup enables us adding all the model object’s properties to the view model with only some lines of code. It makes a real difference if the model and view model have a way more data than in the current example.

struct ContentView: View {
    let viewModel: ContentViewModel
    
    var body: some View {
        VStack(spacing: 4) {
            Text(viewModel.symbol).font(.system(size: 42)).fontWeight(.bold)
            VStack(spacing: 4) {
                Text(viewModel.name)
                Group {
                    Text(viewModel.numberDescription)
                    Text(viewModel.weightDescription)
                }.font(.footnote)
            }
        }
    }
}

Let’s take a look on the view model. When view model is annotated with @dynamicMemerLookup, we’ll just need to implement one method. This is what is used to passing through model object’s data directly to the view. That is all we need to do for exposing model object’s properties on the view model level.

@dynamicMemberLookup
struct ContentViewModel {
    private let chemicalElement: ChemicalElement
    
    init(chemicalElement: ChemicalElement) {
        self.chemicalElement = element
    }
    
    subscript<T>(dynamicMember keyPath: KeyPath<ChemicalElement, T>) -> T {
        return chemicalElement[keyPath: keyPath]
    }
    
    var numberDescription: String {
        return "Number: \(chemicalElement.atomicNumber)"
    }
    
    var weightDescription: String {
        return "Weight: \(chemicalElement.atomicWeight)"
    }
}

Summary

Dynamic member lookup in Swift is useful addition to MVVM pattern when there is need to expose model’s properties directly to the view. When working with models with many properties, it is very useful.

Please also take a look on MVVM in SwiftUI.

If this was helpful, please let me know on Mastodon@toomasvahter or Twitter @toomasvahter. Feel free to subscribe to RSS feed. Thank you for reading.

Categories
Foundation iOS Swift SwiftUI Xcode

Alert and LocalizedError in SwiftUI

Everything can’t go exactly as planned and therefore, at some point, there is a need for presenting localized error messages to the user. Let’s take a look at how to add custom error type what provides error description, failure reason and recovery suggestion and presenting it in SwiftUI view.

Adding custom error type

Custom error type is needed when we want to propagate errors using Swift’s error handling mechanism. Custom error types need to, at minimum, conform to Error protocol which defines localizedDescription property. If we would like to provide more information to users, including recovery suggestions, then we need to use LocalizedError instead. LocalizedError inherits from Error and defines additional properties which are intended for describing the error further. Note that LocalizedError is very similar to NSError: errorDescription, failureReason, recoverySuggestion, helpAnchor are all represented by NSError.UserInfoKey.

In the example app we’ll use LoginError currently definiing only one error: incorrectPassword.

enum LoginError: LocalizedError {
    case incorrectPassword // invalidUserName etc
    
    var errorDescription: String? {
        switch self {
        case .incorrectPassword:
            return "Failed logging in account"
        }
    }
    
    var failureReason: String? {
        switch self {
        case .incorrectPassword:
            return "Entered password was incorrect"
        }
    }
    
    var recoverySuggestion: String? {
        switch self {
        case .incorrectPassword:
            return "Please try again with different password"
        }
    }
}

Presenting error in SwiftUI

Custom error defined, the next step is to present the error using SwiftUI’s alert view modifier: alert(isPresented:content:). Alert view modifier requires boolean binding and Alert container defining title, optional message, and buttons. In the example below, error is handled by the view model and Alert itself is created using convenience initializer which we’ll look at a bit later. Convenience initializer makes the view implementation more readable and reduces code duplication.

struct ContentView: View {
    @ObservedObject var viewModel: ContentViewModel
    
    var body: some View {
        VStack(spacing: 16) {
            Text("Alert Views")
            Button(action: viewModel.showAlertView) {
                Text("Show Alert View")
            }
        }.alert(isPresented: viewModel.isPresentingAlert, content: {
            Alert(localizedError: viewModel.activeError!)
        })
    }
}

Alert view modifier requires a boolean binding controlling if the alert is visible or not. When alert is dismissed, SwiftUI automatically calls the binding with false, indicating that the alert should not be visible anymore. Note that force unwrap is safe here because view model makes sure isPresentingAlert never returns true when underlying error is nil.

final class ContentViewModel: ObservableObject {
    @Published private(set) var activeError: LocalizedError?

    var isPresentingAlert: Binding<Bool> {
        return Binding<Bool>(get: {
            return self.activeError != nil
        }, set: { newValue in
            guard !newValue else { return }
            self.activeError = nil
        })
    }
        
    func showAlertView() {
        activeError = LoginError.incorrectPassword
    }
}

Boolean binding is created manually and implemented in such way that when activeError is set, isPresentingAlert returns true. When alert is dismissed, set will clear the current active error. This approach makes it simple to handle any errors conforming to LocalizedError in the view model. Like mentioned before, LocalizedError enables us to add detailed information about the alert and we can use that when creating the Alert. Let’s take a look on it next.

extension Alert {
    init(localizedError: LocalizedError) {
        self = Alert(nsError: localizedError as NSError)
    }
    
    init(nsError: NSError) {
        let message: Text? = {
            let message = [nsError.localizedFailureReason, nsError.localizedRecoverySuggestion].compactMap({ $0 }).joined(separator: "\n\n")
            return message.isEmpty ? nil : Text(message)
        }()
        self = Alert(title: Text(nsError.localizedDescription),
                     message: message,
                     dismissButton: .default(Text("OK")))
    }
}

Alert’s extension has initializers both for LocalizedError and NSError. NSError is used a lot in Objective-C frameworks so there is high probability that we need to present NSError in the future as well. Here, we can use Swift language’s built-in support of converting Swift error type to NSError and therefore we can implement convenience method only once for NSError. LocalizedError can be bridged to NSError and Swift compiler takes care of keeping the information about the error. In this implementation, I decided to include both the failureReason and recoverySuggestion when creating the message for Alert. This enables custom error types to choose how much information they provide (choosing which properties return text). Moreover, it is better to show as much information about the error as possible.

LoginError.incorrectPassword presented by Alert in SwiftUI

Summary

We created a custom error type and used LocalizedError instead of Error for making it suitable for displaying as an alert. We looked into how to use alert view modifier and MVVM together and introduced design pattern for easy alert presentation. If you need action sheet, then follow similar steps but use actionSheet view modifier with ActionSheet container.

If this was helpful, please let me know on Mastodon@toomasvahter or Twitter @toomasvahter. Feel free to subscribe to RSS feed. Thank you for reading.

Example project

SwiftUIAlertView (Xcode 11.4 beta 2)

Categories
iOS Swift UIKit

Most visited blog posts in 2019

Thank you to everyone who visted my blog and I really hope that you learnt something new. I am trying to keep my blog post short and having sample code what can be used instantly. But now, its time to take a look back on all the blog posts I wrote in 2019. This year I kept following my schedule of publishing a blog post every second week. This means that in this year I published 27 blog post covering wide variaty of topics from UIKit to SwiftUI, SpriteKit, VisionKit, CryptoKit, app architecture and so on. I finally managed to get noticed by iOS Dev Weekly and the issue 430 contained my post Adding custom attribute to NSAttributedString on iOS. Really happy about it!
All in all, I am very happy to see how my blog grew in 2019. Total view count grew more than 5 times compared to 2018 (started blogging in late 2017).

Let’s take a look on stats from 2019 and list blog posts by the number of vists in 2019. The first list contains blog posts written in 2019 and the second list contains all the other blog posts people read in 2019.

Most read posts written in 2019

Most read posts written before 2019

Have a great coming year! I’ll keep publishing new blog posts every second week so follow me on Twitter @toomasvahter or subscribe to RSS feed. Thank you!

Categories
iOS macOS Swift Xcode

Performance testing using XCTMetric

XCTMetric enables creating tests with measure blocks collecting information about CPU, memory and disk. In this post we’ll write UI-tests measuring a button tap what triggers writing to disk, allocating larger amount of memory and applying filters what requires CPU to do more work. It should be noted that XCTMetric can also be used in unit-tests.

Method under the test

The method we are going to write performance tests against is a simple method dealing with loading an image, writing data to disk, applying CIFilter and writing processed image to disk. In this example case, everything runs on a main thread what probably would not be a case in a real application.

@IBAction func process(_ sender: Any) {
	let image = UIImage(named: "Image")!
	imageStorage.store(image, filename: "original")
        
	let processedImage = ImageProcessor.processImage(image)
	imageStorage.store(image, filename: "processed")
	processedImageView.image = processedImage
}

XCTClockMetric for measuring taken time

XCTClockMetric is for measuring time taken by the block. Useful for catching regressions in longer running operations.

func testCalculateWithClockMetric() {
	let app = XCUIApplication()
	app.launch()
	measure(metrics: [XCTClockMetric()]) {
		app.buttons["Process"].tap()
	}
}

XCTCPUMetric for measuring CPU utilization

XCTCPUMetric measures CPU activity and output 3 different results: CPU time, CPU cycles and CPU instructions retired. CPUs have a feature called speculative execution what means that more instructions are completed than the actual program flow requires. Retired instructions are the instructions which were actually needed by the flow of the program. This feature speeds up the program execution as CPU can process data ahead of time. Example case would be if else where CPU processes both branches but only one branch is valid in the program flow.

func testCalculateWithCPUMetric() {
	let app = XCUIApplication()
	app.launch()
	measure(metrics: [XCTCPUMetric(application: app)]) {
		app.buttons["Process"].tap()
	}
}

XCTMemoryMetric for measuring allocated memory

XCTMemoryMetric measures allocated physical memory useful for testing operation allocating significant amount of memory (processing images).

func testCalculateWithMemoryMetric() {
	let app = XCUIApplication()
	app.launch()
	measure(metrics: [XCTMemoryMetric(application: app)]) {
		app.buttons["Process"].tap()
	}
}

XCTStorageMetric for measuring disk usage

XCTStorageMetric measures bytes written to the disk.

func testCalculateWithStorageMetric() {
	let app = XCUIApplication()
	app.launch()
	measure(metrics: [XCTStorageMetric(application: app)]) {
		app.buttons["Process"].tap()
	}
}

XCTOSSignpostMetric for measuring time between signposts

Apple provides signpost metric for application launch time for making it easy to add performance test measing launch time. In WWDC’19 session “Optimizing app launch” the suggested goal is 400 ms which is the duration of the app launch animation. XCTOSSignpostMetric has initializer for custom signpost as well.

func testLaunchPerformance() {
	if #available(macOS 10.15, iOS 13.0, tvOS 13.0, *) {
		measure(metrics: [XCTOSSignpostMetric.applicationLaunch]) {
			XCUIApplication().launch()
		}
	}
}

Summary

XCTMetric enables writing performance tests for performance critical parts of the application. We took a look at CPU, memory, storage and signpost metrics.

If this was helpful, please let me know on Mastodon@toomasvahter or Twitter @toomasvahter. Feel free to subscribe to RSS feed. Thank you for reading.

Example

MeasuringInTests (Xcode 11.3)

Categories
Foundation iOS Swift

Replacing multiple text tokens in Swift

Let’s see how to replace multiple tokens in string. As an example problem to solve we will use this string:
The quick <color_1> <animal_1> jumps over the lazy <animal_2>

String extension for replacing tokens

Token’s format is < text _ numbers > what can be turned into regular expression: <[:alpha:]+_{1}[:digit:]+>.

We’ll extend string and add a function what takes in regular expression and closure responsible of providing replacement strings. For finding tokens, we’ll use NSRegularExpression and get all the matches in the string. Next step is to reverse enumerate matches and replace tokens. Reverse enumerating is required it ensures that token ranges are constant. If we would start replacing from the first match, then all the succeeding ranges should be shifted based on the length difference of all the preceding tokens and replacements. In this case reduce is convenient because we can enumerate all the matches and then mutating the copy of the initial string with very few lines. Another aspect to note is that NSRegularExpression uses NSRange instead of <a rel="noreferrer noopener" aria-label="RangeRange<String.Index>. Therefore we need to convert ranges from one type to another making sure character indexes match.
This function can now be used with custom logic when providing replacements. For example: we can have a simple mapping or even returning the same replacement string.

let text = "The quick <color_1> <animal_1> jumps over the lazy <animal_2>"
let replacementMap = ["<animal_1>": "fox", "<animal_2>": "dog", "<color_1>": "brown"]
extension String {
func replacingOccurrences(matchingPattern pattern: String, replacementProvider: (String) -> String?) -> String {
let expression = try! NSRegularExpression(pattern: pattern, options: [])
let matches = expression.matches(in: self, options: [], range: NSRange(startIndex..<endIndex, in: self))
return matches.reversed().reduce(into: self) { (current, result) in
let range = Range(result.range, in: current)!
let token = String(current[range])
guard let replacement = replacementProvider(token) else { return }
current.replaceSubrange(range, with: replacement)
}
}
}
let finalString1 = text.replacingOccurrences(matchingPattern: "<[:alpha:]+_{1}[:digit:]+>", replacementProvider: { replacementMap[$0] })
let finalString2 = text.replacingOccurrences(matchingPattern: "<[:alpha:]+_{1}[:digit:]+>", replacementProvider: { _ in "REPLACEMENT" })
print(text)
print(finalString1) // The quick brown fox jumps over the lazy dog
print(finalString2) // The quick REPLACEMENT REPLACEMENT jumps over the lazy REPLACEMENT
String extension replacing tokens matching a pattern.

Summary

When we would like to do multiple replacements in a string, then one of the approaches is to get all the replacement ranges and then reverse enumerating the ranges and making replacements. In this way we can avoid having complex code trying to adjust based on the length difference of the source and replacement string.

If this was helpful, please let me know on Mastodon@toomasvahter or Twitter @toomasvahter. Feel free to subscribe to RSS feed. Thank you for reading.

Categories
Foundation iOS Swift

Property wrapper for validating email using NSDataDetector

Property wrappers allow property declaration to state what kind of property wrapper is used for implementing the property. We can use it for implementing transformations on properties like validating if string is email or not. This is what we will do: creating a property wrapper for email properties and validating emails using NSDataDetector. If value being set is email, we store it and if it is not, we set the property to nil instead.

Creating property wrapper

Property wrappers are types annotated with @propertyWrapper. The type needs to implement one property: wrappedValue. Emails are represented with strings, therefore our wrappedValue property is optional string. Optional is required, because string can contain invalid email and in that case we set the property to nil. Whenever we would like to use this property wrapper, we just need to add @EmailValidated in front of the property definition.

@propertyWrapper
struct EmailValidated {
private var value: String?
var wrappedValue: String? {
get {
return value
}
set {
value = {
guard let trimmedString = newValue?.trimmingCharacters(in: .whitespacesAndNewlines) else { return nil }
return validate(trimmedString)
}()
}
}
}

Validating email using NSDataDetector

Validating emails using regular expressions is not easy. Fortunately Apple provides API exactly for this: NSDataDetector. We can create an instance of NSDataDetector with specifying link as detected types. When matching emails, we use anchored option as we expect the string to only include email, nothing else. Anchored will tell the data detector to match starting with the first character. As firstMatch(in:options:range:) uses NSRange, we need to convert Swift’s range to NSRange because those ranges do not have one-to-one match. For this, we can use special NSRange initialiser taking Swift string and its range.

NSDataDetector represents links with URL, therefore we will see if match contains an URL and if URL’s scheme is mailto. If it is, we can extract the matched email and return it.

private func validate(_ emailString: String) -> String? {
let dataDetector = try! NSDataDetector(types: NSTextCheckingResult.CheckingType.link.rawValue)
// Finding matches in string
let range = NSRange(emailString.startIndex..<emailString.endIndex, in: emailString)
guard let match = dataDetector.firstMatch(in: emailString, options: .anchored, range: range) else { return nil }
guard let url = match.url else { return nil }
// Extracting email from the matched url
let absoluteString = url.absoluteString
guard let index = absoluteString.range(of: "mailto:") else { return nil }
return String(url.absoluteString.suffix(from: index.upperBound))
}
view raw Validate.swift hosted with ❤ by GitHub

Using EmailValidated property wrapper

For using the created property wrapper, all we need to do is to annotate property with @EmailValidated.

struct Contact {
var fullName: String
@EmailValidated var email: String?
}
var contact = Contact(fullName: "Toomas")
contact.email = "invalidemail"
print(contact.email as Any) // nil
contact.email = " test toomas@email.zz"
print(contact.email as Any) // nil
contact.email = "toomas@email.zz"
print(contact.email as Any) // Optional("toomas@email.zz")

Summary

We created a simple property wrapper for validating emails. We saw that creating a property wrapper for validating email with NSDataDetector requires only a little bit of code.

If this was helpful, please let me know on Mastodon@toomasvahter or Twitter @toomasvahter. Feel free to subscribe to RSS feed. Thank you for reading.

Example

EmailPropertyWrapper playground (Xcode 11b5)

Resources

Categories
Foundation iOS Swift

Key-value observing without NSObject and dynamic modifier in Swift

When writing code in Swift it is often needed to observe changes in other objects. We can use Apple’s key-value observation but it has some implications: requires to use NSObject and dynamic dispatch through Objective-C runtime. This time, let’s build a simple key-value observation in Swift what does not require to use NSObject at all. Although it is far from being as feature complete as Apple’s implementation, it delivers the basic use-case which is often all what we need.

Custom KeyValueObservable protocol

The approach we take here is defining a protocol, providing default implementations for all the functions. Then we can make any class to conform to this protocol, but as we need to store observation related information, then the class needs to define a property holding an instance of ObservationStore. Secondly, it is required to send key-value change notification manually using didChangeValue(for:).

Add observer function returns an instance of Observation what can be used for removing the added observation. If the observer does not need to be removed during the lifetime of the observer, it can be ignored. Observation is always cleaned up automatically next time any key value changes happen after observer is deallocated. This is due to the fact that observation handler captures observer weakly and during key-value changes, it is checked if the object is still alive or not.

protocol KeyValueObservable where Self: AnyObject {
/// Stores all the added observations.
var observationStore: ObservationStore<Self> { get }
/// Sends key-value change notification to all the observers for this key path.
func didChangeValue(for keyPath: PartialKeyPath<Self>)
/// Adds observer for key path and returns observation token.
/// – Note: Observation token is only useful if it is needed to remove observation before observer is deallocated. When observer is deallocated, then observation is removed when next key value change is handled.
@discardableResult func addObserver<Observer: AnyObject, Value>(_ observer: Observer,
keyPath: KeyPath<Self, Value>,
options: Observation.Options,
handler: @escaping (Observer, Value) -> Void) -> Observation
/// Removes added observation.
func removeObservation(_ observation: Observation)
}

Adding default implementations

When adding observer, we create an observation handler what captures self and observer weakly. Handler returns boolean, what tells if the handler is still valid or not. Handler is not valid when observer has been deallocated since the last change. Otherwise handler is valid and should not be removed automatically.

extension KeyValueObservable {
@discardableResult func addObserver<Observer: AnyObject, Value>(_ observer: Observer, keyPath: KeyPath<Self, Value>, options: Observation.Options, handler: @escaping (Observer, Value) -> Void) -> Observation {
let observation = Observation()
let observationHandler: (PartialKeyPath<Self>) -> Bool = { [weak self, weak observer] changedKeyPath in
guard let self = self else { return false }
guard let observer = observer else { return false }
guard changedKeyPath == keyPath else { return true }
handler(observer, self[keyPath: keyPath])
return true
}
observationStore.observationInfos[observation] = observationHandler
if options.contains(.initial) {
handler(observer, self[keyPath: keyPath])
}
return observation
}
func removeObservation(_ observation: Observation) {
observationStore.observationInfos.removeValue(forKey: observation)
}
func didChangeValue(for keyPath: PartialKeyPath<Self>) {
observationStore.observationInfos = observationStore.observationInfos.filter({ (_, handler) -> Bool in
return handler(keyPath)
})
}
}

Supporting objects to key-value observing

As mentioned before, ObservationStore is needed to added to every class conforming to KeyValueObservable protocol. It stores all the observations and restricts the access to modifying the observations directly from the observable class.

Observation is a simple struct containing an identifier and subtype defining the observation options. In this basic case, it just has initial option what assures handler is called immediately when adding an observer.

final class ObservationStore<T> {
fileprivate var observationInfos = [Observation: (PartialKeyPath<T>) -> Bool]()
var observations: [Observation] {
return observationInfos.map({ $0.key })
}
func removeAll() {
observationInfos.removeAll()
}
}
struct Observation: Hashable {
fileprivate let identifier = UUID()
struct Options: OptionSet {
let rawValue: Int
static let initial = Options(rawValue: 1 << 0)
}
}

Conforming to KeyValueObservable

In this small example a class Event conforms to KeyValueObservable and ViewController observers the title change and updates a label.

final class Event: KeyValueObservable {
let observationStore = ObservationStore<Event>()
var title: String = "Initial Title" {
didSet {
didChangeValue(for: \Event.title)
}
}
}
final class ViewController: UIViewController {
let event = Event()
@IBOutlet weak var label: UILabel!
override func viewDidLoad() {
super.viewDidLoad()
event.addObserver(self, keyPath: \.title, options: .initial) { (observer, title) in
observer.label.text = title
}
}
@IBAction func changeTitle(_ sender: Any) {
event.title = "New Title"
}
}
view raw Observing.swift hosted with ❤ by GitHub

Summary

This time we added basic support for observing key paths without using key-value observing APIs known already from Objective-C times. The added KeyValueObservable protocol is easy to add to existing classes but requires manually calling didChangeValue(for:) for every property change.

Inspiration came from Observers in Swift part 2 (Swift by Sundell).

If this was helpful, please let me know on Mastodon@toomasvahter or Twitter @toomasvahter. Feel free to subscribe to RSS feed. Thank you for reading.

Resources

Categories
Foundation iOS Swift UIKit

Displaying menus with UIContextMenuInteraction on iOS

iOS 13 added a new class named UIContextMenuInteraction what is used for attaching menus to views. When adding menu interaction to a view and user uses 3D Touch or long press gesture on devices not supporting it, a menu is presented alongside with the highlighted content view. Therefore depending on the available space, not all the menu items can fit into the menu.

Setting up UIContextMenuInteraction

UIContextMenuInteraction is initialised with a delegate. Delegate’s job is to create an instance of UIContextMenuConfiguration with provider block for creating a menu when needed. It also should be noted that delegate can return nil in what case no menu is shown.

let interaction = UIContextMenuInteraction(delegate: self)
imageView.addInteraction(interaction)
imageView.isUserInteractionEnabled = true

Creating UIMenus and UIActions

Action provider of UIContextMenuConfiguration is a function taking in suggested menu items and returning an instance of UIMenu. Suggested menu items are the ones provided by responders from responder chain. For example we could use it for sharing actions among multiple responders.

Every menu item is represented by UIAction or another UIMenu allowing to have nested menus. UIActions have title and optionally image and state icon if the state is on. In addition we can explicitly disable actions and set a destructive appearance.

extension ViewController: UIContextMenuInteractionDelegate {
func contextMenuInteraction(_ interaction: UIContextMenuInteraction, configurationForMenuAtLocation location: CGPoint) -> UIContextMenuConfiguration? {
let actionProvider: ([UIMenuElement]) -> UIMenu? = { _ in // menu elements from responder chain if any
// Creating actions…
let imageAction = UIAction(title: "Title (image)",
image: UIImage(systemName: "arkit"),
identifier: nil,
discoverabilityTitle: nil,
attributes: [],
state: .off,
handler: actionHandler)
let destructiveAction = UIAction(title: "Title (destructive)",
image: nil,
identifier: nil,
discoverabilityTitle: nil,
attributes: .destructive,
state: .off,
handler: actionHandler)
let submenu = UIMenu(title: "Submenu",
image: nil,
identifier: nil,
options: [],
children: [destructiveAction, disabledAction])
return UIMenu(title: "Optional Menu Title",
image: nil,
identifier: nil,
options: [],
children: [titleAction, imageAction, onDiscoverabilityTitleAction, submenu])
}
return UIContextMenuConfiguration(identifier: "my identifier" as NSCopying,
previewProvider: nil,
actionProvider: actionProvider)
}

Summary

Creating menus using UIContextMenuInteraction are easy to setup and they look like familiar NSMenu when building iOS app for macOS.

If this was helpful, please let me know on Mastodon@toomasvahter or Twitter @toomasvahter. Feel free to subscribe to RSS feed. Thank you for reading.

Example

UIContextMenu (Xcode 11 beta 4)

Categories
iOS Swift

Most visited posts in 2018

It is this time of the year when to look back. In total I published 22 blog posts and had 2765 views by 1632 people. Together with 3 posts from the 2017 I now have 25 blog posts.

In the end of the July I posted Sharing UI code with protocol extension what marked the beginning of the biweekly schedule. Since then I have tried to find a topic for every second week and write a concise post with sample code. The aim is to share the knowledge in a compact format and have some ready to use sample code what can be used in your projects. I would like to remind that all the source code is under MIT license so feel free to use as you would like to.

Top 3

My hope is that at least some people found those posts useful and they learned something new. Feel free to contact me on Twitter @toomasvahter. Thank you for reading.

Categories
iOS Swift UIKit

Observing keyboard visibility on iOS

Almost every app needs a way of inserting information using keyboard. When keyboard shows up, we do not want to keep content behind the keyboard hidden and instead, allow user to see it. UIResponder contains several notifications we can use to adjust the layout.

Keyboard change notifications

UIResponder contains a list of notifications and user info keys. We have notifications for reacting to visibility and frame changes (for example when rotating device). Notification’s userInfo contains a variety of information about the change. What makes this API a little bit difficult to use is parsing the user info every time we need to use those notifications. If we need to observe keyboard in several view controllers then the amount of code of setting up observation and doing type casting starts to build up. Therefore it makes more sense to have an object handling the observation and type casting user info keys.

extension UIResponder {
public class let keyboardWillShowNotification: NSNotification.Name
public class let keyboardDidShowNotification: NSNotification.Name
public class let keyboardWillHideNotification: NSNotification.Name
public class let keyboardDidHideNotification: NSNotification.Name
public class let keyboardWillChangeFrameNotification: NSNotification.Name
public class let keyboardDidChangeFrameNotification: NSNotification.Name
public class let keyboardFrameBeginUserInfoKey: String // NSValue of CGRect
public class let keyboardFrameEndUserInfoKey: String // NSValue of CGRect
public class let keyboardAnimationDurationUserInfoKey: String // NSNumber of double
public class let keyboardAnimationCurveUserInfoKey: String // NSNumber of NSUInteger (UIViewAnimationCurve)
public class let keyboardIsLocalUserInfoKey: String // NSNumber of BOOL
}

Using a KeyboardObserver

KeyboardObserver is a lightweight object observing keyboard related notifications and calling the changeHandler when any of the notifications is received. User info and notification type information is represented with struct Info. Before looking into how it is implemented, let’s take a look on the example.

final class ViewController: UIViewController {
@IBOutlet weak var scrollView: UIScrollView!
private var keyboardObserver: KeyboardObserver?
override func viewWillAppear(_ animated: Bool) {
super.viewWillAppear(animated)
keyboardObserver = KeyboardObserver(changeHandler: { [weak self] (info) in
guard let self = self else { return }
switch info.event {
case .willShow:
self.scrollView.contentInset.bottom = info.endFrame.height
case .willHide:
self.scrollView.contentInset.bottom = 0
default:
break
}
})
}
override func viewDidDisappear(_ animated: Bool) {
super.viewDidDisappear(animated)
keyboardObserver = nil
}
}

Here we can see that setting up observer is straight-forward and accessing end frame of the keyboard does not require any type casting. Compare it with adding observers to those notifications and then using conditional casts for getting relevant information in the view controller. 

Creating a KeyboardObserver

But let’s now take a look on how it is implemented and see how much less code we need to write in the future. KeyboardObserver is initialised with a changeHandler closure like seen in the previous paragraph. Initialiser retains the handler and sets up observers for all the relevant notifications. For simplicity, we are observing all the notifications but it would also be possible to have an extra argument defining a set of Events and then observing only the notifications we really want to react to.

Type casting relies completely on promises made by UIKit. As UIKit promises that user info always contains those values, we can avoid having any optional values in the Info struct. Therefore it is simpler to use the struct later on as no unwrapping is required.

final class KeyboardObserver {
enum Event {
case willShow, didShow, willHide, didHide, willChangeFrame, didChangeFrame
}
struct Info {
let animationCurve: UIView.AnimationCurve
let animationDuration: TimeInterval
let isLocal: Bool
let beginFrame: CGRect
let endFrame: CGRect
let event: Event
}
let changeHandler: (Info) -> ()
init(changeHandler: @escaping (Info) -> ()) {
self.changeHandler = changeHandler
let notifications: [Notification.Name] = [UIResponder.keyboardWillShowNotification,
UIResponder.keyboardDidShowNotification,
UIResponder.keyboardWillHideNotification,
UIResponder.keyboardDidHideNotification,
UIResponder.keyboardWillChangeFrameNotification,
UIResponder.keyboardDidChangeFrameNotification]
notifications.forEach { (notification) in
NotificationCenter.default.addObserver(self, selector: #selector(KeyboardObserver.keyboardChanged(_:)), name: notification, object: nil)
}
}
@objc private func keyboardChanged(_ notification: Notification) {
guard let userInfo = notification.userInfo else { fatalError() }
let event: Event = {
switch notification.name {
case UIResponder.keyboardWillShowNotification: return .willShow
case UIResponder.keyboardDidShowNotification: return .didShow
case UIResponder.keyboardWillHideNotification: return .willHide
case UIResponder.keyboardDidHideNotification: return .didHide
case UIResponder.keyboardWillChangeFrameNotification: return .willChangeFrame
case UIResponder.keyboardDidChangeFrameNotification: return .didChangeFrame
default:
fatalError("Unknown change notification \(notification).")
}
}()
changeHandler(Info(event: event, userInfo: userInfo))
}
}
fileprivate extension KeyboardObserver.Info {
init(event: KeyboardObserver.Event, userInfo: [AnyHashable: Any]) {
self.event = event
animationCurve = {
let rawValue = userInfo[UIResponder.keyboardAnimationCurveUserInfoKey] as! Int
return UIView.AnimationCurve(rawValue: rawValue)!
}()
animationDuration = userInfo[UIResponder.keyboardAnimationDurationUserInfoKey] as! TimeInterval
isLocal = userInfo[UIResponder.keyboardIsLocalUserInfoKey] as! Bool
beginFrame = userInfo[UIResponder.keyboardFrameBeginUserInfoKey] as! CGRect
endFrame = userInfo[UIResponder.keyboardFrameEndUserInfoKey] as! CGRect
}
}

Summary

We took a look on how to avoid observing multiple notifications and type casting notification user info values on the view controller level. Instead, we created a separate object handling observing and type casting and gives us a simple and concise API to work with.

If this was helpful, please let me know on Mastodon@toomasvahter or Twitter @toomasvahter. Feel free to subscribe to RSS feed. Thank you for reading.

Example project

KeyboardObserver Xcode 10.1, Swift 4.2

References

UIResponder (Apple)